


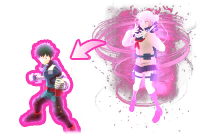
Himiko Toga Guide
Guide developed and supervised by: Soni-Himi (Steam)Last Update: -
Himiko Toga is a technical character, which means your gameplan revolves around cycling and managing quirk cooldowns.
Where Toga differs from the other two copy characters (AFO and Monoma) is in that her complexity comes from essentially playing a whole different character and knowing how, when or if to use their abilities in a situation then swapping back to Toga at the right moments.
She is incredibly flexible and can do a lot because her presence alone can turn a fight in your favor by taking advantage of your opponents' advantages. Doing well with her is all about keeping your momentum and being on top of your decisions in the heat of battle. Whether it be scouting for a revive character to keep stock of their blood to help your own teammates or to copy an AoE character to flush out areas and split people up or even to duel someone on the same character you're confident you can play better and beat in a fight.
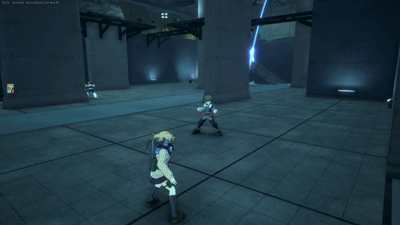
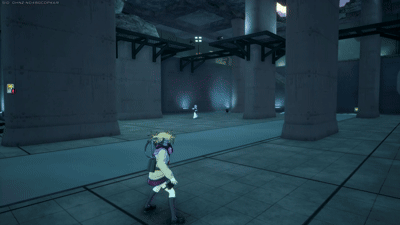
Toga is a character that wants to stick on to and bother one target to toy with and disrupt their attention. She shines when ambushing, being a nuisance and focusing on punishing bad plays from others - whether it be aerial targets who can't dodge your attacks, someone getting too close and entering your beta's range, catching people unaware and shooting them down with alpha or landing a gamma during the end lag of a whiffed attack all while feeling cute doing it.
Best Map: USJ & Chaos City


Alpha Skill - Jagged Throwing Knife
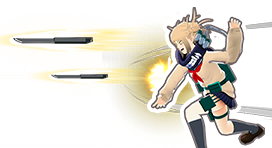
Technical Toga doesn't have the strongest base kit so to use her to the best of you ability you should invest in alpha. It's where her best DPS comes from, has very far range and one of the best fire rates. It also is a beamer alpha meaning it does not knock opponents down easy, taking 20 shots before doing so.
It starts at 16 ammo at level 1 and goes to 30 at level 9. The reload is 0.5 seconds and even the penalty isn't long so you'll likely have this up whenever you need it. Bare in mind that while shooting Toga's movement is restricted and cannot dash while firing so if you want to move faster while using alpha it's important to time your strafing like: Jump left -> shoot a bit -> once you're about to land stop shooting to dash/jump again -> repeat. You can jump while holding the button so use this to mix up your movement and make yourself harder to hit in combination with dash strafing
The cooldown is very fast and forgiving so you should never worry about it and be very liberal with how you use it. Be mindful of not using it in moments beta would be the better option. To get the most out of it you need to know when to spray just a little or to hold the button longer which will be distinguished below.
She can excel and use this at any range but your approach will differ depending on distance.
Close Range
Ideally you don't want to alpha in close range against a lot of the cast on fair grounds or a 1v1, you should use it for kiting, duking, chasing to confirm a kill and punishing committal attacks and heavy end lag moves like for example a Shinso who's mid alpha attack on someone else, but never use this predictably, especially when against a character that has better burst damage than you or a stun/way of locking you down as it's usually a bluff you can do once you've conditioned them to be scared of you, the aim is to either kill in the moment or make them panic and run, forcing them into mid or long range which toga prefers. This gets the most use when your teammate is locked down by a stationary opponent or to 3rd party unaware targets.
Mid Range
This is her preferred "alpha war" range but outside of air strafing to the sides while shooting she doesn't have the best mobility while using it and this is why some matchups she shouldn't take if she can't out-aim them. Generally at this distance you want to shoot at melee characters who you out-range and anyone in their move's end lag. You can trade alphas with other beamers at this range but against higher skilled players it's not advised to do this on fair grounds and make sure you have the advantage first before doing so.
Long Range
This is her safest distance and what she wants often, it's mainly for poking and preparing someone for a KO by whittling them down a bit so that when they bring the fight to you they'll be at a disadvantage, or to butter them up for you or your teammates to kill. She can survey and scout potential threats at this range. Her target priority at this range is generally just anyone she can hit in line of sight but ideally it goes Low HP/healing people > Someone running away > 3rd party someone fighting > everyone else.
A general aiming tip that may or may not apply if you have aim assist is that despite the fast fire rate you still need to lead your shots when shooting afar since it's a projectile and not hitscan (the latter being hitting immediately where your crosshair is.)
All this to say that it's a very weak skill when not leveled to at least level 4 as the size increases help a significant amount.

Beta Skill - Slasher Killer Knife
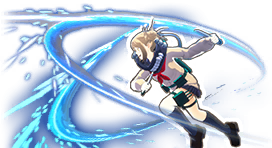
Toga's beta is a skill with good versatility being good for damage and really shines as her mobility. Beta is her riskiest move to get value out of so decision-making when you use this is important, but thankfully it's a rare instance of a skill that recharges while in use so it's forgiving on that front. It's recommended to not depend on this as your sole damage however, because it can be react-able and out-damaged while leaving you with less charges to run away.
It comes with 2 charges and stays the same at all levels. Along with the damage increases it gets 2 size increases at level 4 and level 9. There are two parts to this skill - the initial lunge and the run.
The lunge is a two hit slash combo and has decent tracking while Toga moves in the direction of where you're aiming. The run happens if you hold the button anytime after the lunge and it has a fixed duration unless you hit someone during it, which then time extends as long as you keep hitting people with it. The run has 500 downpower meaning it is an instant knockdown on hit so to get use out of the length it's preferable to hit multiple people and cycle through them as they get knocked down and recover. If you want to end it early you can let go of the button and toga will stop regardless of which state you're in.

For Attacking
Toga's beta has aggressive tracking and an increased vertical hitbox but as a non armored move and quite rollable it still has risks and is best used for punishing people that whiff an attack, catching wake ups on characters who can't beat it, punishing people getting too close so you can run away then reposition or in detransform combos to maximize damage. It also has a quirk of hitting twice if the target rolled during your beta hitting them but don't get used to it happening often since it's out of your control. You can also use it as a wake up catch tool, taking advantage of the close range tracking, to keep someone from escaping
For Mobility
A lot of your vertical movement will come from jumping, aiming and using the lunge (taping the button) upwards to usually get on top of buildings and map geometry easier
The run is incredibly good at being tricky and swerving around nooks and crannies around the map when trying to lose people chasing you and pairs well after mobility charges of other characters' blood you use, most effective when used in the air so you can have options for pathing.
Gamma Skill - Blood Sucker (Syringes)

Toga's arguably most important move and momentum starter but currently it's not advised to depend on it for your base Toga damage. It is a level hungry skill too meaning that you also can't neglect leveling it up if you want to maximize what you get out of it, get it to level 7-9 as early as possible as that's when it gets its last range increase. It deals decent damage at level 9 if all the syringes land but it can be unreliable as it's prone to missing due to obstacles, bad tracking, lag and your target's burst mobility.
She has 2 charges at all levels to compensate for the troublesome tracking. Landing any of the syringe needles on an opponent will give Toga their blood for her to access with her Special Action. The move also has an interesting quirk where you can have only the blood sucking register but not the damage if the target rolled at the right timing.
Using gamma to the best of your ability is all about timing (and gambling). It has some notable end lag so it's not a good idea to use the move carelessly in 1v1s or at every open target the second you see them, so it's important to know how to pick and choose according to the situation. It also does not track targets well through objects or bushes. This is a quirk that likes to be used in open areas of the map as that gives the least obstructions.
The best times to use gamma are: while you are in the air, during your opponent's end lag on one of their moves whether it be an attack or at the end of their mobility skill, if someone is stationary, or someone unaware like while looting or in another fight, during a teammate's grab or stun like strike Shigaraki gamma or Denki's Gamma for example and in selective instances as a detransform combo finisher.
A niche usage of it is to gamma people while you're stalking them to safely test which version of a character, default or skill set, you're fighting. Once you get blood the icon will tell you which role they are so you can then plan accordingly.
Special Action #1 - Transform
Toga's special is the most important part of her kit and what her gameplan comes back to. To transform once you get blood you press the special button and to detransform you press crouch twice quickly. You can act immediately after detransforming. Important to note that toga detransforming with her AoE or Traps active from a character she copied (Tech Dabi for example) become only visual with no damage or disappear.
Transforming has many reasons such as using another character's strengths that toga can take advantage of like AoE characters to control space, revive characters to keep your team alive, mobile characters either to chase or run and so on. She also can transform and detransform quickly to reset her own cooldowns if staying as base toga is preferable in that situation.
A lot of the difficulty in playing her comes from knowing how to play other characters efficiently. It's recommended you have a good understanding on how to play the whole roster but you don't have to master them all. When looking to transform you should value how confident you are in playing the character over just their strength, I advise having 3-6 characters in your pocket that you play well and play reliably to get the most use out of them.
The biggest double-edged sword however is that the enemy you copy and their team have you highlighted so you can use it to your advantage and confuse them but in practice it's easy to point to you and single out who's who, this is why unless the character you copy is good at handling multiple people or you can escape from them it's not advisable to transform if you have a whole team's attention on you- instead try do so during chaos and diversions like 3rd partying or your teammates taking attention if your aim is to disorientate people. Another option is to kill that person and use their blood in a fight with another team so you get the benefit of transforming without being traceable. Just don't forget that while you're transformed, your location is visible at all times by the team you stole blood from.
Lastly, Toga generally would prefer to play transformations out as long as she can before detransforming due to below average dps on her kit outside of alpha but don't get too attached to your blood either and detransform if you have to.
The interactions between tuning and Toga's special action are as follows:
✅ Means "Works while transformed"
🟡 Means "Effects carry over between transformations"
🟠 Means "Works when both you and the victim have the tuning"
❌ Means "Doesn't work while transformed"

|
Kota Finder ✅ |
|
Crushing PU ✅ |
|
PU Turbo ✅ |

|
Resist Heat ✅ |
|
Resist Cold ✅ |
|
Resist Shock ✅ |
|
Wall Runner ✅ |

|
Battlefield Analysis ✅ |

|
Card Duplication ✅ |
|
Compression Magic ✅ |
|
Fixer ✅ |
|
Trance Blow ✅ |
|
Revenge Rapid 🟡 |
|
Revenge Strike 🟡 |
|
Revenge Technical 🟡 |
|
Revenge Assault 🟡 |

|
Revenge Support 🟡 |

|
Indestructible 🟡 |
|
Symbol of Peace 🟡 |
|
Muscle Form 🟡 |

|
Hyper Regeneration 🟡 |
|
PU Power Intensified 🟡 |
|
Full Burn 🟡 |

|
Critical Permeation 🟡 |
|
Ability Manifest 🟡 |
|
Sisterly Disposition 🟡 |
|
Iron Fist 🟡 |
|
Booming PU Voice 🟡 |

|
Quick Reload 🟡 |
|
Quirk Factor Release 🟡 |

|
Special Action Reload Boost 🟡 |
|
Space Hop 🟠 |
|
Electrification 🟠 |

|
Willpower 🟠 |

|
High-Speed Replenishment 🟠 |
|
Reinforced Revive 🟠 |
|
Warp Heal 🟠 |
|
Acceleration 🟠 |
|
Speedy Civilian Rescue ❌ |
|
Camouflague ❌ |
|
Embrittlement ❌ |
|
Speedy Self-Revive ❌ |

|
Quasi-Permeation ❌ |
|
Spiraling Leap ❌ |
|
Perception ❌ |

|
Extra Wind ❌ |
|
Divine Protection ❌ |

|
Foundation of Peace ❌ |
Special Action #2 - Blood Sucker (Direct-Drinking)
Toga has a second special action that's a stab that can be used on downed bodies, it gives you their blood and puts your Special Action on a short cooldown. It won't see a lot of use unless you were struggling to get the blood with gamma.
Basic Attacks
Ground Melee
A simple 3-hit melee on the ground that has short range but good speed. You won't be in the position to use this a lot of the time as Toga wants to keep distance but it is a good wake-up catching tool and you can time each press a little slower to account for when your opponent's i-frames end. This also combos well into beta and with the addition of tuning it doesn't hurt to know some detransform into melee combos.

Air Melee
A simple 1 hit slash in the air that probably gets better use as mobility aid than as an attack. Using it after a jump can increase your travel distance slightly but when really high up it's useful for air strafing.

Leveling Paths
Early Fighter Path A
If you're in the position where you or a teammate are in a fight almost immediately this is what you go for if you need to scrounge up levels fast.
![]()
![]()
![]()
![]()
![]()
![]()
![]()
![]()
![]()
![]()
![]()
Early Fighter Path B
Same reasoning as the previous path but if you need to fight someone you want to stay close to, keep from acting and repeatedly knocking them down.
![]()
![]()
![]()
![]()
![]()
![]()
![]()
![]()
![]()
![]()
![]()
Zoning Demon Path A
A solid default to go to for covering your bases. Alpha for poking and damage, Beta for getting people off you and gamma for fishing blood.
![]()
![]()
![]()
![]()
![]()
![]()
![]()
Zoning Demon Path B
Same reasoning as the previous path.
![]()
![]()
![]()
![]()
![]()
Run 'Em Down Path
Overwhelm people with beta and constant knockdowns to apply pressure while doing decent damage but it's very glasscannon-ish so avoid being predictable and blindside people as much as you can.
![]()
![]()
![]()
![]()
![]()
![]()
![]()
![]()
![]()
Relentless Killer Path
Aggressiveness is key for this path and suitable if you prefer Toga's alpha, gamma is more for utility and just making sure you have blood to use which is why maxing it fast is not necessary.
![]()
![]()
![]()
![]()
![]()
![]()
![]()
Blood Cycler Path
For getting gamma to be as dependable as possible fast. Alpha and beta are ideally use for softening up in between transformations while your main dps comes from transformations.
![]()
![]()
![]()
![]()
![]()
![]()
![]()
![]()
![]()
![]()
![]()
Techs
Beta Double Hit
This is dependant on human error so it's not possible to use it intentionally. Sometimes if your enemy is rolling on the same frame you hit them they might ignore the hard knockdown and get hit again.

Gamma Damage Double Dip
If you currently have blood stored and you gamma a second person it's possible to transform right after it hits and use the original blood you had because loading blood is not instant.
Detransform Cancel Invincibility
Transform or detransform anytime you have control of the character and you become your copied character or swap back to Toga respectively. What makes it notable is it's a cancel and has some i-frames so in the case of detransforming back to toga you can use any skill (ideally beta) immediately after an attack from your copy character, remove any debuff states (not applicable to stuns) like trance or to narrowly avoid some damage with the i-frames.
Transform Emoting
When you have blood stored, hold/have the emote wheel open while pressing transform. Now play any of Toga's emotes you have set and you will be able to use the corresponding emote of that character (Toga clap your hands > Twice clap your hands for example). It only works once until you detransform and retry.
Combos
The different ways you can combine and chain various skills for higher damage within 500 DP (Downpower). The downpower of Toga's abilities are as follows:
Alpha Skill: 25 DP
Beta Skill: 100 DP (Base Hit), 10 DP (Tackle), 500 DP (Afteslashes)
Gamma Skill: 10 DP (Per Syringe), 20 DP (Full Hit Lvl1-3), 40 DP (Full Hit Lvl4-8), 60 DP (Full Hit Lvl9)
Special Action: 100 DP
Ground Melee: ? DP
Air Melee: ? DP (Presumably 250 DP)
The DMG of the following combos at max level and accounting for the character's strike role is classified under the following tags:
Basic DMG (100-149 DMG), Basic+ DMG (150-199)
Light DMG (200-249 DMG), Light+ DMG (250-299)
Medium DMG (300-349 DMG), Medium+ DMG (350-399)
High DMG (400-449 DMG), High+ DMG (450-499)
Heavy DMG (500-549 DMG), Heavy+ DMG (550-599)
Deadly DMG (600-649 DMG), Deadly+ DMG (650-699)
Melee 1 -> Melee 1 -> Beta
Pretty much the only combo she has outside detransform combos, better than nothing.
Air Melee -> Beta
A variation of the combo above using air melee.

Air Melee -> Melee 1 -> Melee 2 -> Gamma
Use this not for damage but for confirming blood. HP exclusive, Knockdown at lvl 9 Gamma.


Recommended Normal & Special Tunes
Normal Tunes
Strike Slots: HP DMG > Gamma DMG and GP DMG >> Beta DMG >>> Melee DMG
Assault Slots: GP DMG > Alpha Defense > HP Defense >> Else
Rapid Slots: Gamma DMG >>> Melee DMG > Alpha Reload > Else
Support Slots: Gamma DMG >> HP+ and GP+ > Else
Technical Slots: Alpha DMG > HP+ >> Else
Special Tunes
| The list of recommended special tunes (not ordered): | ||
|---|---|---|
|
Wall Runner Probably her best special tune. It lets you preserve beta cooldowns, gives you another wake-up option if buildings are nearby and it's useable when transformed so you have an automatic advantage in mirror matches, especially against other grounded characters that would like to use wallrun. |
|
|
Space Hop Good wake up option, good for mobility and postioning. Useful for longer air time which is useful with gamma since it works better with elevation. |
|
|
Acceleration The benefits of faster attack and movement speed (which carry over into transformations) is too good to pass up on for her, even if restricted to activating it as base Toga only. |
|
|
Crushing PU Charge Reliable and supports aggro playstyles. |
|
|
Card Duplication Good for offsetting needing to fight with how level dependant she is. |
|
|
Divine Protection Toga is nimble enough to get in and out of places when she wants so snagging unattended boxes is no challenge for her. |
|
|
Ability Manifest It's nice if you play with it in mind and carries over into transformations. |
|
|
Reinforced Revive Works when copying someone who has the tune as well but usually convienient since most revive characters run it. |
|
|
Electrification Useful when used in combination with beta and for protection or roll catching if they try to roll your beta. |
|
|
Muscle Form Only works if you activate PU as base Toga. The anti-flinch is very useful but don't sleep on the HP gain either. |
|
|
Critical Permeation If you're guardbroken while holding alpha or beta you can continue to attack while critical permeation activates, which is nice. |
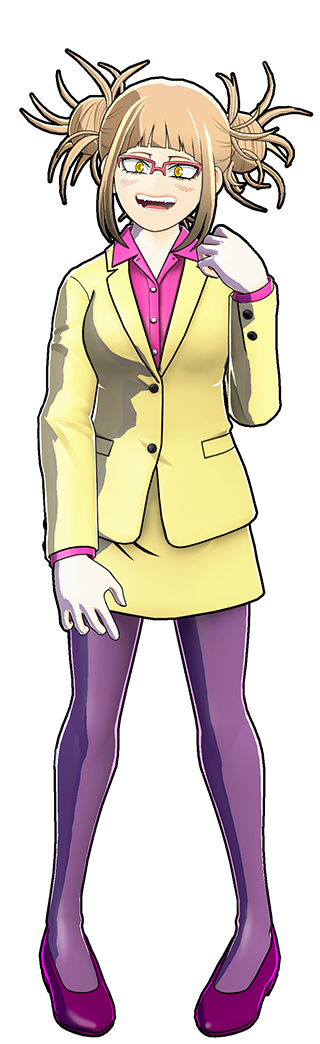
Recommended Builds and Costumes
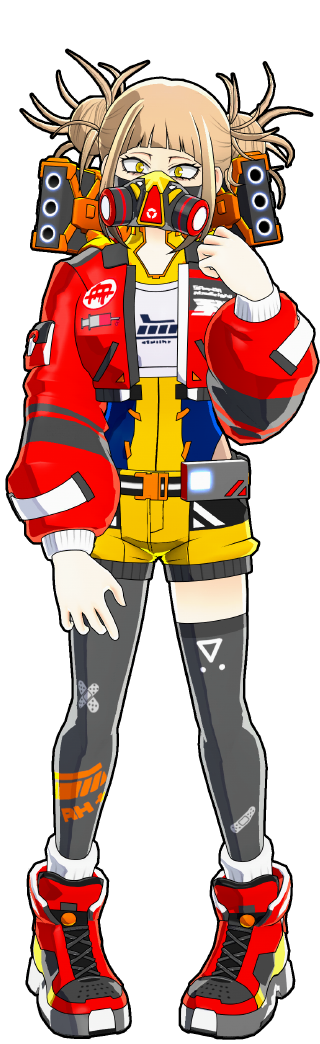 |
Cyberpunk (Heat) Arguably her best aggressive build with Crushing PU Charge + Card Duplication, letting you keep fighting and rewarding you for doing so. |
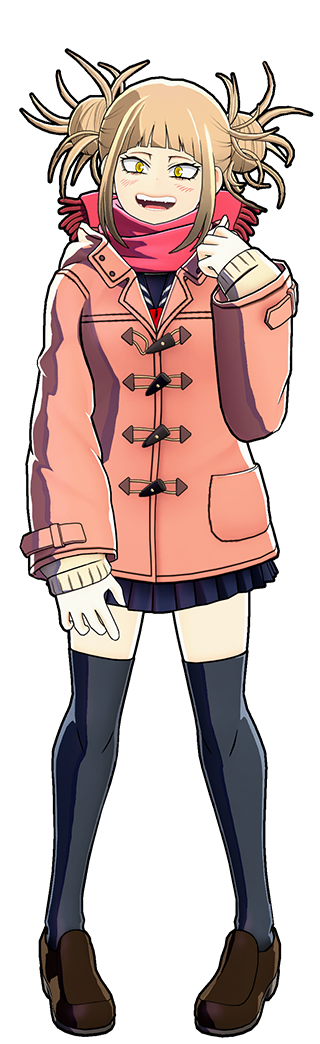 |
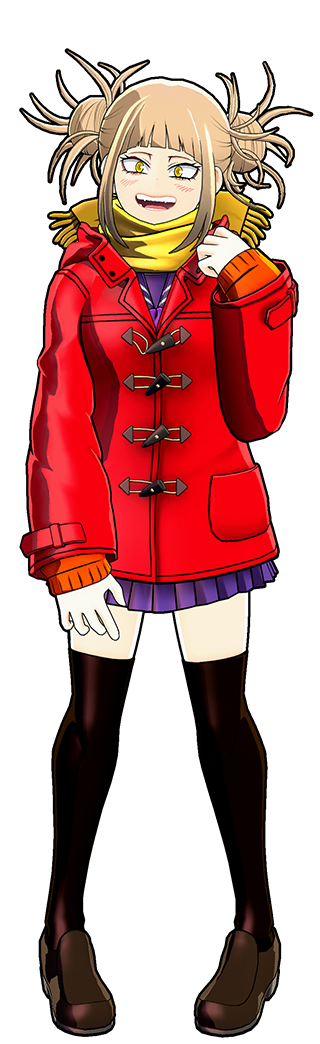
Disguise: Duffle Coat (Default) For Wallrun + Space Hop and only one of two costumes that can run the combination. Toga's best mobility build. Alternatively you can run both All Might tunes to get Muscle Form sooner due to Symbol of Peace. |
 |
Disguise: Suit (Fancy) Mainly for Critical Permeation (which doesn't trigger transformed) or High-Speed Replenishment but the blue slot is good for Acceleration, Card Duplication or Wall Runner. |
 |
Disguise: Duffle Coat (Heat) Willpower + Critical Permeation for safety nets and lets you keep attacking with invincibility if guardbroken during alpha and beta. |
 |
Disguise: Duffle Coat (Dangerous) The second Wallrun + Space Hop build option, you can triple stack alpha attack for normal tunes as well. |
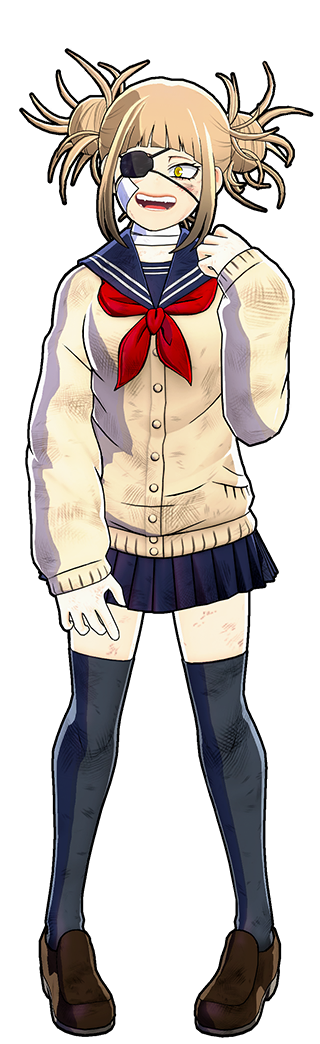 |
Uniform: Damaged (Default) Can run Kota Finder + Divine Protection so as long as you know where to be you won't be short on resources for long. It's even useful if you have to dip into storm for supplies. Also helpful due to how level dependant Toga is. |
 |
Cyberpunk (Default) Can run rapid tunes like Acceleration and any red tune of your choosing like Ability Manifest or Crushing PU Charge. |
 |
Cyberpunk (Fancy) An alternative for "Uniform: Damaged (Default)", same rules apply, equipping Kota Finder and Divine Protection. |
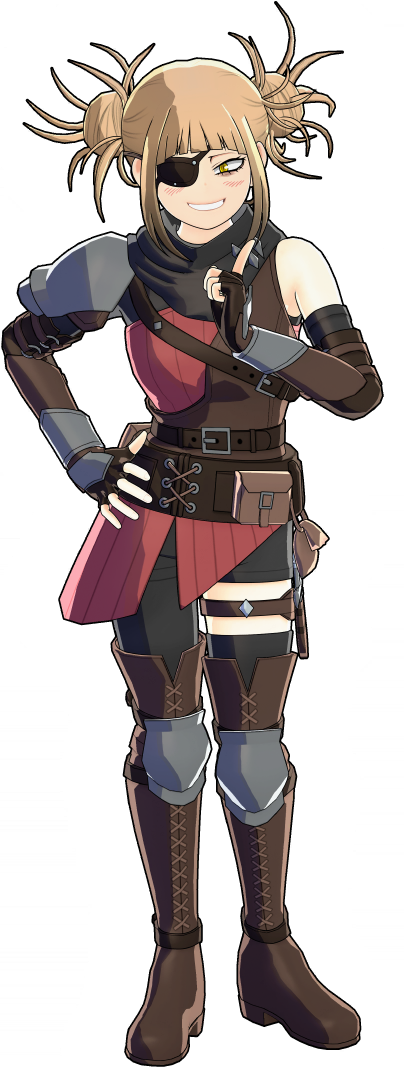 |
Dark Night Assassin (Default) There's a good number of build combinations you can run with an assault and strike slot. One suggestion is Crushing PU Charge + Full Burn. |
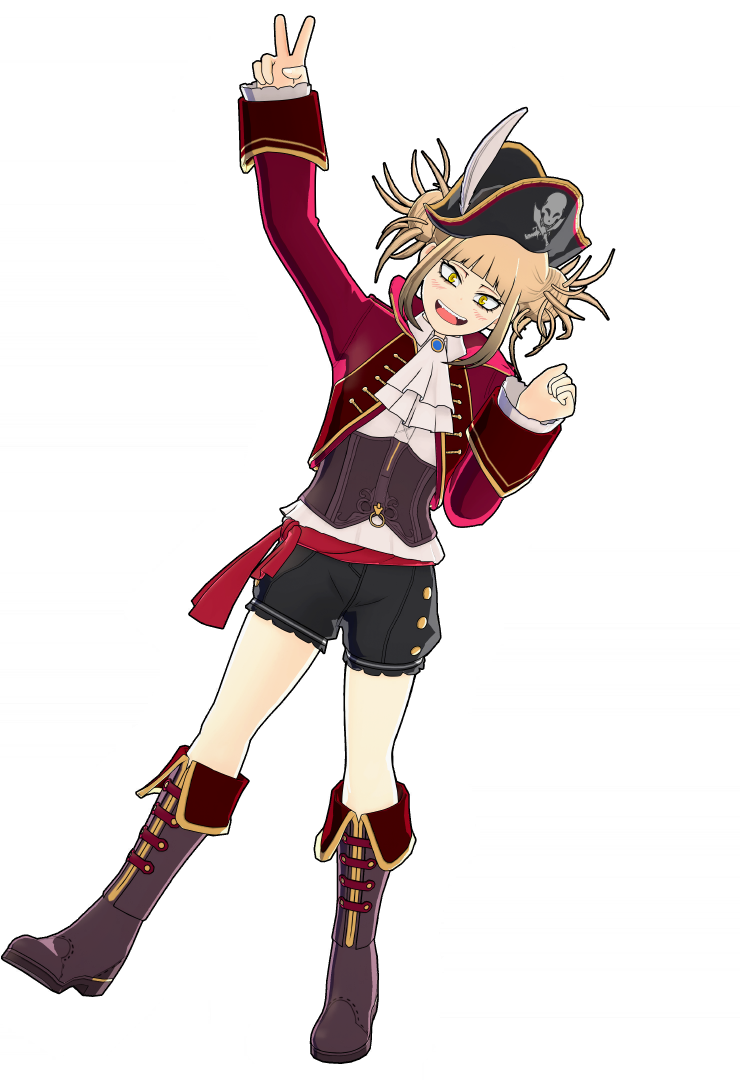 |
Villain Pirates (Default) Another good option for your selection of Rapid and Strike tune combinations like Ability Manifest, Crushing PU Charge or Kota Finder for the red special slot and Wall Runner, Acceleration or Muscle Form for the blue one. |
 |
Villain Costume (Hero-Style) This build is more for the normal tunes as you can stack gamma attack, HP/GP attack and alpha attack as you see fit. Compression Magic is the ideal special tune here. |
 |
Disguise: Camie (Default) Useful budget build for PU Turbo. |

Izuku Midoriya (Default) 
Difficulty Score: 🟡Even🟡
In a head on fight Toga needs to make herself as hard to hit as possible while closing the gap so she can bait out deku's beta and depend on her own beta to punish him whiffing. Deku does have more DPS but Toga has more tools to readily use than him. She can also transform into him for a bit more damage and force a mirror match since as long as she has blood she can catch up with him.
Izuku Midoriya (Full Bullet) 
Difficulty Score: 🔴Unfavorable🔴
His alpha is very oppressive and shuts down Toga because she doesn't have a good amount of options outside of breaking line of sight, which hinders her trying to alpha or gamma him in turn. His gamma can block Toga's gamma, and when in the air he can alpha or beta which comes out as a better damage trade in his favor. You can use his blood to turn his own DPS against him but she struggles to secure said blood sometimes.
Izuku Midoriya OFA 
Difficulty Score: 🔴Unfavorable🔴
Deku can be very predictable with his approach but the melee tracking range makes gauging your beta timing a little difficult. He shuts down your escape with ground alpha due to instant knockdown, and if in overdrive his gamma lock on too, meaning you have to fend him off while he can run if need be. His air maneuverability makes using alpha a struggle, and Toga's gamma can miss due to struggling to hit fast targets. If you see him coming from above with overdrive try to get in the air or stall to avoid the slam AoE and punish him with Beta if close or alpha if far. Copying him you can turn his tricks against him but whoever melees first is likely the winner.
Katsuki Bakugo (Default) 
Difficulty Score: -
Katsugi Bakugo (Machine Gun) 
Difficulty Score: -
Ochaco Uraraka (Default) 
Difficulty Score: 🔴Unfavorable🔴
A very tug of war type match-up but it's toga either fending Ochako off or Ochako looking for uninterrupted combo opportunities. Aim to use alpha after dodging her gamma which keeps her in place for quite a while and stay grounded so you can dodge beta easier. Use Beta if she gets too confident and gets close to you. You can win a mirror match if you copy her but it's a very unnecessarily volatile 1v1 and you must pay good attention to her.
Ochaco Uraraka (Zero Satellites) 
Difficulty Score: 🟢Favorable🟢
Ochako has a lot of "laggy" moves and very dodgeable, but when she hits she HITS. You're generally fine staying as toga if you don't want to mirror match but if you're confident at playing Assault Ochako you can use her blood for beta then detransform and Toga gamma then repeat to keep up with her escaping.
Tenya Iida 
Difficulty Score: 🔴Unfavorable🔴
Iida is too fast to alpha consistently and his beta is too strong to trade with, being armored and relatively low knockdown and beats out Toga's own beta from any other angle besides the front. Your best bet is waiting for him to come to you and using beta to punish him missing but don't bother chasing him unless you have his blood, if he’s low and running away alpha him instead.
Shoto Todoroki (Default) 
Difficulty Score: 🔴Unfavorable🔴
Toga has decent counter play to Shoto's beta and gamma by getting in the air by jumping, using beta and keeping distance, but his alpha is too risky to not respect since he will out-damage you and has decent range rivalling Toga's alpha range. It's best to bait out Shoto's betas with proper spacing so you can use your own beta or gamma and to alpha or gamma him when he runs away with his gamma. When transforming into him timing is important because he can alpha or gamma you to catch you out after the animation.
Shoto Todoroki (Ice Fang Wind Flame) 
Difficulty Score: 🔴🔴Very Unfavorable🔴🔴
You can't fight a Technical Shoto in a building let alone when paying attention to you. His gamma counters your alpha and his alpha shuts down your beta both in short and long range, don't bother.
Tsuyu Asui 
Difficulty Score: 🟡Even🟡
Tsuyu is rather squishy but she can pester you well if you're not landing your betas when she approaches. With the momentum change it makes targeting her a bit more challenging too. Generally whoever can read the other better wins.
Eijiro Kirishima (Default) 
Difficulty Score: -
Eijiro Kirishima (Red Drive) 
Difficulty Score: -
Denki Kaminari (Default) 
Difficulty Score: -
Denki Kaminari (Lightning) 
Difficulty Score: -
Momo Yaoyorozu 
Difficulty Score: -
Neito Monoma 
Difficulty Score: -
Itsuka Kendo (Default) 
Difficulty Score: -
Itsuka Kendo (Twin Palm Strike) 
Difficulty Score: -
Ibara Shiozaki 
Difficulty Score: 🔴Unfavorable🔴
Ibara can be a very scary fight when on Compress. With her Alpha she has huge range and even bigger damage, putting Compress at the disadvantage as he can’t block it with his Beta and it knocks him down. Her Beta, especially at higher levels, is great at both knocking you down and catching your wake up if you aren't careful. Her Gamma does insane damage directly to your HP, and like all grabs can hit you through your Gamma’s armor and stop it going off. Her close range expertise means you rarely want to try and melee her, especially since she has armor on all of her moves. All of her moves do leave her as a stationary target on a whiff, so make sure to capitalize on that to return big damage or get distance from her if you're in her Beta/Gamma range. The sky and tall buildings are unsurprisingly your best bet in this fight, as she's limited to using only her Alpha and being an easy target to hit if she misses while you look down on her. If you're in the air and she hits you however, you become a lot easier to hit again as your recovery takes away a lot of your momentum, making you a slow moving target in the open air. Make sure to utilize your i-frames so you aren't an easy target for a second hit.
Mirio Togata (Default) 
Difficulty Score: 🟡Even🟡
While Mirio is prone to exploding if you can catch him off guard, his movement and love for close up encounters can sometimes put Compress at the disadvantage. He loves close quarters fights, and his movement is also superb, being one of very few characters who can outright get away from Compress. His Gamma being able to block your projectiles and force you in close can be good to bait you into an uncomfortable position. What helps Compress the most in this match up is Mirio’s low health pool, and easily exploitable punish windows upon an Alpha or Beta whiff. These leave Mirio stationary and if you're fast enough to hit him can lead to him taking big damage. If you aren't quick enough however, he can reset the situation if he enters his Special Action for invincibility to wait out his cooldowns. In his Special Action he can also just run up to you directly without threat to force close range fights. In this situation it's best to either run yourself, or use Gamma to get away.
Mirio Togata (Sheer Counter) 
Difficulty Score: 🔴🔴Very Unfavorable🔴🔴
Fitting his namesake, Sheer Counter is an excellent counter to just about everything Compress wants to do. For starters his Alpha makes him invincible, meaning not only can you not hit him with your own Alphas, but reflected Alphas don’t hit him back either unless he stands still. This is terrible for Compress, as your main method of damage is completely stopped here, and you can’t stun him either. His counter is also a fantastic move against Compress. Since your offensive gameplan pretty much boils down to spam Alpha, it's very easy for Sheer Counter to predict this and time his Gamma accordingly. Your Alphas huge size and the shockwave after make it especially easy for him to counter you. While his movement isn’t superb compared to Compress’, he actually has a way to counter your Gamma too. By timing his Gamma alongside yours, hitting him with the smoke bomb you drop will send him straight after you to easily knock you back down. You must play cautiously around Sheer Counter, baiting his counter so you can punish him on a whiff or run away. His Beta can be similarly punished if he misses, and fortunately isn’t too strong of a move. His Special Action is still a problem letting him engage you for free, except you now have to be careful about timing his counter if you try and Gamma away from him while he’s in it.
Tamaki Amajiki 
Difficulty Score: 🟡Even🟡
Although his Alpha is blocked by your Beta, the grab version of it can still be quite scary as a hit means you’re likely to be losing a large chunk of your health. That being said, a whiff or hit into your Beta often lets you squeeze an Alpha hit back at him while he recovers, giving you the sustainability to win the fight. His Beta is a bit trickier, as its tracking and movement speed can sometimes make it a bit awkward to dodge. On hit it also gives him invisibility, so make sure you keep track of him if he knocks you down. Learning the dodge window for this move makes it much more bearable since it's his best option against Compress. His Gamma is fortunately not a huge problem for Compress. While it will always be annoying as a third party tool, in a direct fight Compress can just block it with his Beta. If you catch a Tamaki using it with their back turned or if they miss, they’re a sitting duck and you can often deal huge damage or even downright knock them if they don’t cancel it fast enough.
Nejire Hado 
Difficulty Score: 🟢🟢Very Favorable🟢🟢
Easily one of Compress’ best match ups, Nejire is one of only three characters whose entire moveset can be stopped by Compress’ Beta. Her Alpha is nothing special, being overall worse than Compress’ and reflectable using your Beta. Her Beta can be blocked with yours, and while it is good for knocking you down she sort of struggles to catch Compress’ wake up thanks to everything being blockable. You can allow her to waste her Betas charge firing into your own Beta, and then Alpha her back when she gives up. If she isn't looking at you her Beta leaves her a mostly stationary target to wail on. Her Gamma can give her height making her harder to hit, but once more can be reflected, although it rarely actually hits her back. Her movement is all around worse than Compress’ and while her floating can make it more difficult to hit her, it isn't that hard if you can get used to it. Even if you can’t just wait for her to come down since she can’t do anything to you up there anyway.
Hitoshi Shinso 
Difficulty Score: 🔴Unfavorable🔴
While his Alpha can be blocked, often allowing you to slip in an Alpha while he recovers, his sheer damage potential and team combo potential still make this match up quite hard. Shinso is another character who thrives in catching your wake up with his Gamma and Beta. Teleporting into the air while he falls with his Beta is a great way to both take loads of damage and get knocked out of your marble, wasting a charge. This combined with the fact that the brief animation before you teleport leaves you wide open to being hit by his Gamma, Alpha, or even his Special Action, means your best wake up option is incredibly risky if you can't find a safe spot to use it. His Gamma allows him to land all his moves much easier if it connects, and it can even be mixed into combos for a guaranteed hit to make running even harder. On a miss however, he does leave himself quite open while he recovers which will allow you to spam Alphas in return. This also applies to his Special Action. His movement is also quite good, and while he may not have the distance to fully get away, he can certainly move around in ways that will make him awkward to both track down or finish off.
All Might (Default) 
Difficulty Score: 🟡Even🟡
While All Might’s Alpha can be reflected like most others, you may be surprised to learn you can even block the splash damage from it with your Beta as well. All Might's Beta will be his best tool against you on Compress, as if you don’t recover quick enough after being hit, it can be combo’d into a second Beta or into a ton of Alphas. For this reason if you're hit by it, recover as fast as possible, but let your i-frames run out so you can’t be hit by any subsequent moves, especially that second Beta. If you start reflecting Alphas, this is most likely the move he’ll use in response, so get ready to dodge it. All Might's Gamma isn't too strong, and is mostly used as a way to stall since you can’t hit him while he’s in it. Typically All Might players will use his Special Action leap after exiting this to run, so be ready to quickly wail on him with Alphas while he crouches and then keep chase with your Gamma. This should fortunately be quite easy, as although All Might has decent movement Compress’ is still superior. If he chooses to use his Betas to get more distance it also means his best move in this fight will be gone, so keep track of how many charges he uses when moving around.
All Might (Gatling) 
Difficulty Score: 🟢Favorable🟢
Gatlings Alpha is just about one of the easiest Beta reflection targets in the entire game. Its long start up before it starts dealing big damage will give you ample time to begin reflecting it with your Beta. If he tries to use his uncharged Beta, you can also reflect that to stun him and start potential Combos. Holding your Beta out will likely bait him into going for one of his two most dangerous moves in this match up, his charged Beta, or his Gamma. His Gamma is especially damaging, and can grab you out of your own Gamma, so be on the lookout for it. If he misses his Gamma his recovery is quite punishable, allowing you to spam your Alpha against him. Although Gatlings movement is a little better than default All Might’s, escape or chase still shouldn’t be a primary concern for Compress here.
Shota Aizawa 
Difficulty Score: 🔴🔴Very Unfavorable🔴🔴
While Aizawa’s Alpha can be blocked by your Beta, often allowing you to squeeze an Alpha in between his attempts to grab you, his damage potential and reliable counter to your whole kit easily gives Aizawa the upper hand. When you throw your Alpha in between his attempts to grab you really have to try and aim for a stun or else he can spam his own Alpha to try and start his high damage combos. Aizawa can also easily close distance and dart around you using his aerial Alpha and Beta, making him very hard to hit. Aizawas Gamma is a hard move to fight when on Compress, as its ability to block all shots from his front and sides means you’ll have to be behind him to get a hit on him. If you're able to get the opportunity to attack his exposed behind however he’ll be stuck losing a lot of health. Aizawa's Special Action is unsurprisingly a huge counter against Compress, as not only does it allow for an easy attempt of his grounded Alpha with you not being able to block or fight back, but if you’re in your Gamma’s marble and become affected by it, you’ll be kicked out which ruins your momentum. Finding a good moment to use your Gamma in this fight can already be hard as well, as the pause before your teleport sets him up for an easy grab if you aren't careful. Aizawa's movement is nothing to scoff at either, being able to make good ground regardless if he's running from or chasing you.
Present Mic 
Difficulty Score: 🟡Even🟡
Like when fighting most Alpha spam characters, an easy get around to a trigger happy Mic will be to reflect his Alpha with your Beta. This is especially important to do in this match up, as thanks to his Special Action Present Mics Alpha can easily stack up damage even faster than normal. Mic does have some counterplay here, as throwing his radio behind you will let it hit you since your back is turned to it. In close quarters Present Mic players will often go for his easy tap Beta into Gamma combo. If he starts with Beta you can actually block this and attempt to dodge his Gamma after or start stunning him if you're quick. Be careful if he expects this though, as if he does just Gamma he’ll punch you straight through your barrier. If you ever dodge his Gamma, its end lag gives you a good punish opportunity, or gives you time to Gamma away if you're in a bad spot. Just like his tap Beta, you can also block his charged Beta, which shouldn’t be too difficult as its long start up gives ample time for you to put up your Beta. In the event he does knock you down, watch for his tap Beta, as its stun will stop you from teleporting on wake up. In terms of movement, Mic is very outclassed against Compress, and you shouldn’t struggle to run or catch up to him.
Cementoss 
Difficulty Score: 🟢Favorable🟢
Despite his unique playstyle Cementoss will normally be a good match up for Compress. Both his Alpha and Gamma can be reflected while still in midair, meaning his combo game against Compress is much more limited as it relies on the stun from direct hits for max damage. If you're hit by Alpha or Gamma, recover/roll as fast as possible to try and prevent a follow up attack. Cementoss is great at creating his artificial high ground for both vertical movement and to create a safe spot to heal. Compress’ Gamma is an excellent counter to this however, as it can easily get you above Cementoss to rain Alphas on him. Watch for if he places a Gamma on top however, as it’ll block you from getting above him if you’re too close to the pillar. If he doesn't stack his pillars high enough you actually won’t need Gamma at all, as simply throwing Alphas from the ground can still let you hit him thanks to the marble's arc and the projectile size. While this primarily covers the counter play outside, fighting Cementoss inside is not advised unless you already have a considerable advantage. His ability to block your exits combined with the fact his moves are super easy to hit inside, will put you at a big disadvantage.
Endeavor (Default) 
Difficulty Score: 🟢Favorable🟢
Endeavor struggles quite a bit in this match up. His Alpha, while capable of high damage if you aren't careful, is very easy to block and you can react to it after he gets a tick or two worth of hits. His Beta will be his most threatening move thanks to its very high damage, so reflecting it is instrumental in stopping Endeavor's offense. It does offer counterplay against your Beta though, as once it lands on a surface the pillar it makes can’t be blocked anymore. His Gamma is also not blockable. If he misses it or you catch an Endeavor using it against someone else however, him being stuck in the air gives you an excellent opportunity to spam Alphas into him. In the event he knocks you down, try to find cover before using Gamma to get away. Otherwise the pause before the teleport makes you an easy Beta target. The movement granted by Endeavor’s Special Action is far outclassed by Compress’ Gamma.
Endeavor (Inferno Fist) 
Difficulty Score: 🟢Favorable🟢
Much like with Strike Endeavor, Inferno Fist’s Beta is the move you’ll want to watch for. Its spawn AOE and ability to drag you back inside can make for a lethal trap, so it's best to just Gamma out in most situations. If Inferno Fist tries to melt you with Alphas while you're stuck, reflect them with your Beta until he stops before you use Gamma to discourage him from following. If he tries to use his Gamma, teleport instantly to avoid it. In the event you don’t have Gamma available, you can reflect his Gamma too, but only while it's airborne. Once it hits the ground you’ll need to run. If you're ever in the open holding your Beta against him, be aware you’re an easy target for his Beta and that you’ll need to watch for it. His movement is the same as his base, so still not great.
Hawks (Default) 
Difficulty Score: 🟡Even🟡
Hawks only really has one good move in this match up and that is his Beta. Its near guaranteed shield break and being a super easy method to knock you down already make it great. The additional movement on hit it provides him is the cherry on top though, as Hawks become much harder to hit with his increased speed and can easily follow up on you. If he misses his first Beta it is easy to punish however. His slow moving auto-track Alpha sucks, and will do very little damage before you can react and block it. A Hawks who can quickly beam with the aimed version before moving again is much harder to react to. His Gamma is easy to dodge and reflectable too, so make sure to attempt the reflect whenever you see him do his spin. Even with his nerfs his movement is nothing to scoff at, and if you get outlined by his Gamma you may have difficulty running away.
Hawks (Slicing Wind) 
Difficulty Score: 🟡Even🟡
Much like the base Battle Style for Hawks, Slicing Wind only really has one truly problematic move for Compress in his Gamma. Its combo potential, and large hitbox make it very dangerous if you can’t avoid it. Try and recover as quickly as possible to prevent follow ups if you're hit by this attack. Like most Alpha’s, Slicing Wind is reflected right back at him, so watch for him so you can return to sender. His Beta is sort of an awkward move to characterize. While it is damaging if he lands it, it can be dodged fairly easily and leaves him very open to punish if he misses. Its best use against Compress will be to use it to break out of combos, as at level 7 it can break through the effects of stuns, countering Compress’ Alpha. His movement is quite good too, so it may be difficult to run from or catch up to Slicing Wind if he has his cooldowns.
Mt Lady 
Difficulty Score: 🟡Even🟡
Mt. Lady is an excellent close range fighter, and ideally someone you want to interact with from a nice middleground. This highly limits her damage options and forces her to make a play to try and get in which you can predict, or spam her Alpha which you can reflect. Highground is ideal though as it's much harder for her to reach and she wastes moves to get up. If Mt Lady ever gets too close to you, you should try and Gamma away since that's where she excels. Do be careful though, as her stomps can stun you out of it. If she ever knocks you down her Beta will be her best wake up catch option, so avoid that as best as possible. Her movement is quite poor, so you’ll outclass her there. Her giant form isn’t particularly bad unless you're right beside her making you an easy target. Her Alpha is incredibly easy to reflect thanks to its slow speed, and her Beta is easily dodged by teleporting into the air. Her Gamma will be the only real threat as its huge hitbox means you aren't safe in the sky. If she ever enters this mode, try your best to disengage as fast as possible, as her huge damage reduction and insane damage make winning a fight almost impossible if she's even kind of healthy.
Tomura Shigaraki (Default) 
Difficulty Score: 🟢Favorable🟢
Unfortunately for Shigiraki he really struggles to do much to Compress. His Alpha and Beta being grounded when Compress can easily fly into the air or get high ground with his Gamma means he lacks the ability to deal consistent damage to you. His Alpha also leaves him open to a counter attack since he's stationary using it. Even when you don’t have Gamma available, jumping over and over to stay off the ground until you get it back will negate some damage. You do need to keep in mind his Alpha and Beta can travel up surfaces though, so you aren't entirely safe when you are on top of buildings. If Shigiraki tries to Gamma you, dodge towards him so he runs right past you. It’ll grab you through your Gamma’s armor so using it won’t be a safe option to get away. If he does land it recover as fast as possible or else he may be able to hit his Special Action after to inflict Defense Down on you. His Gamma and Special Action being his movement sources means you won’t struggle to run or catch up to him. Shigi really isn't scary unless you’re in a small final circle or inside a building with him. Try and avoid those situations and he shouldn't be an issue.
Tomura Shigaraki (Catastrophe) 
Difficulty Score: 🟡Even🟡
Catastrophe is another character utilizing stuns like Compress. While you can reflect both his Alpha and Beta, he can easily get around this by throwing them at the ground instead to damage you. This means you’ll have to be smart using it, as just holding it out will invite unwanted damage while you do nothing back to him. If he's close to you Catastrophe can also go for his Gamma instead, allowing him to start his combos. If you’re ever hit by one of these combos you’ll also be taking a ton of damage which’ll force you to flee. Fortunately he isn’t too good at catching your wake up or stopping your Gamma. The best thing to try and do in this match up is just get the stun on him first if you're close, or stay above him and rain down your Alpha. Fortunately your Gamma is great movement against Catastrophe, so he can’t outrun or chase you well.
All For One (Default) 
Difficulty Score: 🟡Even🟡
When it comes to AFO’s base kit you’ll be having quite a back and forth match up. Like all Alphas if AFO spams it against you it’ll be very easy to reflect it back. You can reflect the charged version too, and thanks to its slow movement speed you can actually walk into its path on missed shots to ensure it's reflected. His Beta will be his counter to you, as it's quite large and can’t be reflected or blocked. Its ability to go through walls also gives AFO an option to stop you from following him in or out of buildings. His Gamma is a very back and forth move here. Dodging this move leaves AFO wide open to a counter attack or it’ll allow you an opportunity to escape him. Its lack of Armor also means you can stun him out of it if you're close enough. Mistiming a dodge however gives AFO a free combo which is almost guaranteed to do huge damage. This move also can’t be dodged while you’re in the air, which is a problem for Compress since he’s in it so often thanks to his Gamma. When approaching AFO or using Gamma in an area you know one is in, try when possible to make sure he’s already used his Gamma so you won’t be caught in it while airborne. His base kit doesn't have any movement. AFO’s stolen quirks will offer an additional challenge to you depending on what he has in the pocket. Any quirks that provide him movement will be what you want to watch for, as a 400HP character with the potential to run or catch up to you can make for a scary fight. His reliance on the stolen quirks levels needing to be high does help you though.
Dabi (Default) 
Difficulty Score: 🟢🟢Very Favorable🟢🟢
Dabi is another character who really just can’t touch Compress outside of close range. Engage Dabi from a mid range or from above and he shouldn’t be an issue. Although his Alpha tracks you, its slow speed makes it very easy to dodge, and even easier to reflect. His Beta only deals damage when you run over it, so watch for where he places it in a fight. Your Alpha is great at setting them off from range, as the large projectile size and shockwave can both set them off. Dabi’s Beta can also eat projectiles to protect himself. Unfortunately for Dabi, this only includes the marble portion of your Alpha since the object persists until it touches the ground. While the object will fly past if he remains inside the trap's radius, if he continues to run he might get hit anyway. If you chase Dabi into a building his traps will be a much bigger problem in the enclosed space. He can also use them to block exits to stop you fleeing. His Gamma is his best tool against Compress thanks to it actually fully blocking your Alpha. If you're outside, simply Gamma over it to rain Alphas from above. If Gamma is unavailable he still can’t do much to you since as long as you're outside the radius, his Alpha is his only option to hit you. Inside buildings his Gamma is much better since you can’t teleport over it, and it can go through walls to hit you on the other side. He doesn’t have movement to run or chase.
Dabi (Crazy Torch) 
Difficulty Score: 🟡Even🟡
Crazy Torch’s simple game plan of run up and Beta you can work both great and poorly against Compress. On one hand he becomes very easy to predict, often running at you in a straight line and inviting you to stun them with Alpha. You can even stun him out of his Beta before he hits you. Getting stunned like this while also draining their own HP if their Gamma is active puts Crazy Torch in a very bad spot. If he can hit you though, Compress can really struggle since the grab knocks you down on hit. Compress hates these wake up catch scenarios, and Crazy Torch is great at them thanks to his Betas tracking. If you try and Gamma he can just Beta you again to either DOWN you or get you very low. It's very important to keep track of how many Beta’s Crazy Torch has (max 2), because if you’re alive after the second one is used you know he can’t catch you anymore and you can Gamma away. His Gamma is another good counter to you though, as the small fire shockwaves it produces will block your Alpha from hitting him, and also all but guarantee you won’t be able to finish a combo on him thanks to it knocking you away if you're going for a melee. His alpha isn't very problematic for you, and his Beta being his movement means his best offense is wasted if he uses it to run.
Himiko Toga (Default) 
Difficulty Score: 🟡Even🟡
Togas Beta will be her best move in this fight. Its quick movement speed and ability to knock you down even through your Gamma’s armor can make it difficult to counter. You can stun her out of this move however, so if you dodge it try and either punish her with Alphas or Gamma to distance yourself. Her Alpha has a shockingly long range for what it is, so you're not safe just because you’re out of her Beta distance. It can also stack damage fast if you aren’t careful, so make sure to reflect it when possible. Toga’s Gamma can be blocked by your Beta, so always try and stop it when it comes out. If you don't, she'll be able to either refresh cancel her abilities similar to Monoma, or can chase or run using your own mobility. If she transforms into you for a mirror match, check the Mr. Compress match up.
Himiko Toga (Sting Dance) 
Difficulty Score: 🔴Unfavorable🔴
Sting Dance is another hard to hit aerial character that Compress struggles with. Thanks to her fantastic air mobility, Sting dance is often darting around above you and not giving many opportunities to counter attack her until she's back on the ground. While her Alpha is reflectable and her Gamma can be blocked, her Beta can bypass it and stun you, allowing for an easy Gamma follow up from her. You especially don’t want Sting Dance to start cooldown refreshing as normally her moves won’t start reloading until she's touched the ground. Giving her the option to reset in the air is not good. While she's in the air it's best to just try and dodge her until she makes a mistake or runs out of moves and is forced to land. If she misses a Gamma for example, she's slow to recover, which gives you the chance to try and stun her. You can also get into the air yourself using Gamma, which will prevent her Beta from hitting you since it only hits below her. If she transforms into you for a mirror match, check the Mr. Compress match up.
Twice 
Difficulty Score: 🟢🟢Very Favorable🟢🟢
The match up against Mr. Compress is not kind to Twice at all. For starters he’s the second of three characters who can have all of their moves stopped by Compress’ Beta. Simply holding out your Beta to Twice almost completely stops him. His only real option is to try and melee you, which isn't a terrible option thanks to the slide making it hit from an unexpected distance. Learn to expect this and dodge it, and Twice is incredibly punishable on a miss. The only other way for him to get around this is to hope a clone of a player he previously downed counters Compress. His alpha is reflectable, his Beta is (somehow) blockable and its low health means its Alpha spam will kill itself. His Gamma is blockable, and is also pretty poor for movement. Just wait for a mistake, and Twice can virtually never win this fight.
Mr. Compress 
Difficulty Score: 🟡Even🟡
Due to the threat of each Compress’ Alpha stun, a lot of this match up can be spent with both parties trying to predict when the other will drop their Beta. In this situation it’s often best to be the aggressor. Close distance on your mirror match but in a diagonal line so you’re harder to hit, and throw some jumps in there as well. If your opponent sees you approaching they’ll likely take down their Beta to try and stop you, so try and predict this with an occasional Alpha. Approaching this way will ensure even reflected Alphas don’t hit you back most of the time. If you predict right you can start your own Alpha combo. Some Compress players are very scared of opposing Alphas, and may not drop their Beta at all. In these situations the occasional Alpha will keep them too scared to lower it, while you close the final distance to start potential melee combos. In an Alpha spam fight, you may be tempted to Gamma into the air and rain them from above. You should always try and be the second Compress to do this though. Assuming your opponent Gammas into the air, Gamma up after them immediately. This prevents them from hitting you while they’re above, and lets you catch up. If they choose to go higher with their second Gamma, go up after them again. This leaves you as the Compress with the high ground as your opponent is stuck falling below you, and they can only try and Beta to save themselves. If you went up first, they could do this to you. Because your movement is the same, the previous idea also applies here. If you're the first to Gamma away, the other Compress can always catch you, so try and force the other to run first. For the most part just always try and use Gamma second.
Overhaul 
Difficulty Score: 🟡Even🟡
Overhaul is another fairly grounded character who can struggle against Compress, but will fare a bit better. Staying on top of high ground or in the air above him will be your best bet, since he is actually quite strong on the ground. His counter to you sitting on high ground will be his Beta, as he can make it hit the edge of the buildings you’ll be looking down from. His Gamma will be his scariest move, as it stops you from using your own Gamma, and can combo into itself or any of his other moves. It's also very good for catching your wake up if he ever knocks you down. His Special Action will prevent you from landing any melee combos on him, and he can also heal up for free using it, essentially giving him 2 health bars for you to take down. While Overhaul isn’t very scary early on, in small finals circles or inside tight buildings, he poses a very big threat if you can’t stay above him consistently.
Kurogiri 
Difficulty Score: 🟢Favorable🟢
Kurogiri is the final character who is completely stopped by your Beta. Against your Beta his Alpha will be reflected, and his Beta will be blocked. This means just like Twice you can more or less just wait for him to make a mistake to punish him. Kurogiri is another one of the characters who can just outrun Compress if he’s put on the back foot however, as his portals go crazy distances you just can’t keep up with. Additionally, if a Kurogiri is able to hit you with his Beta, locking you into something like his quad Beta combo does absolutely ridiculous damage and will immediately put you at a major disadvantage. Even some of his other combos can be quite threatening. If he ever sends his Gamma ball after you keep in mind his Alphas will be blocked rather than reflected. This means you will have to shoot it down, which fortunately isn't too hard with your Alphas massive size. If Kurogiri is trying to air stall in his Gamma, Gamma up after him and hit him while he's stuck up there to try and force him down.