PLAYER EVOLUTION: Terminology, Mechanics and Course of Action
In this sub-guide you'll learn to evolve from New Player to General Player to Advanced Player! And we will look at why some people might appear to be so unbeatable and strong and why you might not be like them yet!
Introduction and Warning
This guide might require more concentration and brainpower to digest, especially if you're not familiar with some of these concepts, as explaining them with words can be tricky. If you have any doubts don't hesitate to join the Ultimate Player Guide's Discord Server. Furthermore, this guide (like all the others) will perfect itself as time goes. If you're an experienced player and want to contribute, feel free to join the discord!
Terminology
Here you will learn terminology often used by players ranging from basic to more advanced. Ordered in alphabetical order (for the first term of a pair).
- 3rd Party: Attack an enemy that is already fighting somebody else, often as a mere happenstance or to take advantage of a vulnerable enemy.
- Aggro: To aggro is to focus a target, and to take the aggro means to take the enemy's focus.
- Air Stalling: Purposefuly trying to remain in the air as long as possible, often really far above from the ground, in order to avoid being attacked or making some players lose interest in you.
- AoE: Area of Effect, the area of an attack.
- Beamers & Knockdown Beamers: Characters who rely primarily on projectiles, such as both Bakugos. Knockdown beamers are those who can trigger knockdown in 3 shots or less, which unlike normal beamers interrupt your escape.
- Blues: GP Drinks
- DoT: Damage Over Time, for example, the Burn and Decay statuses are DoTs.
- Downpower/KV: The knockdown units an attack applies. If a character receivers 500 of these in a short enough window of time, they will be forcefully be knocked down, giving you invincibility for 1~ second or until you use an ability or melee attack.
- Flesh: When an enemy has no GP. You’ll probably hear this as “This person is flesh!”
- Flinch: This is a term for when your actions are restricted by being hit with a attack with no knockback or stun. All it does is basically stop your sprint when hit.
- Greens: HP Drinks
- Hitstun: The period of time after being attacked where the player who got hit cannot do anything. The time varies depending on the move the player gets hit by.
- I-Frame: Invincibility/Invulnerability Frame, it refers to the seconds of invincibility you receive from actions such as being revived or recovering after being hit with max knockdown skills. I-frames make your character glow white.
- Kiting: Run away from an opponent while attacking to discourage chasing.
- Pinks: Full Revive Cards.
- Pity: A mechanic used in gacha games so players are guaranteed to get what they want after a certain amount of rolls has been done. In this game’s case that would be the “Exchange” system on banners.
- Punish: Let or force someone to make a mistake such as being in a bad position, using and/or missing an attack or action that leaves them open for a good amount of time, falling prey to a stun etc. for you to follow up, capitalise and attack them once they are vulnerable.
- Rainbows: Level-Up Cards (not ability cards).
- Rat/Ratting: A tactic where you purposefully hide for a large portion of the match.
- Res/Rez: Resurrection.
- Shields: Sometimes used as an alternative name for GP.
- Storm/Circle: The Poison Mist.
- Storm Camping: A tactic where you remain inside the Poison Mist for a long amount of time with the goal of staying there as long as your HP healing items supply makes it possible.
- Stun: Can be used to refer to hitstun, or to refer to other types of stun such as Denki Kaminari's shock paralysis or Hitoshi Shinso's Special Action.
- Superarmor/Hyperarmor/Armor/Armored: Some skills give a character "superarmor", which makes it hard for their attack to be interrupted. Hyperarmor is just another term for it.
- Thirst/Thirsting: When a player is adamant about finishing off a DOWNnd player and ignores other enemies to achieve this.
- ToD: Touch of Death, combos that can kill you even at full HP and GP.
- Teamheals: Team Recovery Items.
- Wake-Up: The action of recovering from the strong impact of an attack. More on this later.
Mechanics: I-Frames, Downpower, Knockdown, Knockback and Hitstun
If you've been playing the game you might have noticed that receiving some attacks slow you down slightly, while some others actually keep you in place while receiving them, the latter are Hitstun attacks. A good example would be Mr. Compress' alpha skill (the marbles he throws) and Momo Yaoyorozu's alpha skill. Hitstuns are essential for combos, as they keep the player locked in place so that they can keep receiving attacks without being able to fight back.
Some skills might be powerful enough to blow you away, however, there are two types of "blown away": Knockback and Knockdown. Knockback is when the attack simply blows you away but you can still take damage while you're falling. This happens with Assault All Might's beta skill and Assault Ochaco Uraraka's alpha skill (the projectile).
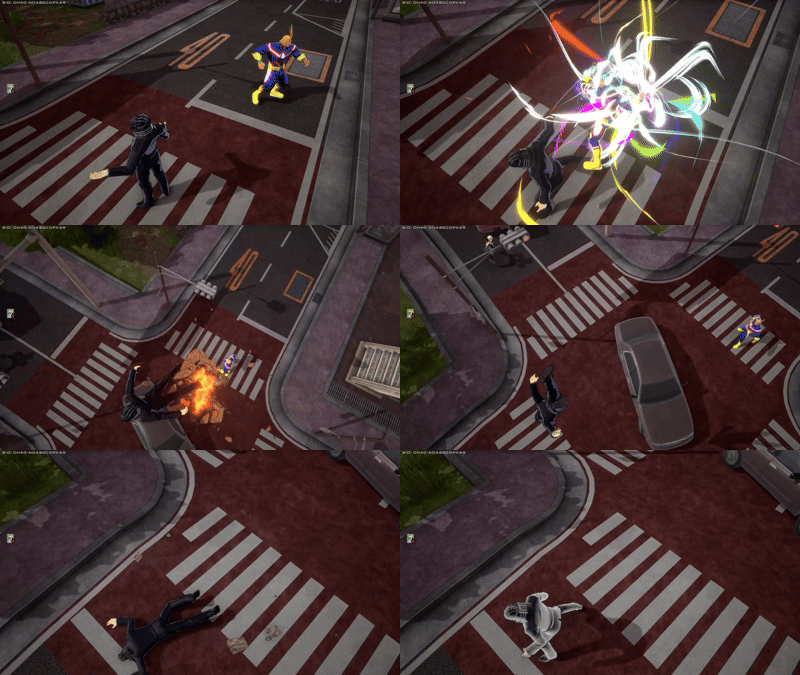
On the other hand, a knockdown is almost the same thing, except that you also gain i-frames (invincibility frames) in the process if you just keep falling. To difference both, just look at your character. If he's glowing white while it's falling, then it's a knockdown, otherwise it's just knockback.
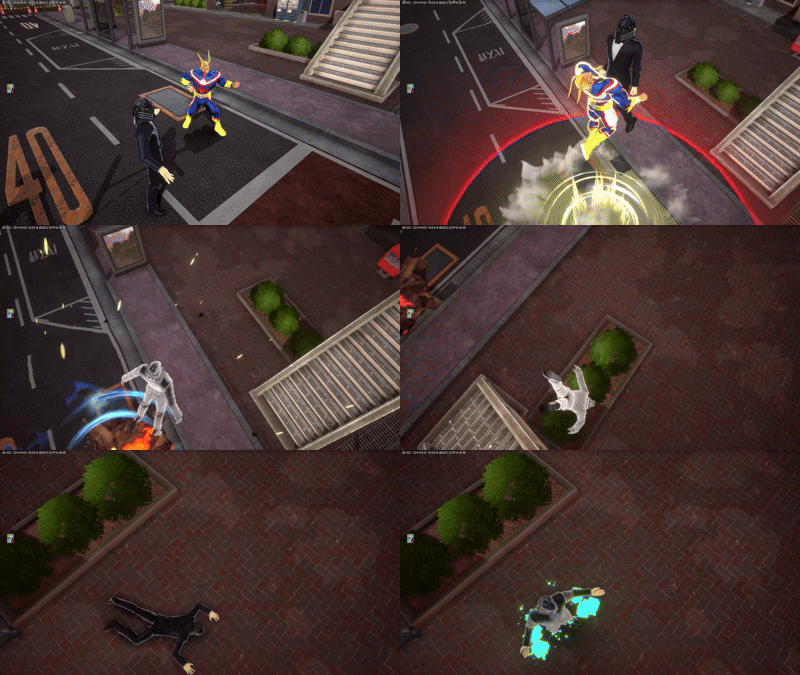
In this game, every skill inflicts an amount of "Downpower" (DP). When a character receives 500 DP in a short amount of time they receive a knockdown, gaining invincibility frames they can use to quickly reposition or think. Without this system, you would have to react immediately to every strong attack, making surprise attacks way too effective, but thanks to downpower you can get a break. Combos attempt to exploit the low DP of some skills to deal the biggest amount of damage before you receive knockdown. Below you have examples of being hit with low DP skills and being hit with high DP skills.
Mechanics: Wake-Ups
A wake-up or recovery is the action of recovering from falling or hitting the ground, which gives you i-frames for slightly longer than a second. There are 3 types of Wake-Up:
- Air Wake-Up: When an attack blows you away but you cancel the fall so you don't hit the ground, that's an Air Wake-Up. It's the fastest type of wake-up, but it's a terrible choice against some characters or abilities, since you're i-frames will expire while you're in the air, a position from which you have limited options.
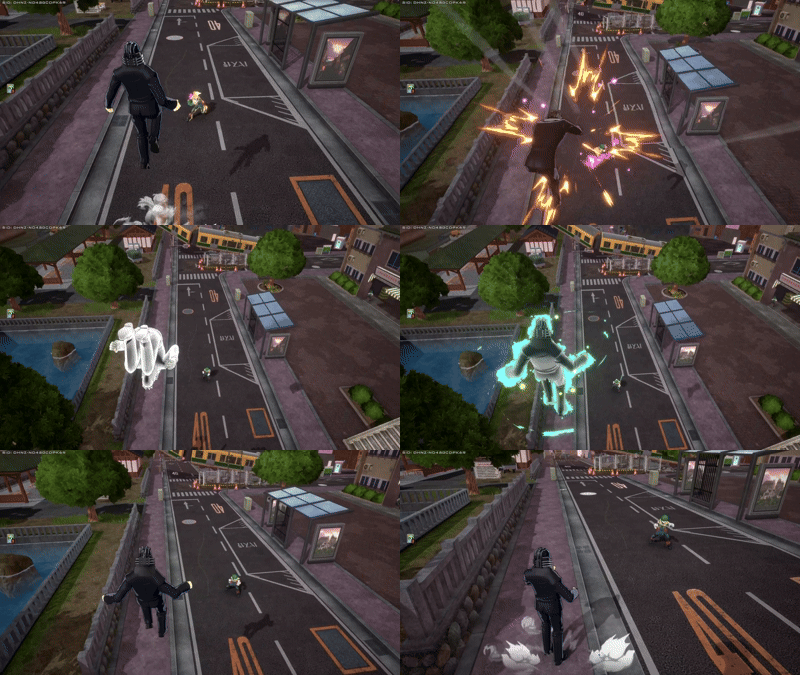
- Hop Wake-Up: If you let your character fall and hit the ground, but then do a little hop to recover yourself from that state, then that's a Hop/Jump Wake-Up. It's a good option if you want to gain some time but still be fast. If an Air Wake-Up would be a bad play in your situation, you can use this instead.
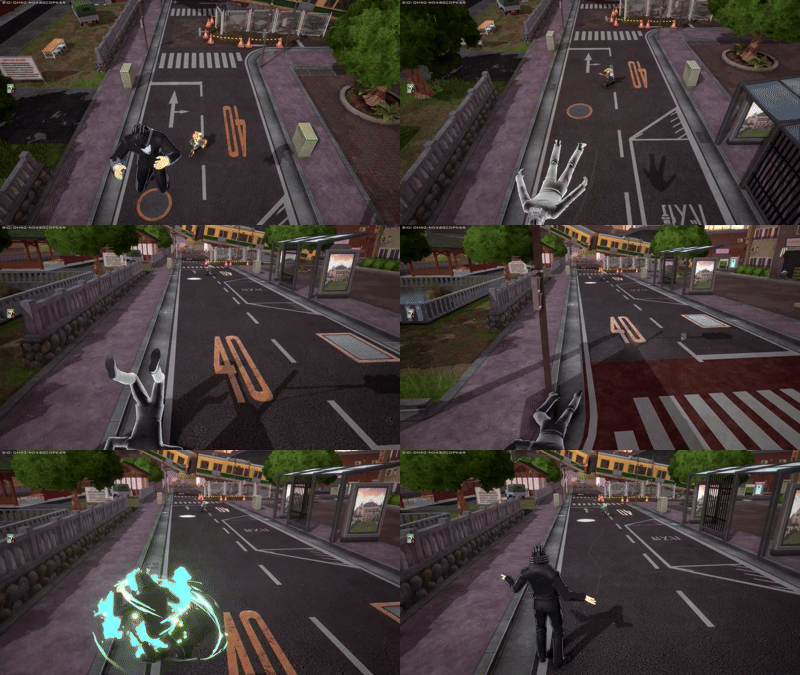
- Ground Wake-Up: The slowest type of wake-up, but a very useful one. This type of wake-up can let the enemy react better to your actions, which is problematic, but you also get to stall and gain some time for your skill or special action cooldown to come back, or for an ally teamheal to arrive and heal you
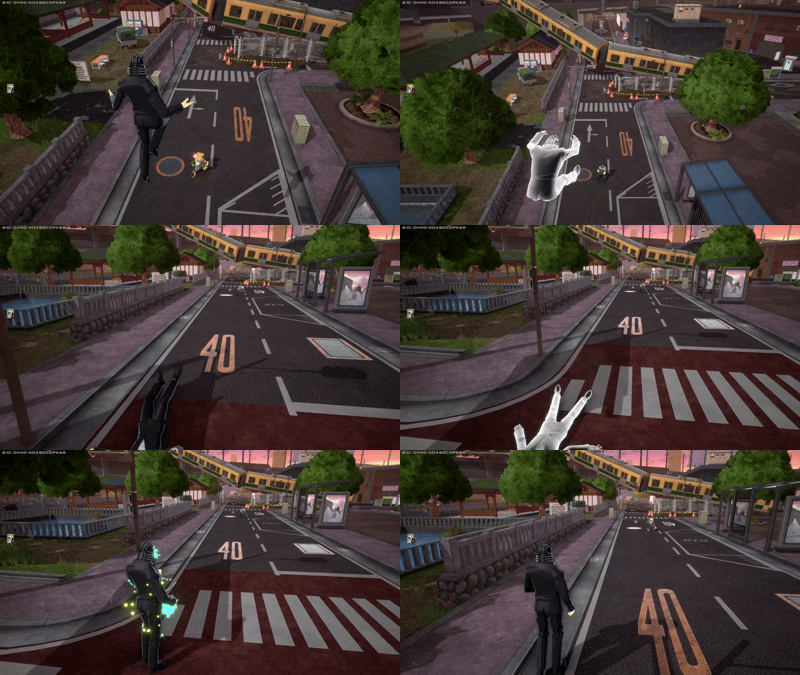
We could further split these wake-ups into full or short wake-ups. If you use an alpha, beta or gamma skill, a melee attack, or the special action button (but not passive special actions like Endeavor's flight), you will cancel immediately the i-frames given to you by the wake-up. Cancelling these i-frames early allows you to act faster but also means you surrender your "protection" sooner. However, if you don't use any of these skills and simply press the movement keys, jump, or dash, then you will be able to retain the full duration of your i-frames to survive slightly longer. The difference matters a lot in higher level of play, where some people expect you to "waste" your i-frames by using a skill early, so they attack you slightly before so that when the enemy attack reaches you, you have cancelled your i-frames, taking the attack and losing more health. However, if you keep your i-frames, then the enemy might attack you with a skill while you're invincible, dealing no damage to you but leaving them in a vulnerable position that you can take advantage of to fight back.
Knowing which option to use is key, and your needs change based on your enemy and the character you're playing, as well as whether some of your skills or enemy skills are available or still in cooldown. Experience will tell you when to wake-up and when to not, but overall, characters with low or no mobility, and with slow animations prefer to delay their wake-up as much as possible, since if you have slow attacks you can be attacked while they're activating.
Mechanics: Superarmor/Hyperarmor
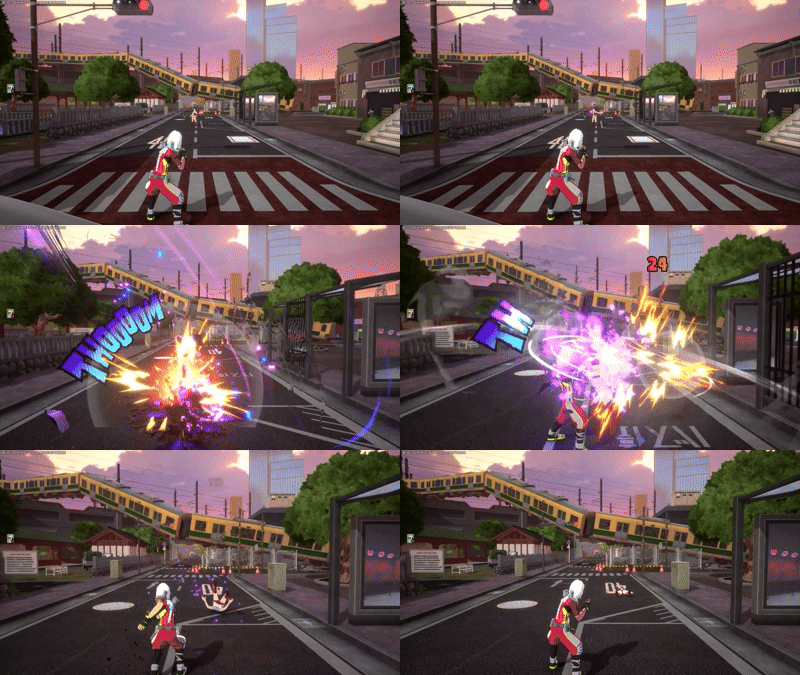
If you attack an enemy but receive an attack back, chances are you will be blown away. However, some skills allow the character to resist this, being able to keep attacking without being pushed away or hitstun'd. The abilities with this property make the character glow yellow. Skills that grab characters ignore the armored property. Kirishima's Special Action is a good example of this, as while he has it active, he's very hard to blow away or interrupt.
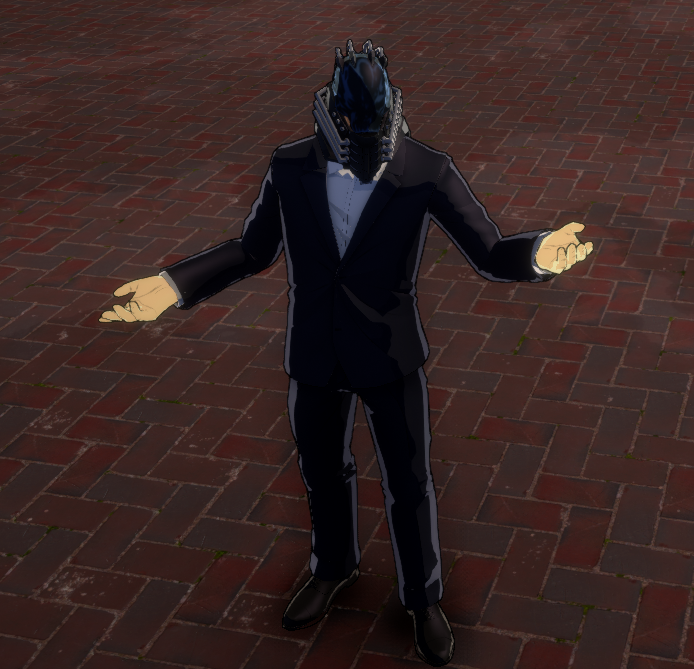
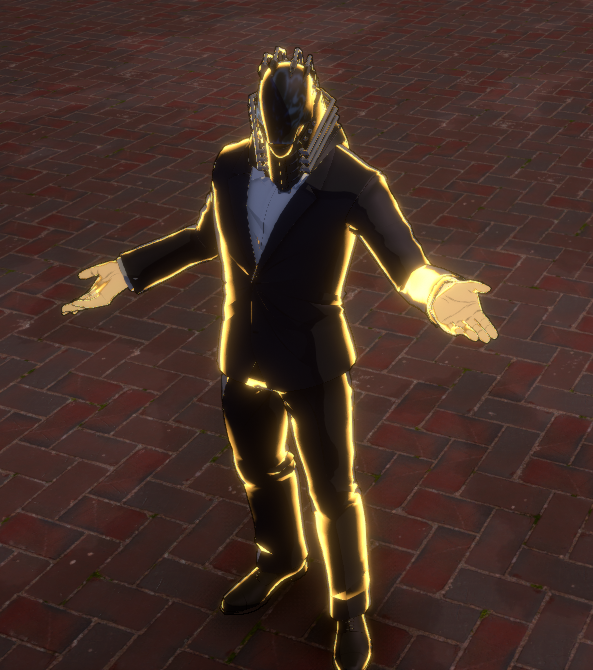
You can make use of superarmor to attack the enemy while bypassing their troublesome stun abilities, you will take some damage, but you will also catch them.
Mechanics: Dodging/Rolling to Avoid Damage
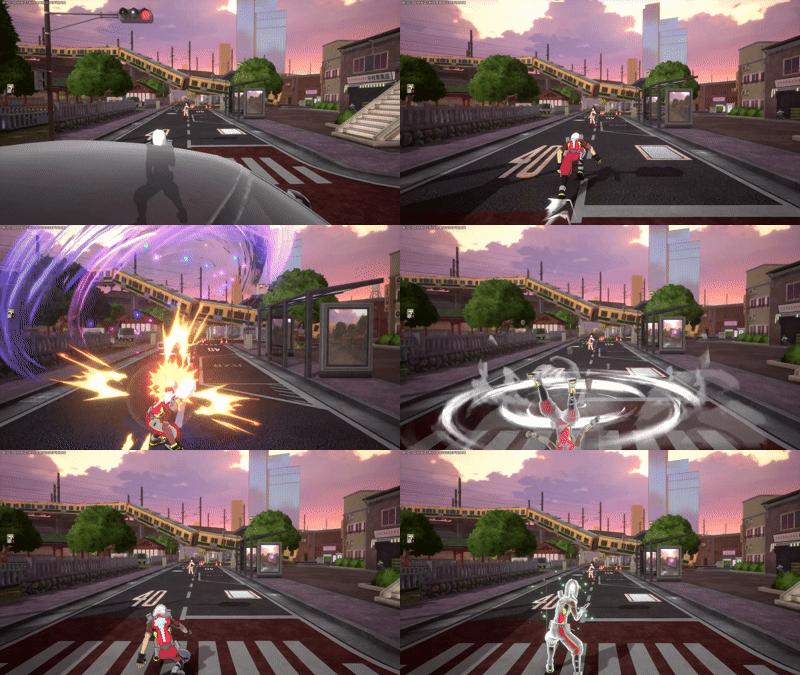
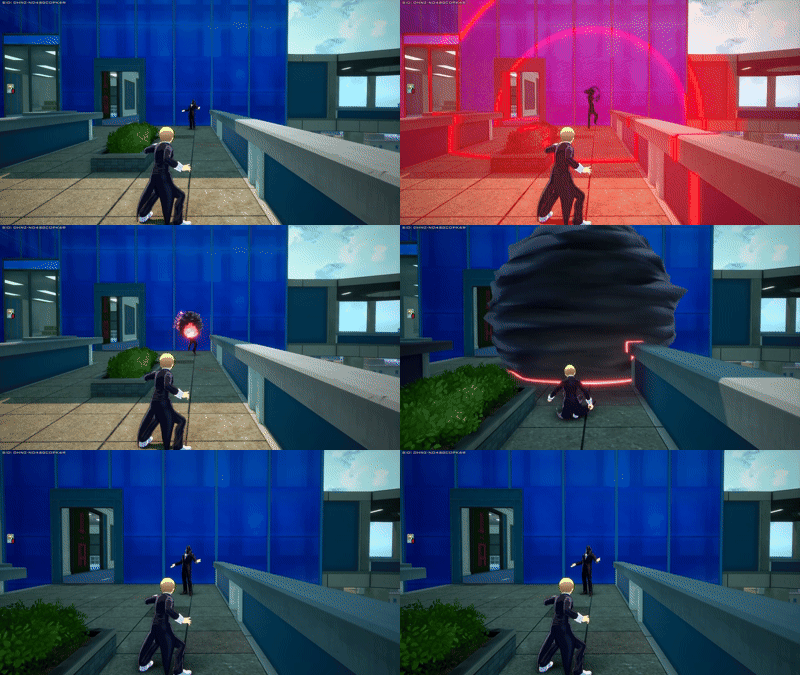
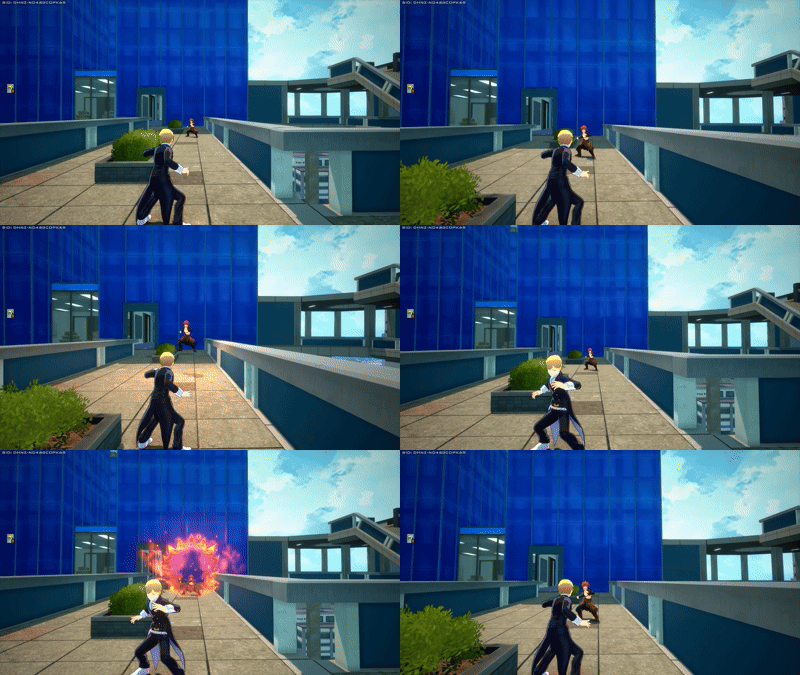
The dodge/roll movement type is not purely aesthetic. While you're rolling, you receive brief i-frames that last for less than a second. These i-frames aren't visual, so you won't see your character glowing white, but you still have them, and you can use them to avoid the damage or effect of skills, which is why sometimes even though an attack landed on the enemy they received no damage. Every skill is technically dodgeable, in the sense that no skill is able to cancel i-frames, however, the damage area of some skills linger for longer than usual, so if the lingering time is higher than the duration of your i-frames, you won't be able to dodge it. The duration of the lingering can make a skill easy to dodge, hard to dodge, or impossible to dodge fully.
Strategy: Cooldown Management
This game has two types of cooldowns: Normal Reload and Penalty Reload. When a skill has more than 1 ammo/charge (let's say 5) and you use one, then that skill will start reloading at a rate marked by the Normal Reload. However, using every charge before they can fully reload will trigger Penalty Reload instead. In many characters this difference isn't all that important, as both can roughly have the same duration, or perhaps the character has the means to defend itself even without that skill. However, some characters or skills have more demanding cooldowns, so you want to not overuse them and instead spread your skill usage between your 3 skills + Special Action instead of spamming one specific skill. An example of this is Rapid Hawks, who even though can easily run away from battle, if he has his Special Action and beta skill in cooldown (his main forms of mobility), then he will have a hard time escaping from that situation, potentially getting him killed.
Another two important attributes are Reload Start Span and CanReloadInAir. The first is the time it takes for the skill to begin reloading at all, which you can appreciate noticeably in Technical Tomura Shigaraki's alpha and Rapid Hawks's Special Action. The second is the property that defines whether the skill can reload without the need to touch the ground (or stick to a wall) for it to begin reloading, which is the case for many skills that enable air mobility, like all of Strike Hawks's kit.
If your character is cooldown-demanding you will quickly feel it, in which case you will have to learn to better spread your skill usage so that you don't run out of valuable skills.
Strategy: Direction Bait and Predictions
Previously we've talked about Wake-Ups, but now let's talk about catching wake-ups and preventing enemy escape to secure a kill.
When dealing with an enemy, try to learn about their behavior. Some people wake-up and cancel their i-frames by attacking all the time, while others do use their i-frames wisely. This difference is key, since there are skills that aren't "instantaneous" and instead either linger for a while or leave you in an advantageous position. If you use them early on an enemy that tends to waste their i-frames then you will successfully ruin them, but if the enemy is more patient and doesn't waste them, then there's a chance you've put yourself in a bad spot, since the enemy can attack you while you're ending your attack animation. Timing these skills correctly is crucial so that you hit the enemy right when their i-frames run out or when they cancel them.
Skills like Shoto Todoroki's gamma creates a frozen path that immediately freezes opponents who touch it, so if they cancel their i-frames or they run out while touching the ice, they will get frozen, allowing you to ruin them in place.
Some skills have a more limited hitbox in terms of height or width/area, so for these it's crucial to know where your enemy will move, especially if they use their i-frames wisely or semi-wisely. If I send Todoroki's ice to the left but my enemy goes to the right, I won't be able to freeze him. But how do we know which direction will the enemy take? Normally, the enemy will choose the direction that in theory works best for them. If to the left they are close to a wall, then they'll likely go to the right where they might have more space to escape. By changing your positioning after knocking down an opponent you can manipulate them into choosing a specific path (if there are two doors but we are blocking one, chances are they will choose the unblocked door), this certainty allows you to secure a hit. Failing to secure this hit could potentially end in the enemy escaping, wasting time in vain.
Some characters might have the tools to not choose a specific direction and just block your attack or fight back, in which case this doesn't apply that much.
Strategy: Level Management
Leveling your skills is an important part of the gameplay, as such, you want to make sure you aren't wasting them. A skill can be level up through Level Up Cards, Ability Cards and Team Enhancement Kits, however, it could happen that you just got Level 9 Alpha with a Level Up Card and 2 seconds later you see an Alpha Ability Card matching your class, but since you're already Alpha Level 9, it's "useless". If you truly want to be optimal, then keep your skills at Level 8 and level your other skills in the meantime while keeping always 1 level up card in your inventory, and only use it in your level 8 skill if you're going to fight. By doing this, you will likely have an extra level than if you didn't do this.
Strategy: Escaping - Escape Styles, Aggro and Wall Run
Escaping isn't just about running in a straight line, so if you want to learn about different ways of escaping or making enemies leave you alone, check the Escapism sub-guide to learn about the valuable skill of knowing how to successfully escape.
Strategy: Using the Poison Mist in your favor
Strategies surrounding the Poison Mist would make this bit too long, which is why you should check out the Poison Mist sub-guide to learn about this valuable skill.
Teamwork
Mastering Teamwork is crucial to reach performance pinnacle, a really strong solo player can eliminate many players and sometimes even win by themselves (mostly in lower ranks), however, they can still get overwhelmed if the team is competent enough (match-ups and character strength difference, as well as the approach all influence this though), even if each individual player is much weaker than their solo enemy. However, when all three players in the enemy team are powerful and they act as a proper coordinated them, there's basically no way to deal with them, in some cases you might struggle to kill an easy target because of their team instantly showing up to defend them.
When it comes to teamwork, you have limited (but there still are) options when playing with random teammates and without Voice Chat, but a team that is made up of specific people that coordinate themselves with Voice Chat there are lots of things you can do to dramatically increase victory odds. To learn more about both basic and advanced teamwork, check the following guide
Strategy: Leading Shots
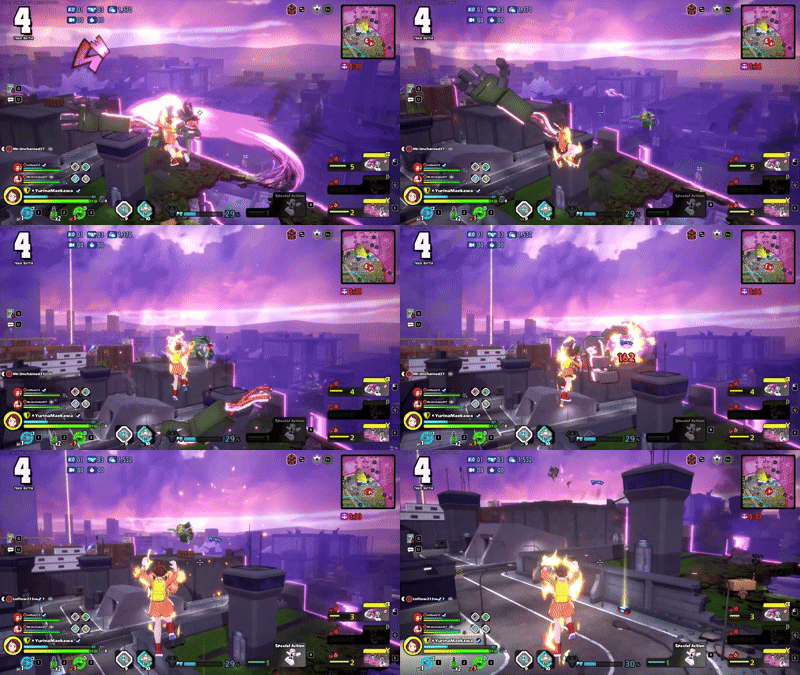
Many characters rely on projectiles to deal great damage to the enemy, however, different projectiles have different travel speed and range, and just like how you gotta learn how far your projectile actually goes, you also gotta learn its speed, otherwise even if you're aiming right where the enemy is, you might not hit them, as they're no longer in that position. The slower your character's projectiles are, the more you have to aim at where the enemy will be rather than where they are right now. Characters like Strike Bakugo can pretty much just shoot the enemy directly with their main projectile, while others like Assault Ochaco need to heavily predict enemy's position. Keep in mind that even if your character's projectile looks very fast, it might still need some leading, but that also depends on how the enemy moves.
Other projectiles might have splash damage or deal increased damage if you hit at their feet (because of the projectile leaving an AoE at the projectile's impact location. When a projectile has such a big area it's easy for one to neglect their aim and just try to land the splash/shockwave of the projectile, but even with these you gotta try to be precise.
Mechanics: Walk Canceling
By using a directional input after a skill that locks you in place, you can "free" yourself faster from this locked state, allowing you to use another one faster than usual, which can be crucial for some characters' combos or simply to be faster in battle.

Strategy: Positioning and Decisionmaking
You are not the main character.
You gotta learn when to engage, when to not, where to be, and when to surrender an encounter and let it be. So many people either don't know when to drop a fight or start useless fights that only lead to terrible outcomes. So here's a few points.
- If you have a full revive card and all of your KOd teammates' badges, don't pick a fight unless there's a reason to (to protect yourself). A frequent mistake some people make is attacking an enemy that appears vulnerable (or sometimes attacking just any enemy) to get some extra damage or an extra KO, but this can often backfire, as you might draw the attention of a difficult opponent or waste a good opportunity to resurrect your team without being interrupted. If you have everything you need to resurrect your team, do it.
- If you're healing (hidden in a bush or behind a corner), don't randomly attack anybody that happens to come nearby if they aren't aware of your presence. Many players want to sneak some extra damage or potentially get a kill, only for them to quickly die after. In some cases you might be able to go for this if you have good options to survive even at low health or your team's got your back, but doing this in the endgame can be a suicide, as you have little chances and spots to heal undisturbed, if you waste them, you're done for.
- If a teammate is healing, try to not drag an enemy towards their position, if you bring danger to them while they are vulnerable, you might get both of you killed.
- Don't pick fights indoors against strong indoors characters if you yourself don't have good options to counter them, because chances are you will get killed. Sometimes this might work, especially if it's your whole team versus one individual, but even then overconfidence has allowed one person to kill a whole team by themselves. Don't be careless.
- Be very careful if you plan to chase an enemy inside the Poison Mist, as you will be taking damage every second. If an enemy shows up at the edge and doesn't let you leave the Poison Mist, or if the enemy you followed destroyed your health, you might not make it back.
- Large Item Boxes and Kota aren't worth risking the whole team's life, if the conflict gets tricky, feel free to retreat.
- Not all characters want to be in the enemy's face, some want some distance or attack from behind their teammates. Taking the wrong approach can get you killed.


