

BATTLE ROYALE MODE AND GENERAL GAMEPLAY
In this sub-guide you'll learn about My Hero Ultra Rumble's main gamemode: The Battle Royale, along with the gameplay it entails!
Pre-Lobby: Character Selection
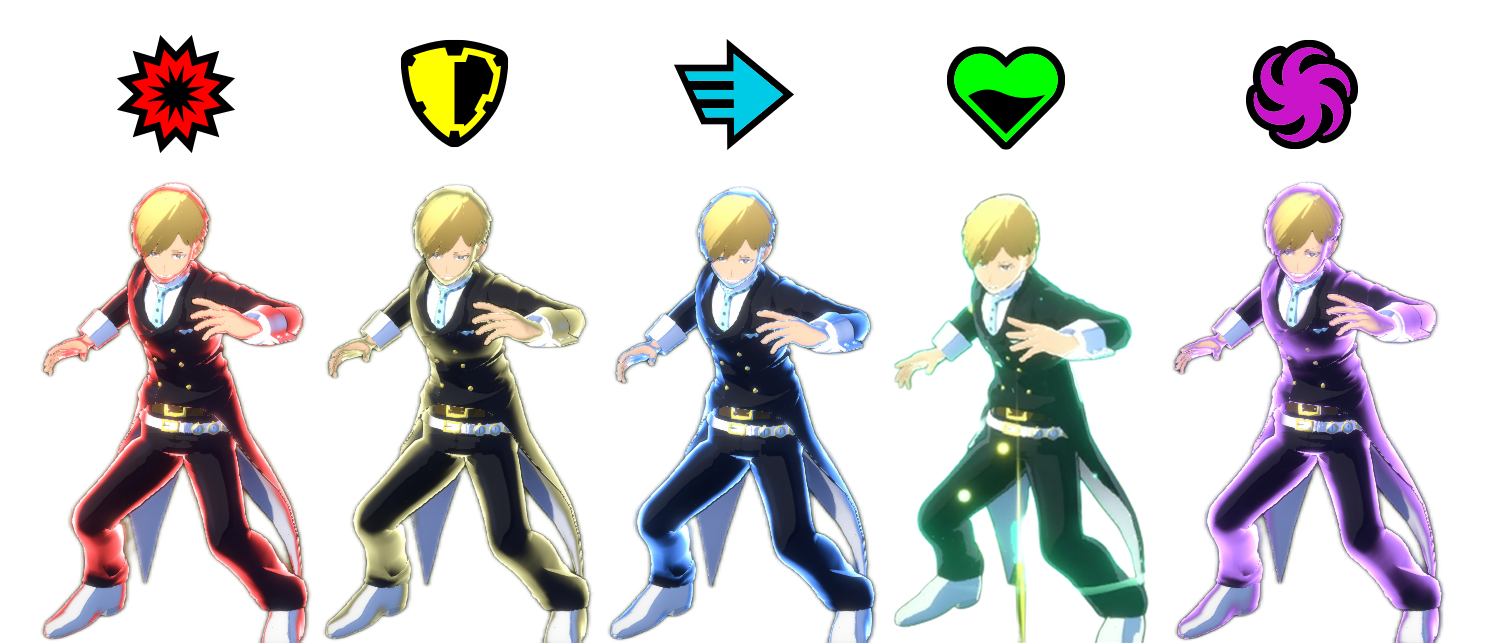
Before going into a match, you might want to know stuff about unlocking characters and how to play characters you don't own for free, as well as why each character has a different background color. To learn about all this you can check these two Character Sub-Guides:
Little tip: You can play as characters you don't own in actual matches by using Rental Tickets, which are used by just playing the character you want to play. This only works on Original Battle Styles though, so if you see the same character appearing twice or thrice, you will only be able to play as the first one.
Pre-Lobby: Matchmaking and Readying Up
After selecting the desired Battle Royale sub-gamemode (Unranked, Ranked, Solos, CPU Match...) and clicking "Battle!", your game will enter matchmaking, searching for allies to match you with. These teammates will always be real people, and if you've picked Ranked, then the game will try to pair you with people close in rank due to the Skill-Based Matchmaking System, though this isn't guaranteed. In Solos and Unranked this system does not exist, so you can get paired with anyone both on the ally and the enemy side.
Once some time has passed, you'll get matched with two teammates (with Crossplay OFF it might take longer, especially on Steam). Make sure to not choose the same character as them (different color variations still count as the same character, with the only exceptions being Izuku Midoriya OFA, All For One Youth Age and Armored All Might). If a character is repeated and the countdown reaches zero before anyone switched to another character, then the one who will get to keep it is decided in this order: Member 1 (Highest Priority) > Member 2 > Member 3 (Lowest Priority). If you right-click a character you can set them as Favorites 1, 2 and 3, which determine which character you will switch to automatically if the countdown reaches zero and both players picked the same character. If you've already switched characters, just press Ready!
After readying up, all you have to do is wait for the game to find a lobby.
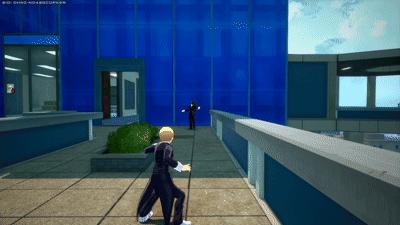
The Lobby
Here is where you wait for all players to join and prepare for the match. The lobby's aesthetics change every season, and sometimes it has objects you can play around with. You can attack players or spy their stats by pressing the Interaction Button while upclose. The lobby is where you can socialize and emote with people, having some fun until the match starts. If too much time has passed since the lobby's creation, bots will start to appear, filling the remaining player slots. These bots always wear default costumes and don't have a profile you can check. Bots are most commonly found in Solos, Unranked, and lobbies where Crossplay is turned OFF, and also if you have been shadowbanned.

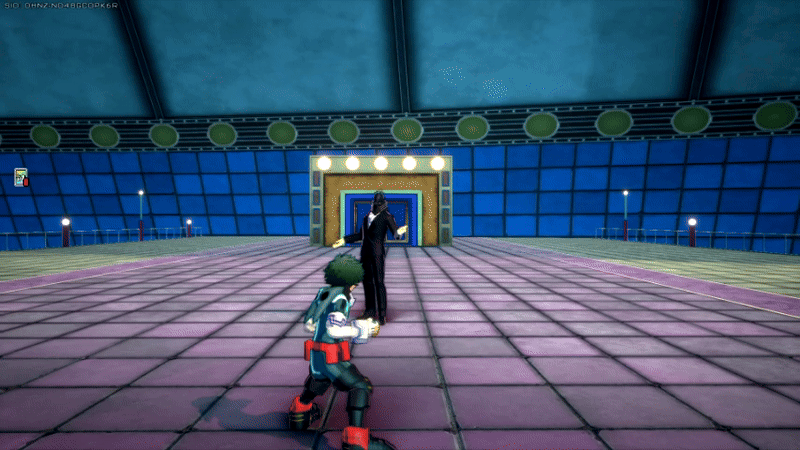
Sally and Match Start
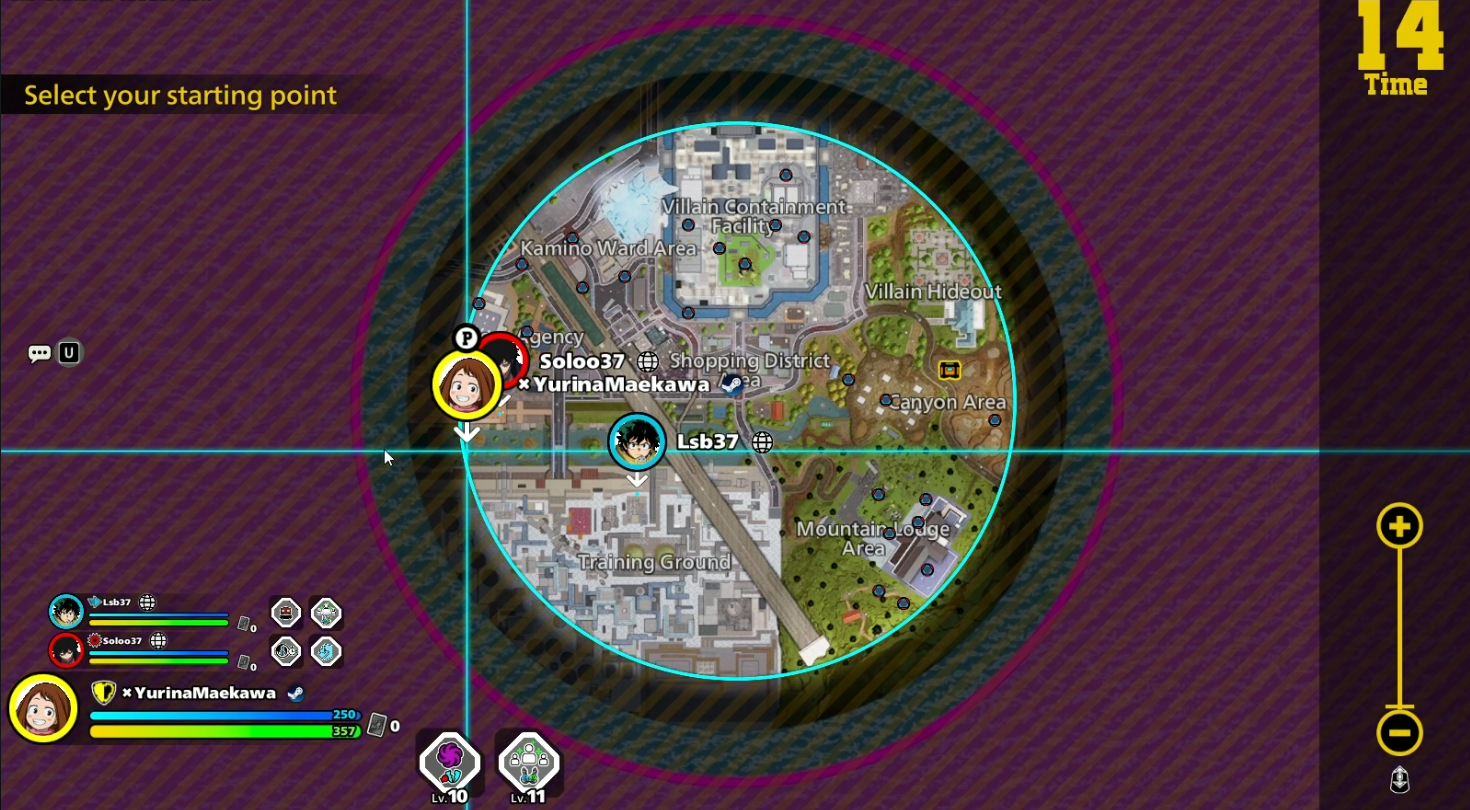
Before starting the match, all players have 15 seconds to choose a landing spot, this screen is referred to as the Sally. Normally, people land in the areas they like more or the ones that have more loot or have it more accessible, though those are also often more populated, so it's best if you play a few matches and figure out what landing spots you like the most.
On the map, you will also see a little box icon, which changes locations every match. This icon indicates the presence of a Large Item Box, from which you can loot valuable items, however keep in mind that usually the box's surroundings are very populated, as everyone else wants this loot too, so it's often recommended to at least not spawn directly at the box, but somewhere nearby, since sometimes all players decide to not risk it, which results in nobody being near the box. It's also strongly recommended to land with your team, as 3 people are stronger than 1, and surely you don't want to be ambushed by a team of 3.
Once the landing spot countdown gets to zero, you will see where every enemy has landed, so you can either plan an escape or an attack. After the sally, you have a 3 seconds countdown to reposition if there are too many enemies nearby.
Gameplay: Health Points, Guard Points and DOWNd State
Before jumping onto the general gameplay of the Battle Royale mode let's talk about you and the stuff you first see on-screen, as well as a bit of trivia an extra info about them.
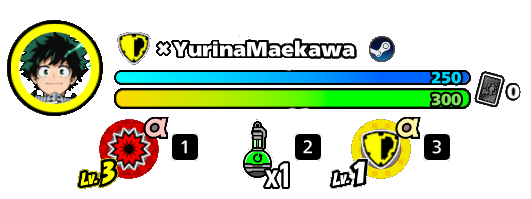
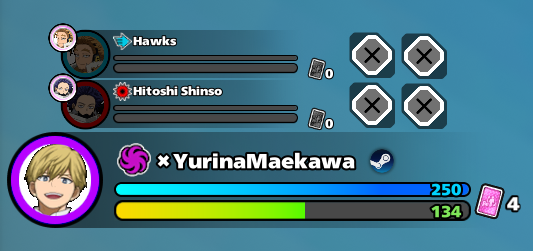
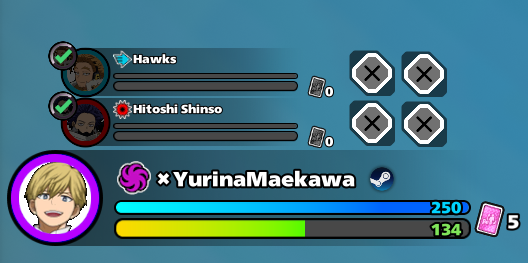
First, you will notice your Player Status interface, with a picture of your character, your role, your username, your platform and two more things: Your Health Bar, and your Quick Item Bar. Your health is split in two types: Health Points (HP), which is the green bar; and Guard Points (GP), which is the blue bar. Every character has 250 Maximum GP by default, while their HP can range from 225 to 400 depending on the character you've picked. When receiving an attack, you will first take GP damage, and once they take all of your GP, a "Guardbreak" is produced. GP does not give you a defense boost, it simply takes damage in place of HP, however, some skills deal True DMG, which means they can damage HP directly, ignoring GP.
There are a few differences between taking a hit on GP and on HP in terms of how your character is knocked away, which is important when it comes to combos, but that's for later.
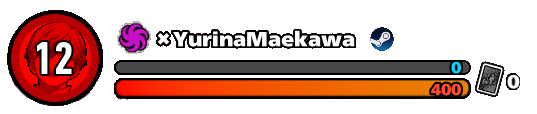
When your HP hits zero, you will become DOWNd. In this state, you have 400 Down HP regardless of what character you've picked, and are unable to use abilities (unless you're Dabi, as one of his abilities can only be used while DOWNd), you will also crawl very slowly and will be unable to use any items or be healed. In this state, you're nearly eliminated, but there's still hope, as if you manage to survive for 20 seconds in this state uninterrupted (most attacks stop the countdown), you will get up with some HP. Your teammates can also skip this countdown by Helping you or using Revive abilities.
If you lose all of your Down HP, you will be KOd, which means you're dead and will go into Spectator Mode. However, this doesn't mean your role in the match is over, as you can still be resurrected from a KO, but more on that later.
Gameplay: Character Abilities
To your right you have your abilities: three aligned in a column plus an extra to the left. The ones in the column are called, from top to bottom, alpha, beta and gamma, while the one more on the left is your Special Action. Remember these terms because you will hear them a lot.
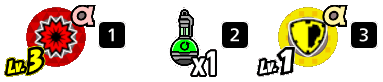
- Alpha is the ability at the top, represented with an α letter. In many characters (but not all of them) it's your primary weapon and the one you often can use the most.
- Beta is the ability in the middle of the column, represented by the letter β.
- Gamma is the ability at the bottom of the column, represented by the letter γ.
- The Special Action is a bit different from your other 3 skills. They usually have longer cooldowns and in many cases do pretty unique stuff. Remember how you can have different variations of characters such as Yellow Deku and Red Deku? Well, different variations have different alpha, beta and gamma skills, but the special action is the same across all variations (Again, Deku OFA and Young All For One are an exception because they're considered different characters).
These abilities have charges or ammo, representing how many you can use. However, there are three types of ways of expressing "ammo": Some abilities just tell you how many uses of an ability you have, so if you have 5, you can use it 5 times, however some have percentages instead, this usually happens in skills you can hold for a period of time, so you can choose to spend the whole ability or just a small percentage of it. Other skills like some Shield abilities have huge numbers above 100, representing the shield's health.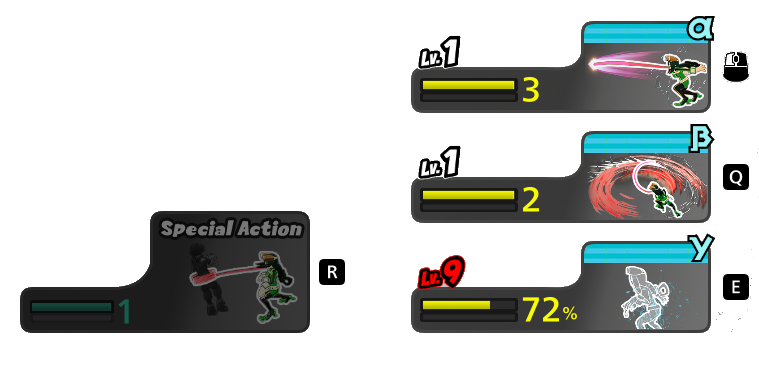
Alpha, beta and gamma (although not your special action) can be leveled from Level 1 to Level 9 through the use of Level-Up items which we will see in the next section. Leveling up a skill can increase its damage, reduce its cooldown, increase its size or range, the amount of ammo, its duration, durability if it's a shield, and more. Specifically, there's the concept of "Key Levels". Usually, when you level up a skill, you often only get a damage increase, however, there are special levels where you also get an extra upgrade like more range or a bigger size/area, these are generally Level 4 and Level 9 (and sometimes Level 7), as Levels 2, 3, 5, 6 and 8 rarely give any special benefits, which is why sometimes people might level a Lvl 3 skill to Lvl 4 instead of one from Lvl 4 to lvl 5.
Additionally, all characters have basic ground melee attacks and an air melee attack, which can be used at any time if your opponent is close enough.
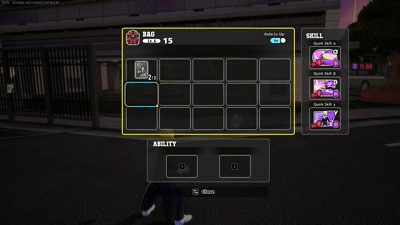
Gameplay: Inventory and Quick Item Bar
By pressing the "Item Bag" button (TAB on keyboard), you will open your inventory. Initially, you will have 9 standard slots and 2 ability slots. However you can find Medium and Large item bags around the map or have them dropped by item boxes. Medium bags have 12 standard slots, while Large ones have 15. All items you pick will go to these slots, except for Ability Cards, which by default occupy the two ability slots. If these are occupied, then they will go to your standard slots.
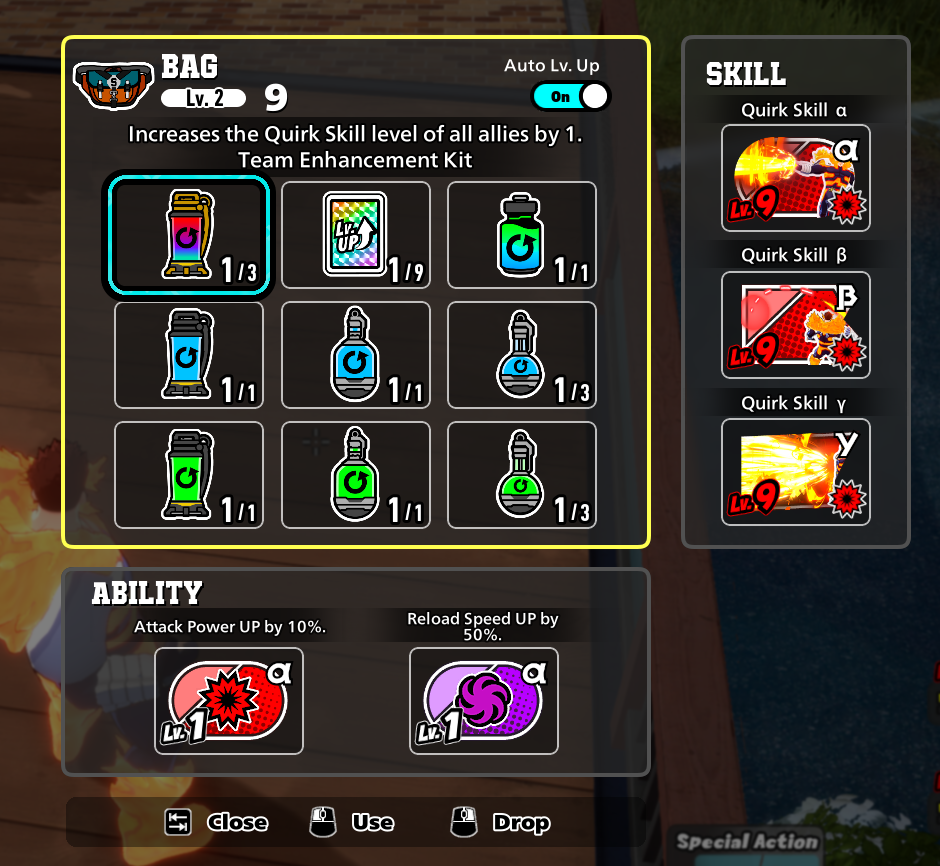
Notice how below your health bar, you have three Quick Item slots, the first and the last being used to activate the Ability Cards in your ability slots, while the one in the middle is used to drink recovery items, use level-up items, or use other items.
Gameplay: Items, Cards and Boxes
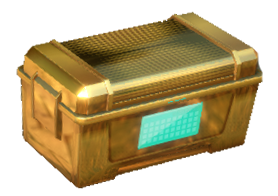
Around the map you will see Item Boxes, which open instantly when interacted with and usually drop healing items, ability cards and level-up cards. In rare occasions they can drop Revive Cards. There's also another type of box known as Gold Boxes, which are rarer and take a few seconds to open, but give better items than normal Item Boxes, such as bigger Item Bags, Full Support Drinks, and both Level-Up and Revive Cards with higher chance.
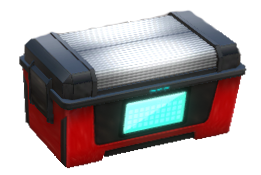
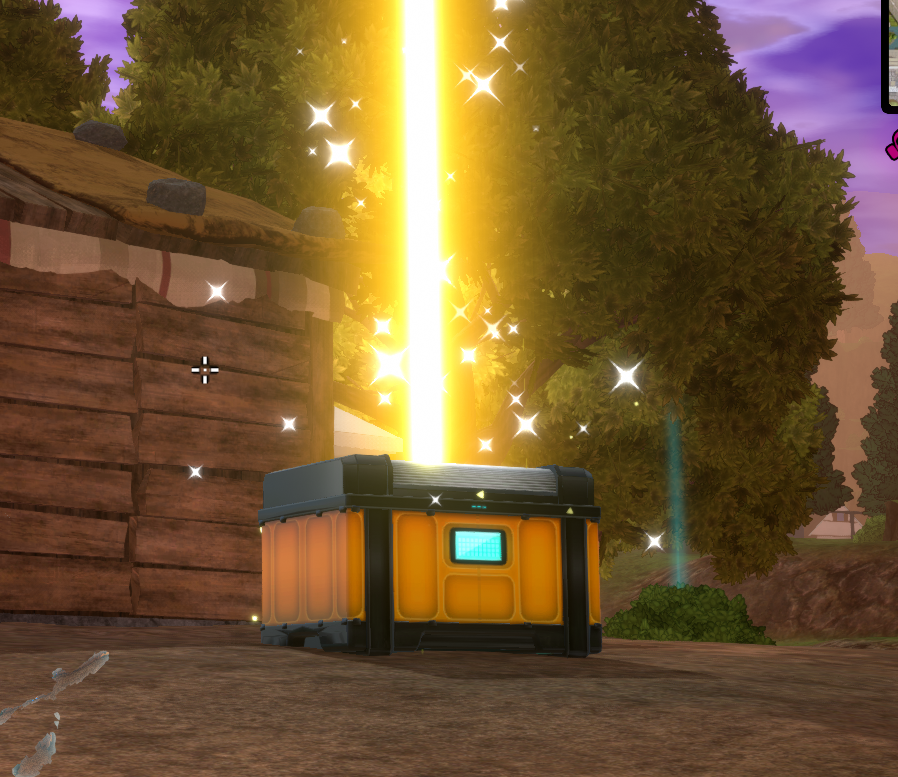
At the beginning of every match, a Large Item Box will spawn somewhere, which you will be able to see in the Sally, but don't worry if you're not able to open this box, as more land around the map periodically. You can see where they'll land or where they're located through both the minimap or by looking around, as Large Item Boxes are signaled by a huge yellow beam you can see so long as no building is blocking your view. Large Item Boxes take a long time to open, so often you will only be able to open them if you're alone. These boxes drop a lot of items, some of which are very valuable, such as Team Enhancement Kits, Large Item Bags, and Full Revive Cards.
Items are also spread around the world, so boxes aren't the only source of them. You might be confused as to what each item does, so let's review that.
 |
HP Recovery Drink (Small) Recovers 100 HP. Three can be stacked per bag slot. The healing amount increases the more teammates of the Support class are in the team. |
 |
HP Recovery Drink (Large) Recovers all of your HP, though it takes longer to drink. Only one can be stacked per bag slot. |
 |
Team HP Recovery Kit Also known as Green Teamheals, they restore the whole team's HP. These are obtained through rescuing Green-Shirt Civilians. |
 |
GP Recovery Drink (Small) Recovers 63 GP. Three can be stacked per bag slot. The healing amount increases the more teammates of the Support class are in the team. |
 |
GP Recovery Drink (Large) Recovers all of your GP, though it takes longer to drink. Only one can be stacked per bag slot. |
 |
Team GP Recovery Kit Also known as Blue Teamheals, they restore the whole team's GP. These are obtained through rescuing Blue-Shirt Civilians. |
 |
Full Support Drink Also known as Full Teamheals, they restore the whole team's HP and GP. Only one can be stacked per bag slot. These are incredibly powerful, and can easily change the outcome of a battle and even make the difference as to who wins the match. You have to gamble a bit with these, since if you drink them too late, a teammate might be DOWNd before you finish drinking this item, wasting its value. But if you drink it too early, the HP and GP you will regenerate for the team will be little, wasting value, so you gotta know when to use it and extract the biggest value possible. These can be rarely dropped from Gold Item Boxes or found around the map, but are commonly dropped from Large Item Boxes. |
 |
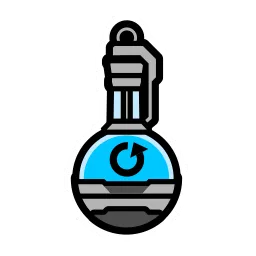
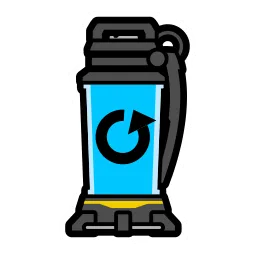
Level-Up Card A basic yet valuable item that is used to level up one ability. Upon collecting one, a prompt will appear on-screen, which you can follow to level up the skill you want to strengthen. Level-Up cards emit a small rainbow beam of light upwards, which makes them easier to spot when behind a small obstacle or from the distance. Nine can be stacked per bag slot. |
 |
Team Enhancement Kit These are the rarest of all items, they level the alpha, beta and gamma of your whole team by 1, essentially granting 3 level ups to each teammate. These can either be found as a drop from Large Item Boxes (which will drop one), or through rescuing Kota, which will grant you 3 of these Team Enhancement Kits. Three can be stacked per pag slot. Unlike the rest of the drinks, this can be drunk instantly. |
 |
Revive Card (Incomplete) These can be obtained from normal or golden Item Boxes, but the main way to obtain them is from rescuing Civilians, as doing so will drop their respective teamheal and an incomplete Revive Card. As the name suggests, these cards are incomplete, you need 3 so that they can combine into one single Full Revive Card, you can tell both apart because incomplete cards are gray, while full cards are pink. They can stack in one slot. |
 |
Revive Card (Full) After collecting 3 incomplete Revive Cards, these will merge into a full Revive Card. To use it you need to collect your teammate's badges, which look like a white coin and can be found at the location where your teammates died. If you don't know where they died, you can just check the minimap, or look around you, you should see their names floating on-screen. After obtaining this card, just use it and the Revive animation will start. Be aware that a huge pink beam will be emitted from your location, so enemies can see where you're reviving your allies, they can also hear the revive noise. Full Revive Cards can be found in Large Item Boxes without the need of collecting incomplete ones. |
Excluding Team Enhancement Kits, all drinking items make you emit a drinking noise that can be heard by enemies nearby, so keep that in mind.
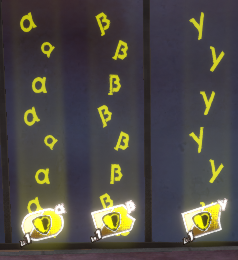
Another type of items are Ability Cards, these can appear red, yellow, blue, green or purple, matching the color of the class they represent. Ability Cards have two purposes: The first is to level up your skills. Unlike the average Level-Up Cards, Ability Cards come in three variations for each class, these being Alpha, Beta and Gamma variations, which you can identify by the greek letters they emanate, as well as the greek letter present on them. If an Ability Card matches your character's class, it will level up the skill matching its greek letter, so Alpha Ability Cards will level up by 1 the Alpha Skill of a character if their class matches the card's.
The other usage of Ability Cards is to trigger special buffs. When you have an Ability Card that doesn't match your class, you have two options: Either you give it to your teammate if it matches their class, or you keep it to yourself. If you do the latter, you can use them in battle by pressing the buttons indicated in the Quick Item bar. Each card grants different buffs based on which of the 5 classes they are from:
Strike Ability Card: Increases the user's damage by 10%.
Assault Ability Card: Increases the user's defense by 20%.
Rapid Ability Card: Increases the user's movement and attack speed by 10% and grants them the ability to wallrun.
Support Ability Card: Grants the user a healing field that heals them and allies inside the field. The field moves with you.
Technical Ability Card: Increases reload speed by 50%.
Once you use them, they will grant you their effect for a couple of seconds and vanish afterwards. Ability Cards can be leveled up with Level-Up cards by dragging them to the Ability Card, or by finding another Ability Card that belongs to the same class and has the same greek letter, leveling up these cards will make them last longer.
Using Ability Cards gives the user a colored shine, so you can sometimes see if the enemy has a special attack, defense, speed, healing or reload boost based on the color of their shining.
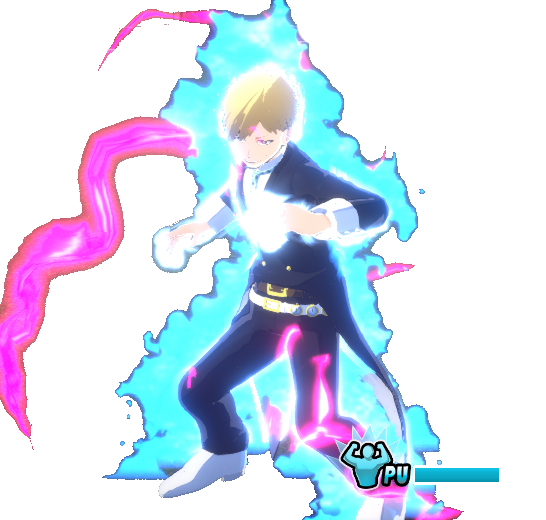
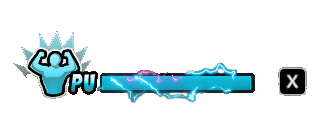
Gameplay: Plus Ultra/Plus Chaos
At the bottom center of your screen there is the PU (Plus Ultra) bar. This bar fills everytime you lost HP and over time, if you have KOd allies, then the natural filling rate increases. Additionally, death of your first teammate fills 20% of your PU gauge. If the second teammate falls, you will recieve additional 40% PU charge. Once your PU hits 100%, you will be able to use it by pressing the indicated input (so long as you're not drinking an item, in which case you have to stop and then press the button).
When using Plus Ultra, your character will perform a short animation which renders the user invincible and pushes close enemies away. Plus Ultra is very useful, as it generates all of your GP, which is also why it's recommended to only use it if you have no GP, unless you have so little HP that the next hit would kill you. Plus Ultra also temporarily increases the level of all your skills to Level PU, which is some sort of Level 10 only reachable through Plus Ultra. Level PU never increases the attack's size, ammo, or range, just damage and reload speed, both of which increase by a noticeable amount, allowing you to deal high damage and get your abilities super fast.
Another useful thing about Plus Ultra is that it can be used even in situations where normally you can't do anything, such as while being attacked with an ability that doesn't let you move. This allows you to cancel an enemy combo or attack mid-way, allowing you to avoid damage that you would have otherwise taken. Plus Ultra lasts for 15 seconds, and once the gauge is depleted, the gauge will go back to filling slowly again.
Plus Chaos is a variation of Plus Ultra used exclusively by villain characters, but the change is purely aesthetic, as Plus Ultra and Plus Chaos are mechanically identical.
Gameplay: Civilians, Kota, Stage Destruction and Teammate Revival
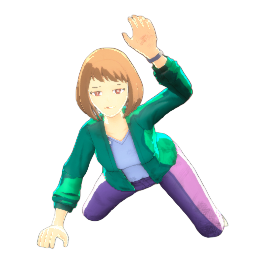
Around the map you will Green-Shirt and Blue-Shirt Civilians. By interacting with them you can rescue them, which will make them drop a Team HP Recovery Kit (if the civilian is wearing green) or a Team GP Recovery Kit (if the civilian is wearing blue), they will also drop an Incomplete Revive Card. Players often rescue civilians to get Full Revive Cards and Team Recovery Kits in case a future fight goes rough, in which case a teammate can try to flee the scene and drink one of them to recover their own and their team's health. If a teammate dies, then they pick their badge and go somewhere else (if possible) to revive them.
Aside from small destructible objects that have no special effects, we also have Destructible Buildings (USJ Map only) and Nezu Boxes. Destroying these have a probability of freeing a Civilian from inside, which can either be green or blue.
Reviving a teammate is simple, you require of two things: A Full Revive Card (the pink ones) and your teammate(s) badges. The former can be obtained through Large Item Boxes, through Momo Yaoyorozu's Special Action, or by collecting 3 Incomplete Revive Cards (the gray ones), which you can obtain from rescuing civilians or from Normal and Gold Item Boxes (alternatively you can get both complete and incomplete revive cards from enemies carrying them).
![]()
As for the teammate badges, they are left at the spot where they have died, which is signaled both on the minimap and on screen, as you will see their name and the icon of their character. Be aware that the badge isn't an item you store in your inventory, and if one of your teammates is alive and they pick it, it counts as if you too have it. To know whether or not you have their badge look for a checkmark near their name. It's worth noting that you only need 1 Full Revive Card to resurrect your teammates, even if you gotta resurrect two.
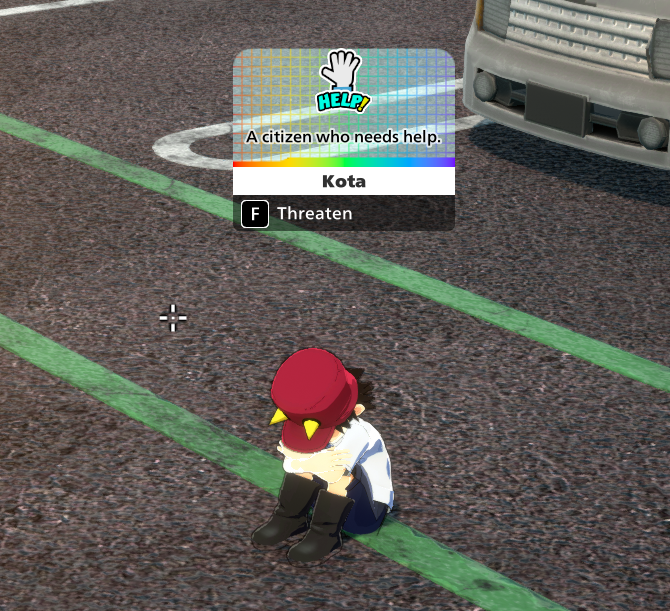
Around the map there's also a 3rd type of Civilian: Kota
There's only one Kota per match, and he spawns in one of his designated spawn points at random, sometimes easy to spot, sometimes kinda hidden (like inside bushes). After rescuing him you will obtain 3 Team Enhancement Kits, allowing your whole team to get +3 levels on all 3 skills, which can quickly change your performance in a match. Finding Kota is very difficult, as you'd have to scan all of the locations he can spawn in until finding the right one, and that's assuming another team hasn't found him before, in which case you will hear Present Mic (the announcer) say that he has been found.
Gameplay: The Poison Mist and the Safe Zone
If you've played battle royales before, you might be familiar with the concept of the "storm" (called Poison Mist here), which is the damaging area that envelops the world. At the beginning of the match the Poison Mist will be outside the map, but once some time passes, it will start to engulf the map's borders. On the minimap you'll be able to see the area it's covering, the area it will cover, and where the safe zone will move. The purple ring indicates the Poison Mist's borders, while the cyan circle indicates the area that will be safe after the Poison Mist moves. Over time, the safe zone will get smaller and smaller, or even move to different locations in an attempt to make it easier for players to kill each other. If the match lasts for too long and reaches the 16 minutes and 30 seconds mark, the safe zone will close and the whole map will be engulfed in Poison Mist, point at which you will either die to an enemy attack, or to the Poison Mist itself.
The mist does little damage at the beginning, taking 10 HP per second, which means that on some characters you can survive inside the Poison Mist for a long period of time, even more if you have healing items, but be careful, the mist only consumes HP, not GP, so GP won't help you. The Poison Mist grows stronger as time passes, taking 10 HP per second at first, then increasing with every phase, until taking 40 HP per second when the Safe Zone closes, at which point you can only survive if you're quick on using Large HP Recovery Drinks, as small ones can't keep up with the damage. If your teammate dies inside the Poison Mist, you should only try to help them get up if you're a high HP character, have quite a few HP Recovery drinks, aren't low on health, and the teammate is relatively close. Ranged revive abilities such as Ibara's and Cementoss's come handy for this... mostly.
In Season 16, the Poison Mist became stronger thanks to the "Poison Sickness", a property that makes the Poison Mist deal 50% more damage to anybody who stays for longer than 10 seconds inside of it without coming out, making the Poison Mist quite the hostile place after the 10 second mark.
Gameplay: Stage Gimmicks
![]()
![]()
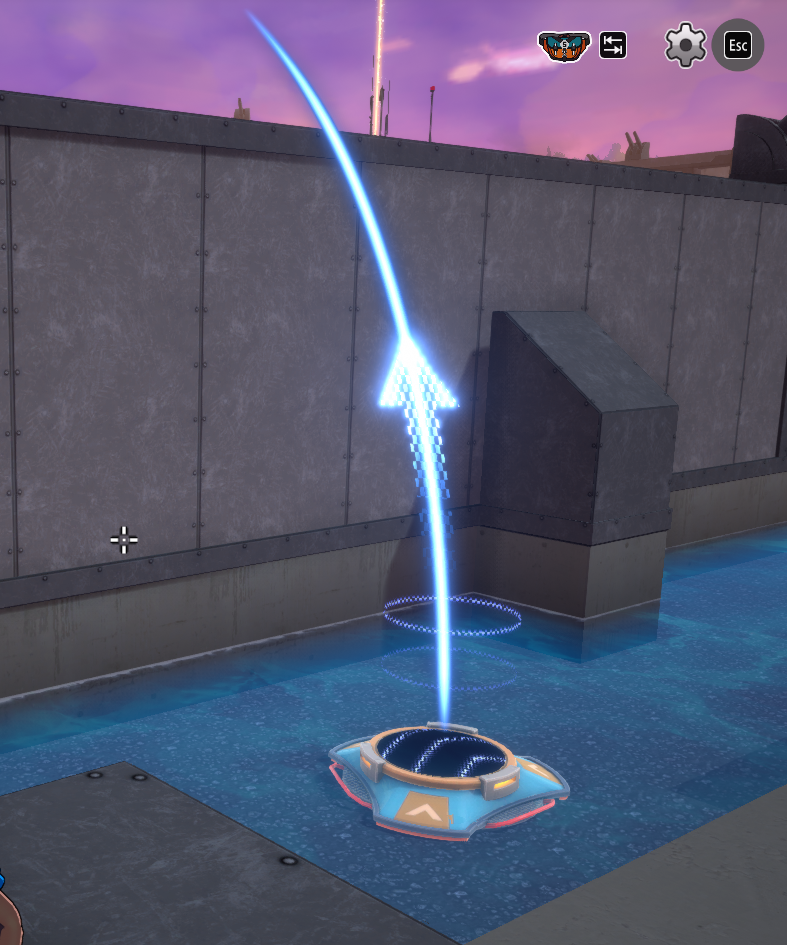
When traversing the map you will notice the presence of Jump Pads and Teleporters. Jump Pads make you jump high in the direction their trail points to, they're useful for mobility, especially for characters that lack mobility options. Touching one while in a skill animation or while drinking a healing item won't make you jump until the animation is over, and if you try to use one while DOWNd, you will get pushed away.
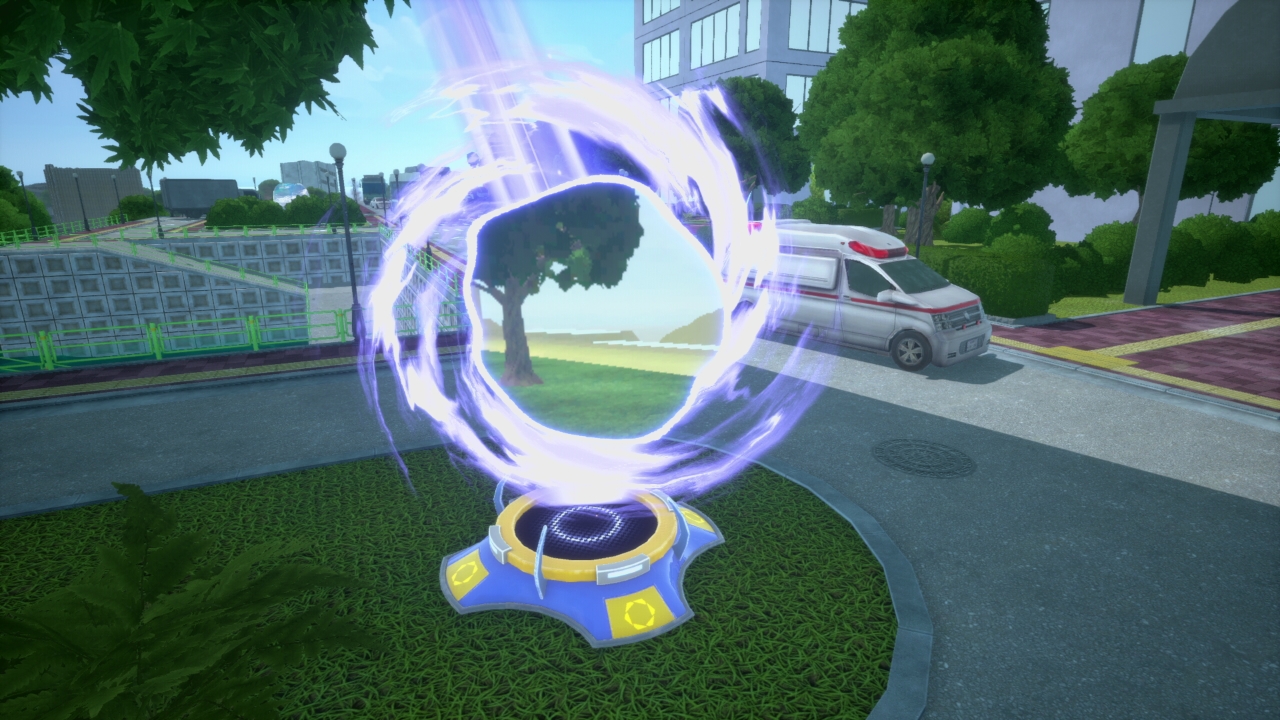
Teleporters are special devices only found in the Neo Academia map, they serve as quick entry and exit to/from the Coffin in the Sky area. These aren't linked to another teleporter, so once you use one, you will have to find another one if you wish to go back, they're 1-way teleporters. It's important to note that once Teleporters are engulfed by the Poison Mist, they will despawn soon after, so make sure to keep this in mind so you don't get trapped outside the Sky Area.
Teleporters give i-frames for a few seconds after their usage, allowing the player to remain invincible so long as they don't use a skill. This is useful when it comes to running from the enemy, as you can quickly drink a small recovery drink while fully invincible.
Gameplay: Movement and Agility
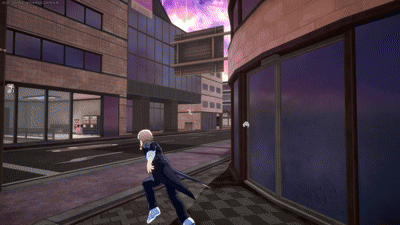
One of the biggest differences between a noob and a standard player is how they move, and that's because they move very differently. In My Hero Ultra Rumble you can walk, run, dash, roll, jump, climb and do wall-shuffling. Walking consists of simply pressing the forward input, this is slow and normally you don't want to do this, because it's slower, yet many new players do and that renders them vulnerable, in this game you want to be quick and evasive, so learn to move quick. The first step is to stop Walking and begin Running; by pressing the dash input you will perform a tiny dash and start running, this is what you always want to do, running keeps you faster and allows you to get to places quicker, it might sound obvious, but believe me that beginner lobbies are full of people that walk a lot and don't run much.
Jumping by itself isn't super special, as your jump height is often low, but some characters like Tsuyu Asui (Froppy) and All For One have higher than usual jumps, which can benefit them. However, jumping is much more useful when using beam attacks that don't lock you in place, like Yellow Deku's alpha, Red Deku's alpha, Red Bakugo's alpha, and overall every shooting skill that lets you move while using it. It's better to use these skills while jumping to the sides to make yourself harder to hit while still attacking.

Rolling (Also called Dodging) is an incredibly valuable skill to master, and that will be explained more in-depth in its own section, but to put it simply, the act of rolling makes you invulnerable for a split second, which if timed correctly, can let you ignore the damage of enemy abilities or even their effects. For example, All For One's gamma skill allows him to warp everyone inside of its range to his position, but if you roll at the right moment, you can avoid being warped to his location.
Crouching is another type of movement, which allows you to move without making any noise, which can be occasionally useful to ambush people and sometimes to change your position behind an obstacle without being heard by the enemy if they're looking for you.
Climbing is your way to get on top of high places when you don't have mobility skills or jump pads. It's pretty slow and leaves you very vulnerable, so you should never climb while being chased unless it's a short fence or any obstacles that are barely tall enough to be climbable. Whenever possible, you should do Wall-Shuffling instead, also known as Wall-Jumping in other games, which consists of jumping from one wall to another and repeat this until you reach the top, keeps you in the move, which makes it better than climbing. Some abilities only begin reloading once you hit the ground, however clinging to a wall counts as hitting the ground, so keep that in mind.
Gameplay: Useful Shortcuts and Tips to Win
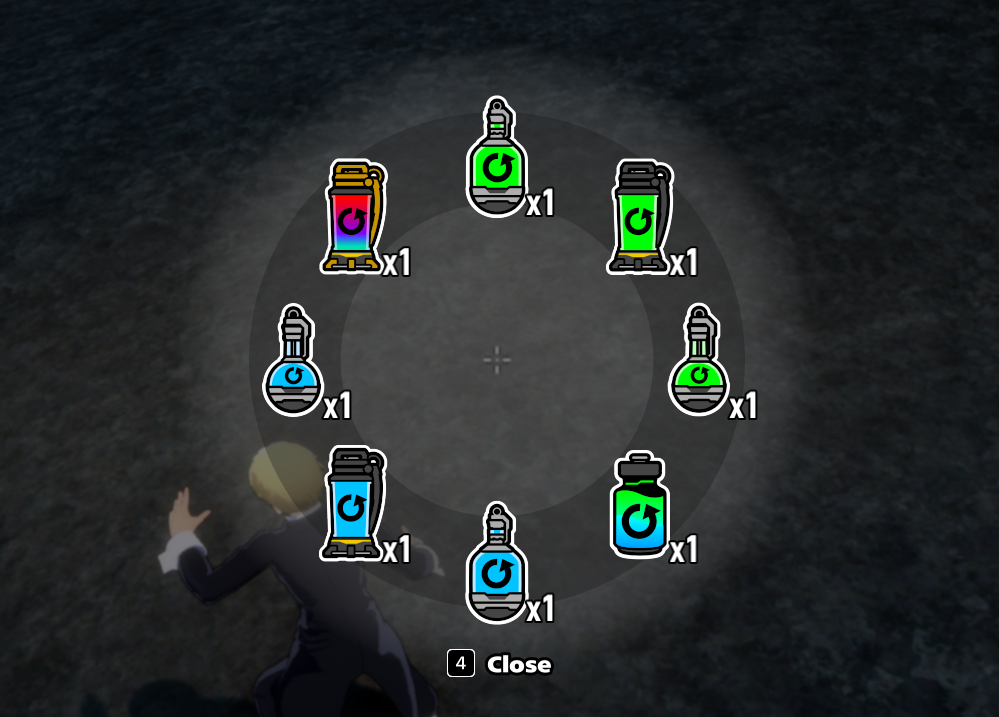
The game also features special shortcuts and wheels that can be really useful. For example, if you press the "Change Item" key (check your settings to know which button that is) you will access your item wheel, which lets you quickly drink whichever drink you wanna drink without checking the inventory (the Quick Item Bar might not always show the item you really wanna use, so this is useful for that too). Using the Place Marker button on one of these will let your teammates know that you ran out of that specific item, however this has a twist...
If your teammates use that on Small or Large recovery items, it does mean they ran out of them and need you to give them some if possible, HOWEVER, if this is done on Teamheals, it means that your teammate is in the process of drinking one, and is telling you to do your best to survive so you can be healed. If this is done on Team Enhancement Kits (the ones that level up your whole team), then it usually means that your teammate is asking you or the other teammate to drink it, since people sometimes forget.
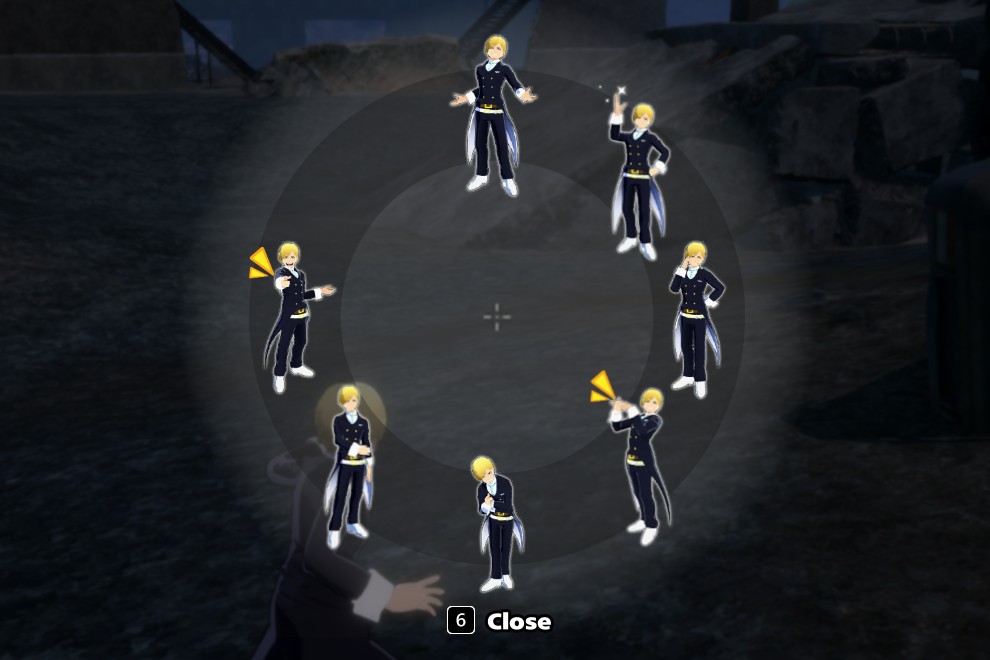
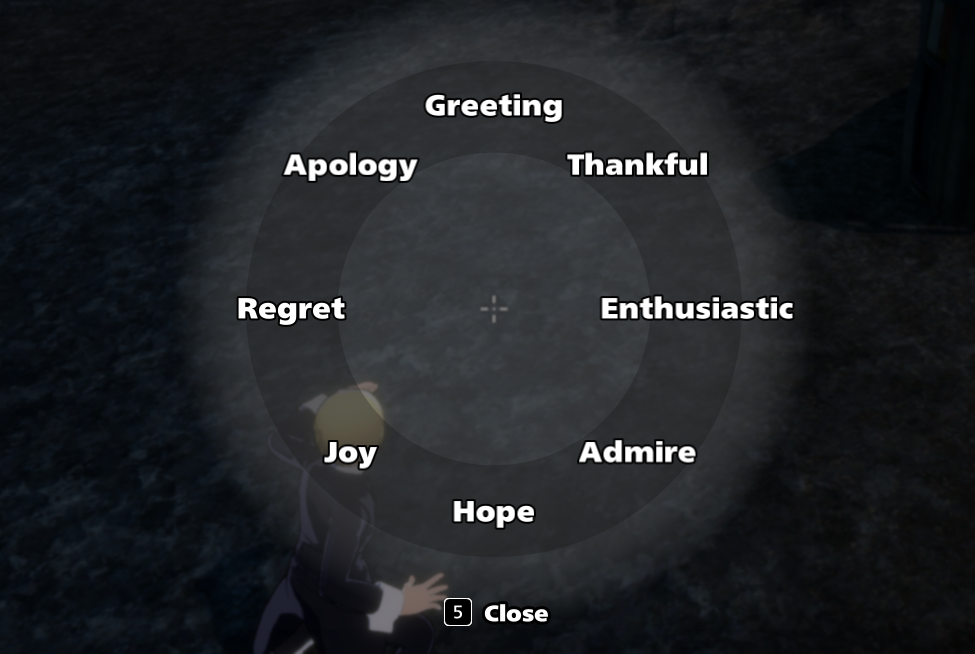
If you check the settings, you will also see buttons for "Voice" and "Emote", these will open the voice wheel and the emote wheel respectively. The voice wheel allows you to use voicelines to communicate with your teammates, such as Greetings (to set up a good mood), a thank you voiceline, an apology voiceline, etc... Don't take voicelines literally every time, since some characters can have pretty rude voicelines for thanking and similar. The emote wheel on the other hand lets you perform little animations to socialize or communicate with the enemy. If you're nice to people in the lobby, you might get treated less harshly in matches, or you might get funny interactions!
If you use the Place Marker button while looking at an item, you will pin it for your allies to see, this is often used on Ability Cards matching your teammate's character class so that they can pick it up and level up. This can also be done with any other items such as healing items or revive cards.
Gameplay Conclusion
Overall, whenever you start a match, make sure to stay close to your team, gather healing items, level your skills and fight using your brain. Don't try to fight a team alone, because those who just mindlessly charge at fights alone are prone to die, and that's not good!