

Endeavor (Inferno Fist) Guide
Guide developed and supervised by: Lethal One (Xbox), ZOL (Steam)Last Update Date: March 13th 2026
Last Update Content: Added Assault Overhaul's match-up
Endeavor (Inferno Fist) is a restrictive character with profound strengths. He excels at area denial and wide-ranging attacks, instilling fear in enemies. He possesses efficient methods to engage, disengage, and inflict substantial damage. While slightly more effective indoors, his ability to maintain a height advantage makes him a lethal opponent in any environment. Whether inside, outside, or supporting a team, Inferno Fist Endeavor is truly a boss battle.
Best Map: Neo Academia

Before getting started, you can relax and listen to this playlist...

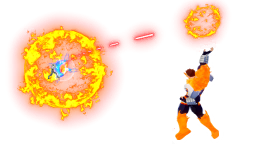
Alpha Skill - Inferno Fist: Jet Burn
Endeavor punches forward, firing a flame resembling his fist. When the fist collides with a surface, it expands into flames in the surrounding area. Up to two of these flames deal tick damage over time and last for approximately 6 seconds. Tick damage from a flame puddle is applied immediately, meaning aiming at an enemy's feet deals more damage. than normal. Additionally, since the flames persist, it is ideal for use in choke points such as fatal funnels and doorways. Additionally:
- Projectile Travel Speed: Moderate, lead your shots heavily.
- Pierces through enemies, multiplying damage.
- Tick damage from a flame puddle is applied immediately.
- Only two fire puddles can exist at once. Once a third is cast, the first dissipates.
- Tuning damage affects fire.
- Jump and hover to evade damage while firing.
- Can be used in tandem with Special Action Dash backwards, then canceled into alpha as a backward/kite tool.
- The fire puddle is effective against melee-oriented opponents when cast underfoot or in doorways.
Beta Skill - Vanishing Storm & Hell Curtain
Endeavor spawns a tornado at a chosen location, staggering anyone caught within its radius. Once the tornado dissipates, Hell's Curtain forms a ring around the Vanishing Storm. Should an enemy come into contact with the Curtain, they will be pulled toward the center, allowing for strategic Jet Burns on the target. The Curtain persists for an extended period, making it ideal for edge-guarding melee opponents or for use in choke points such as fatal funnels and doorways.
Vanishing Storm
- Can be placed at great distances away, on top of surfaces, on walls, and roofs.
- Instantly staggers everyone caught inside.
Hell Curtain
- Damages through walls.
- Features a mirrored downward portion that is typically hidden.
- Place on walls to utilize this portion of the attack.
- An enemy will be permanently trapped if caught between the Curtain and a wall, bouncing indefinitely until death.
Gamma Skill - Prominence Nova
Endeavor raises his right arm and begins charging an orb of flames midair. After a short time, the attack can be fired. However, this technique can be charged further to dramatically increase the scale and size of the blast. Once sent forward, upon colliding with a surface, it will explode and gradually grow in size. Enemies caught within suffer damage over time. This move currently has collision issues if it collides with anything other than the ground. Additionally, it will not hit around corners, behind any object or obstacle, or through walls.
- Projectile travel speed: Slow; lead your shots very heavily.
- Hold to increase explosion size
- Hold to extend suspension time in the air.
- Does not penetrate walls.
- Deals no damage when thrown against a wall typically.
- Can be used to intercept enemy wake-up attempts.
- Can be used to snipe airborne opponents if you can predict their movements.
- Detonates mid-air upon reaching maximum distance, useful for edge-guarding distant enemies.
Special Action #1 - Flight
Dash
Endeavor dashes forward at a stable altitude, immediately draining 10% of the gauge and then slowly draining more. This maneuver can be steered left or right.
- Can be canceled with air melee to retain momentum.
- Can be tapped backward and canceled into α as a backward/kiting tool.
- Can be canceled by not inputting any movement and reactivated to make sharp turns.
- Is infinite during the "3, 2, 1, GO" countdown at the beginning of a match. You can spawn on a crate with a near 100% chance to escape.
- Retains all I-Frames. It is 100% safe to wake up and dash away for a short distance.
- Do not sprint off ledges; roll off them instead. This is objectively faster and will not accidentally trigger his Special Action.
Hover
Endeavor suspends himself midair, slowing his horizontal movement speed, and slowly draining your gauge.
- Can be spammed to drain less gauge.
- Strafe left and right while attacking to evade damage.

Special Action #2 - High Jump
Endeavor leaps upwards or diagonally, draining 50% of your gauge. It is best used mid-air due to a significantly faster activation speed compared to on the ground.
- Castable up to three consecutive times before gauge is fully depleted.
- Goes straight up if input without directional movement.
- I-frames are lost upon casting.
- Gauge consumption occurs only after the move has fully activated.
- Incline can be canceled with alpha, useful for landing on buildings without overshooting.
Basic Attacks
Ground Melee
Endeavor's melee involves a flaming punch. Opponents struck by it will be set ablaze. This attack requires close proximity to land effectively. The initial hit of the melee is crucial as it serves as the combo starter. Subsequent melee actions hinder combo execution. Therefore, to initiate a combo, press the melee button, pause briefly, and then press it again, ensuring you do not activate the second part of the melee. Also to note, When you use your finish move on an opponent, after it says "opponent knocked out", use your melee to cancel the finish off animation so you can immediately pick up their loot.
Air Melee
Endeavor's aerial melee is a flaming kick that propels him forward. This can initiate a combo, chaining an aerial melee into a standard melee onto one of his abilities. Endeavor's aerial melee also provides movement. When jumping or falling, use the aerial melee for improved mobility. This also applies to Endeavor's special action Dash. Using the aerial melee during a dash grants additional movement and conserves the special action's percentage gauge.
Aerial melee will give you momentum:
- After SA Dash
- After β
- After rolling off a ledge
- After climbing a ledge
- After knock downed wakeup

Leveling Paths
Jet Burn Path
Focus on maximizing α damage. Play Endeavor similarly to Nejire or Assault Deku, utilizing alpha's damage for safety and pressure. This playstyle is optimal with alpha tunings and consistent shot landing. Beta should primarily be used to set up alpha. This strategy is particularly effective against aerial opponents like All for One (Young), Nejire, Hawks, Tamaki, Lady Nagant, and Monoma.
![]()
![]()
![]()
![]()
![]()
All's Tornado Path
Jump start your alpha, then go all in on the beta. Not viable in lobbies with plenty of aerial opponents such as All for One (Young), Nejire, Hawks, Tamaki, Lady Nagant and Monoma
![]()
![]()
![]()
![]()
![]()
![]()
![]()
Combos
The different ways you can combine and chain various skills for higher damage within 500 DP (Downpower). The downpower of Endeavor's abilities are as follows:
Alpha Skill: 100 DP (Projectile), 20 DP (Lingering Fire)
Beta Skill: 10 DP (Per Tornado Tick), 50 DP (Curtain), 50 DP (Upon Activation)
Gamma Skill: 65 DP (Per Damage Tick), 0 DP (The Projectile Itself)
Ground Melee: 100 DP (Melee 1), 100 DP (Melee 2), 200 DP (Melee 3), 400 DP (Whole Melee Chain)
Air Melee: 250 DP
The text of the combos below will be colored by how true they are, in this case, we will define as "True" combos that, without 3rd party or tuning interference, can only be escaped/interrupted by Overhaul and/or Mirio, as those are special cases.
White Text means that part of the combo is True on both GP and HP.
Green Text means that part of the combo is True if the target is on HP only.
Blue Text means that part of the combo is True if the target is on GP only (Guardbreak hits are considered GP hits).
Red Text means that part of the combo is Untrue, and therefore the enemy can escape it.
The DMG of the following combos at max level and accounting for the character's strike role is classified under the following tags:
Basic DMG (100-149 DMG), Basic+ DMG (150-199)
Light DMG (200-249 DMG), Light+ DMG (250-299)
Medium DMG (300-349 DMG), Medium+ DMG (350-399)
High DMG (400-449 DMG), High+ DMG (450-499)
Heavy DMG (500-549 DMG), Heavy+ DMG (550-599)
Deadly DMG (600-649 DMG), Deadly+ DMG (650-699)
(Air/Hop Wake-Up) -> Air Melee -> Melee 1 -> Beta
A combo you can perform taking advantage of Endeavor's air melee lunge. Whenever someone is far too close to you when you've been hard knocked down, air waking up into air melee is free damage.
Melee 1 -> Melee 2 -> Melee 1 -> Beta -> Alpha
Another melee combo to dish out extra damage.
Beta -> Gamma
Useful when you intend to dish out damage to a wide variety of targets at once. While the combo is "True" in terms of being damaged by both parts, it's possible to not receive the entirety of gamma's damage.
Beta -> Alpha -> Alpha -> Alpha
Go-to combo. This is Endeavor's bread and butter and his most damaging one. Technically speaking, the 3rd alpha isn't true, but it will be very hard and sometimes impossible for the enemy to fully avoid.


Endeavor (Inferno Fist) is a rather restrictive character. The alpha is slow, the beta is only castable on the ground, and the gamma leaves the user vulnerable, dealing zero damage in certain circumstances. Endeavor is a weak assault character, and is in a poor state in the game right now. The alpha and beta damage damage isn't great. Endeavor's alpha and beta damage lost a significant amount lf damage in a update that makes him relatively weaker. You most learn these way to make him more valuable. once players properly learn to lead their shots while aiming at the opponent's feet for bonus flame damage you're getting better. And that is something you want to do always when you can. Players must predict enemy movements to properly use the beta. When the match starts loot as much as you can. Early game Endeavor is extremely weak, and going into combat is not recommended early game with low levels. There are two playstyles for Assault Endeavor players: Artillery Bombers and the Punch-Up Crew. The Bombers cast Hell's Curtain on unsuspecting foes, firing a rain of alphas before they can react, all while managing their Special Action. The Punch Up Crew, conversely, focuses on close-quarters combat. They physically engage enemies within the Curtain, firing alphas at close range to ensure accuracy, all within a building. The effectiveness of each playstyle depends on the player's ability to frequently land alphas.

Recommended Normal & Special Tunes
Normal Tunes
Strike Slots: Alpha DMG > HP DMG > Beta DMG > Special Action Reload > Else
Assault Slots: Any Defense Tuning > Else
Rapid Slots: Melee DMG > Else
Support Slots: Overhaul > HP+ > GP+ > Else
Technical Slots: Alpha DMG > Special Action Reload > Else
Special Tunes
| The list of recommended special tunes (not ordered): | ||
|---|---|---|
 |
Space Hop Increases jump height for swift evasions and enhanced mobility. Almost mandatory, unless you've mastered managing your Special Action. |
|
 |
Quirk Factor Release Rewards hyper-aggressive playstyles, enabling endless combat. |
|
 |
Special Action Reload Boost Stay in the sky forever, and bomb low health enemies to extend the duration in final circle. |
|
 |
Fixer Multiplies your damage tremendously. |
|
 |
Critical Permeation Permeation stays active during Prominence Nova. Cast it without fear. |
|
 |
Revenge Rapid Enables Wall Runner when you need it. Provides a speed boost higher than the Rapid card. Increases your dash speed, special action flight speed, attack speed, air melee speed, drink speed and wall run speed. |
|
 |
Card Duplication Both variants of Endeavor are level reliant, and this helps with hyper aggressive builds. After max level, funnel levels into your team, or ability cards, rendering Ability Manifest useless. |
|
 |
Wall Runner Utilize the Air Melee to project yourself through the map. |
|
 |
Ability Manifest Increases the duration of Ability Cards. Use with Support and Strike Cards. |
|
 |
Willpower Allows you to survive with 1 HP. Useful for escapes, as it provides invincibility frames during which you can dash away. |
Recommended Builds and Costumes
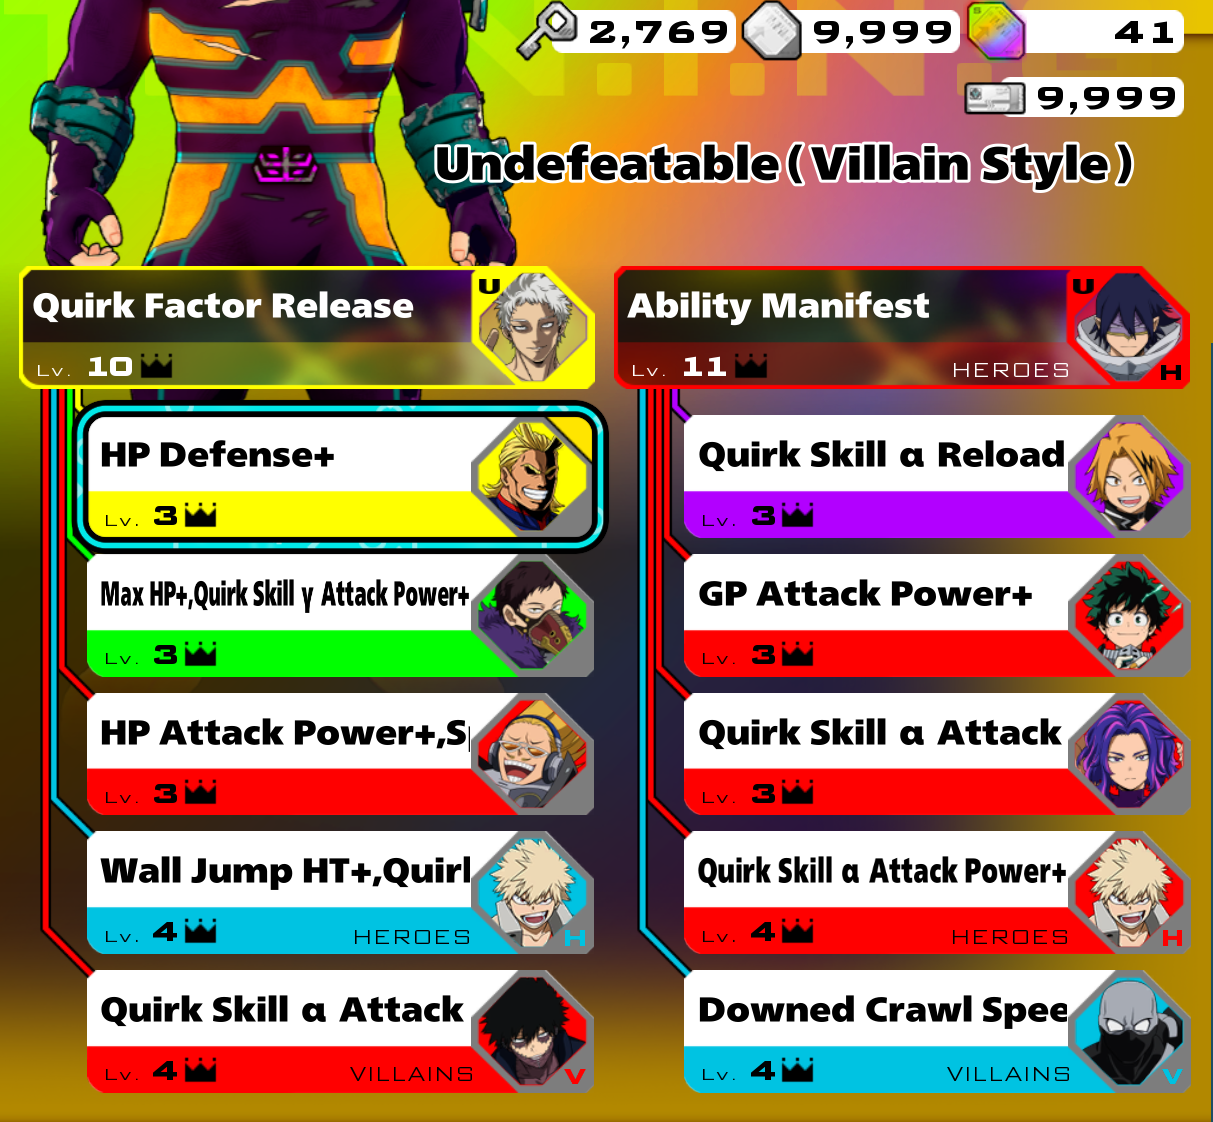
Undefeatable (Villain-Style) - Build Name: HELL'S SPAWN
Max aggression with the ability to push beyond your limits!
Default Special Tunes:
- QUIRK FACTOR RELEASE: Rewards hyper-aggressive playstyles, enabling endless combat.
- ABILITY MANIFEST: Increases the duration of Ability Cards. Use with Support and Strike Cards.
Other Options:
- SPACE HOP: Increases jump height for swift evasions and enhanced mobility.
- WILLPOWER: Allows you to survive with 1 HP. Useful for escapes, as it provides invincibility frames during which you can dash away.
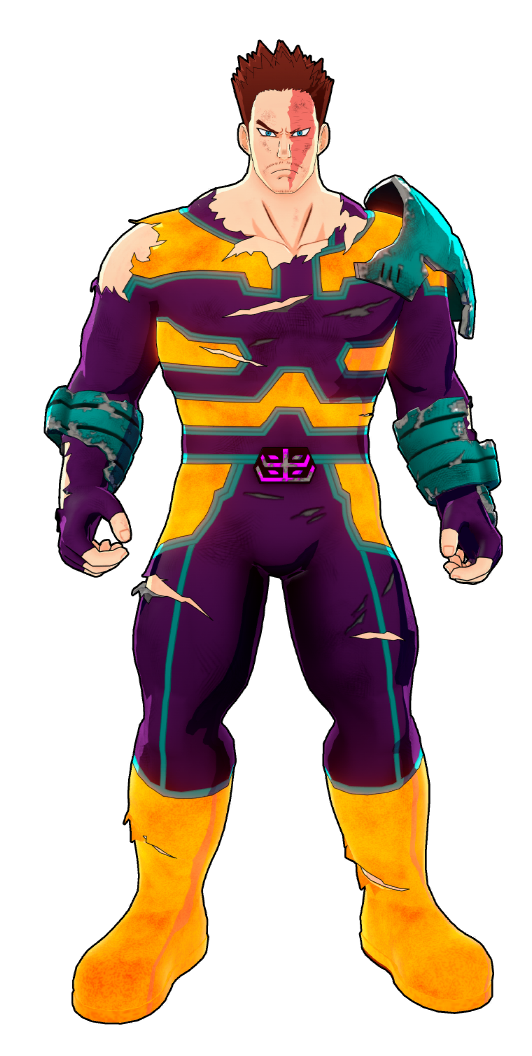
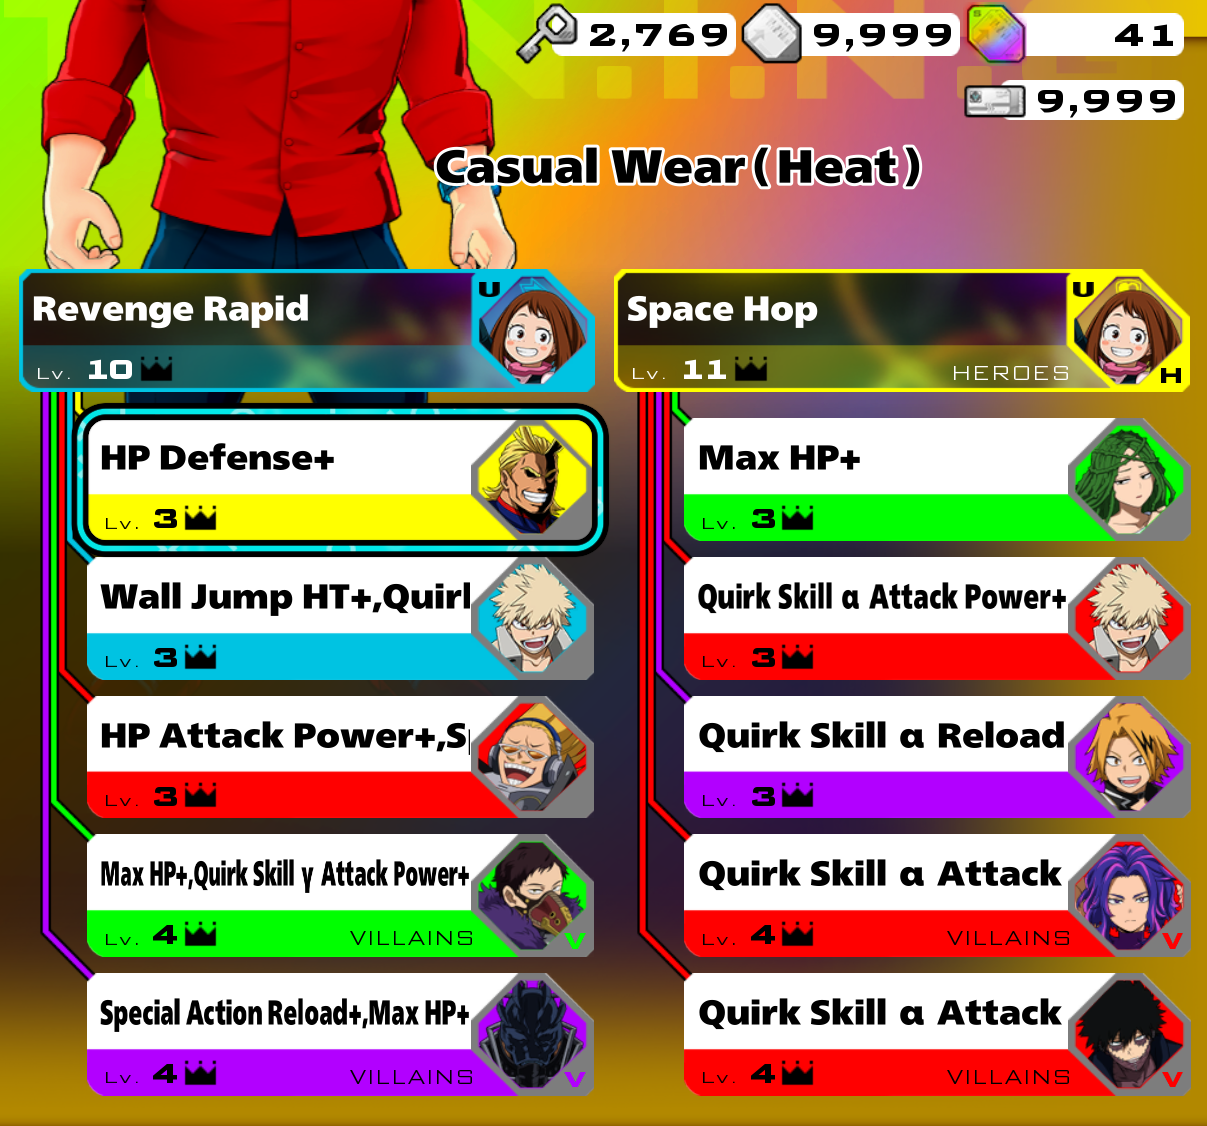
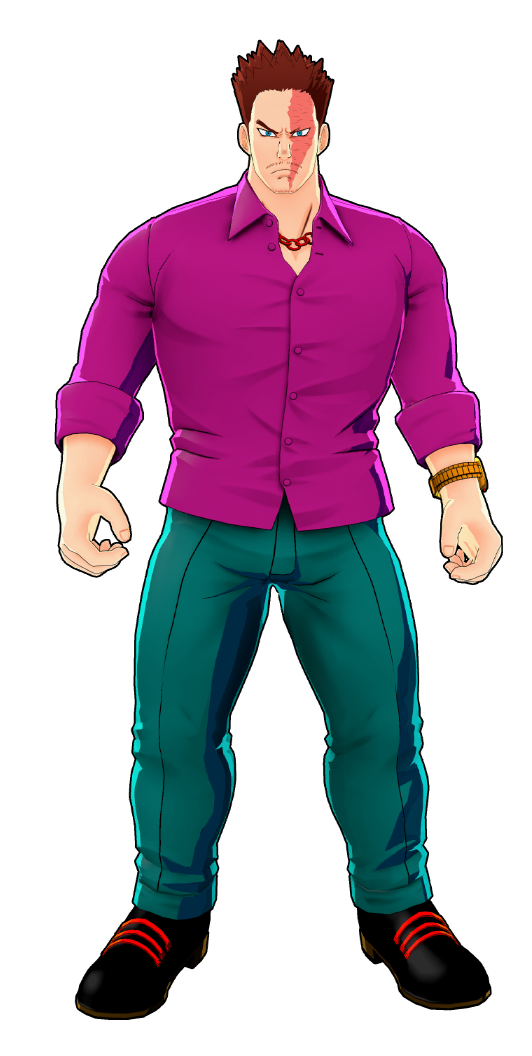
Casual Wear (Heat) - Build Name: Blazing Phoenix
Hyper aggressive Alpha build with a touch of speed to overpower your enemies
Default Special Tunes:
- REVENGE RAPID: Increases speed after shield breaks and grants Wall Runner.
- SPACE HOP: Increases jump height for swift evasions and enhanced mobility.
Default Special Tunes Explanation:
- REVENGE RAPID: Enables Wall Runner when needed, provides a speed boost higher than the Rapid card and increases Dash Speed, Special Action Flight Speed, Attack Speed, Air Melee Speed, Drink Speed and Wall Run Speed.
Other Options:
- CARD DUPLICATION: Both variants of Endeavor are level reliant. Uplifts hyper aggressive playstyles. After reaching max level, funnel levels into your team or ability cards, rendering Ability Manifest useless.
- WALL RUNNER: Utilize the Air Melee to project yourself through the map.
Health:
- 250 GP
- 361 HP
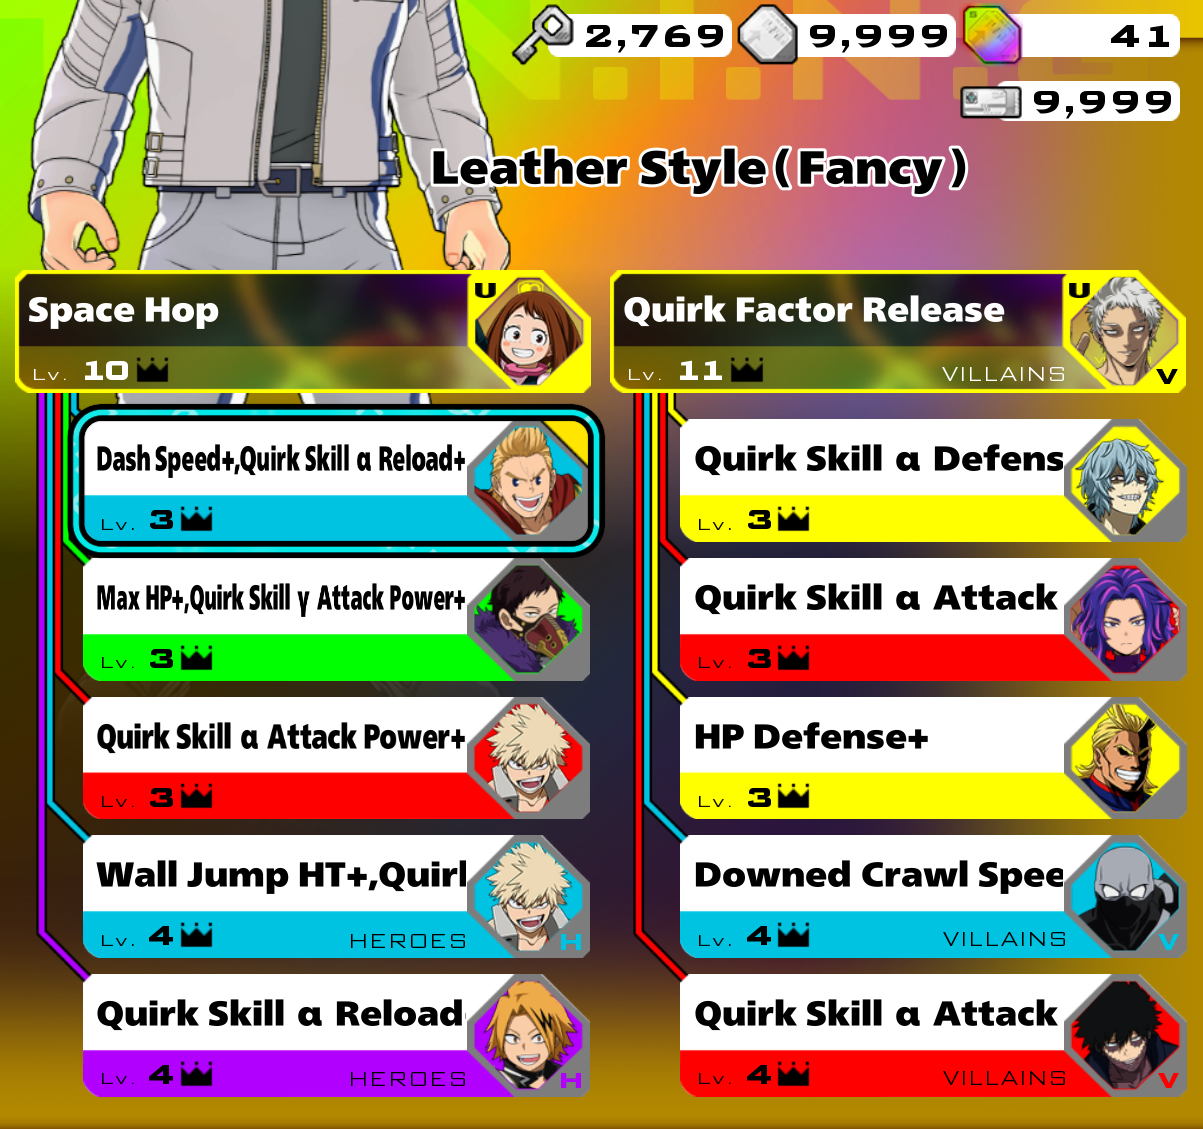
Leather Style (Fancy) - Build Name: PURE ESSENCE
The best of both worlds... equilibrium.
-AGGRESSION WITH MOBILITY-
Default Special Tunes:
- SPACE HOP: Increases jump height for swift evasions and enhanced mobility.
- QUIRK FACTOR RELEASE: Rewards hyper-aggressive playstyles, enabling endless combat.
Health:
- 250 GP
- 353 HP
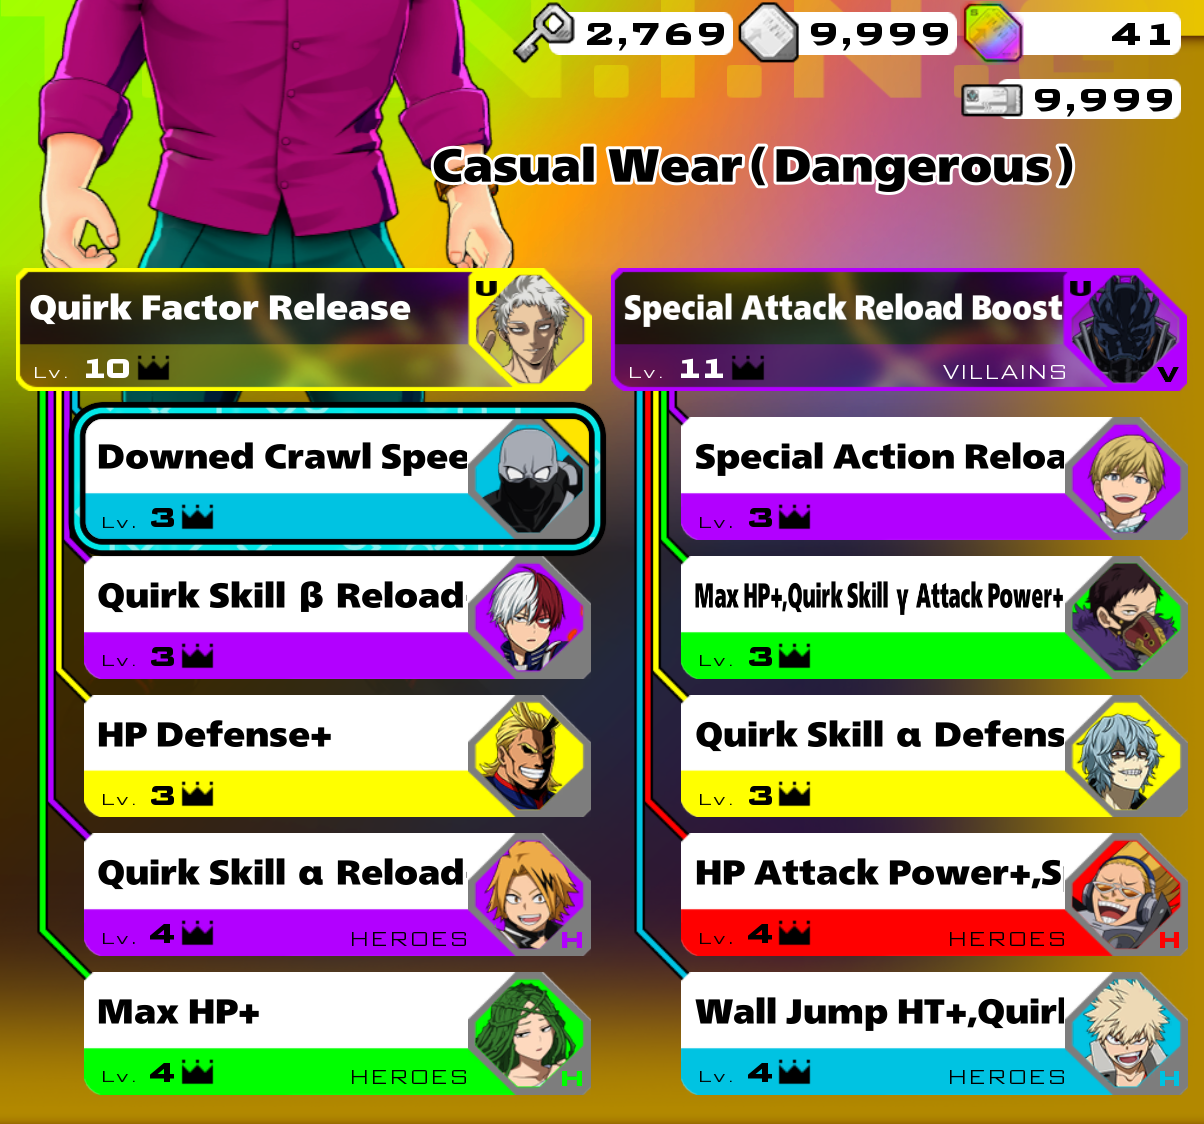
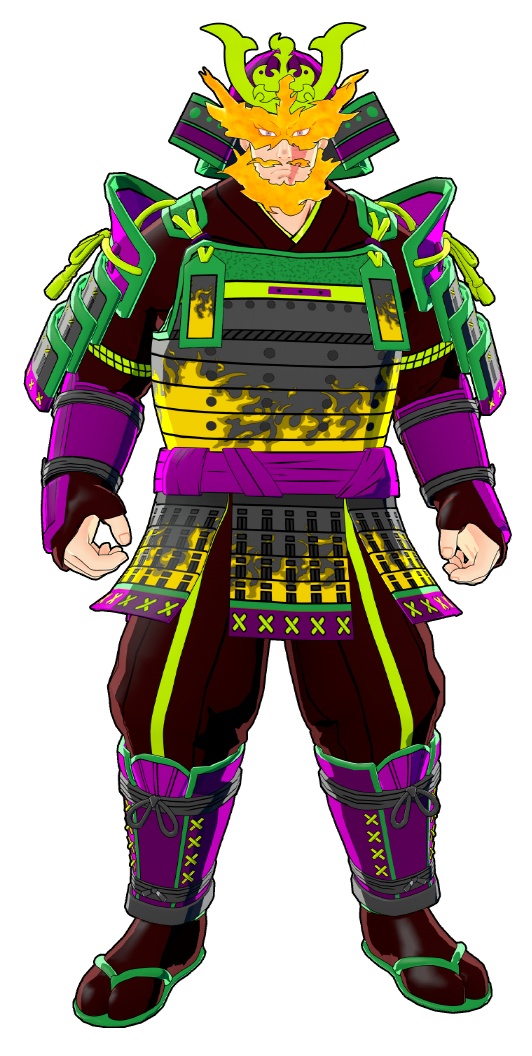
Casual Wear (Dangerous) - Build Name: DEMON LORD
HYPER Aggressive Infinite Flight -THE EVIL BUILD-
Default Special Tunes:
- QUIRK FACTOR RELEASE: Rewards hyper-aggressive playstyles, enabling endless combat.
- SPECIAL ACTION RELOAD BOOST: Stay in the sky forever, and bomb low health enemies to extend the duration in final circle.
Other Options:
- SPACE HOP: Increases jump height for swift evasions and enhanced mobility.
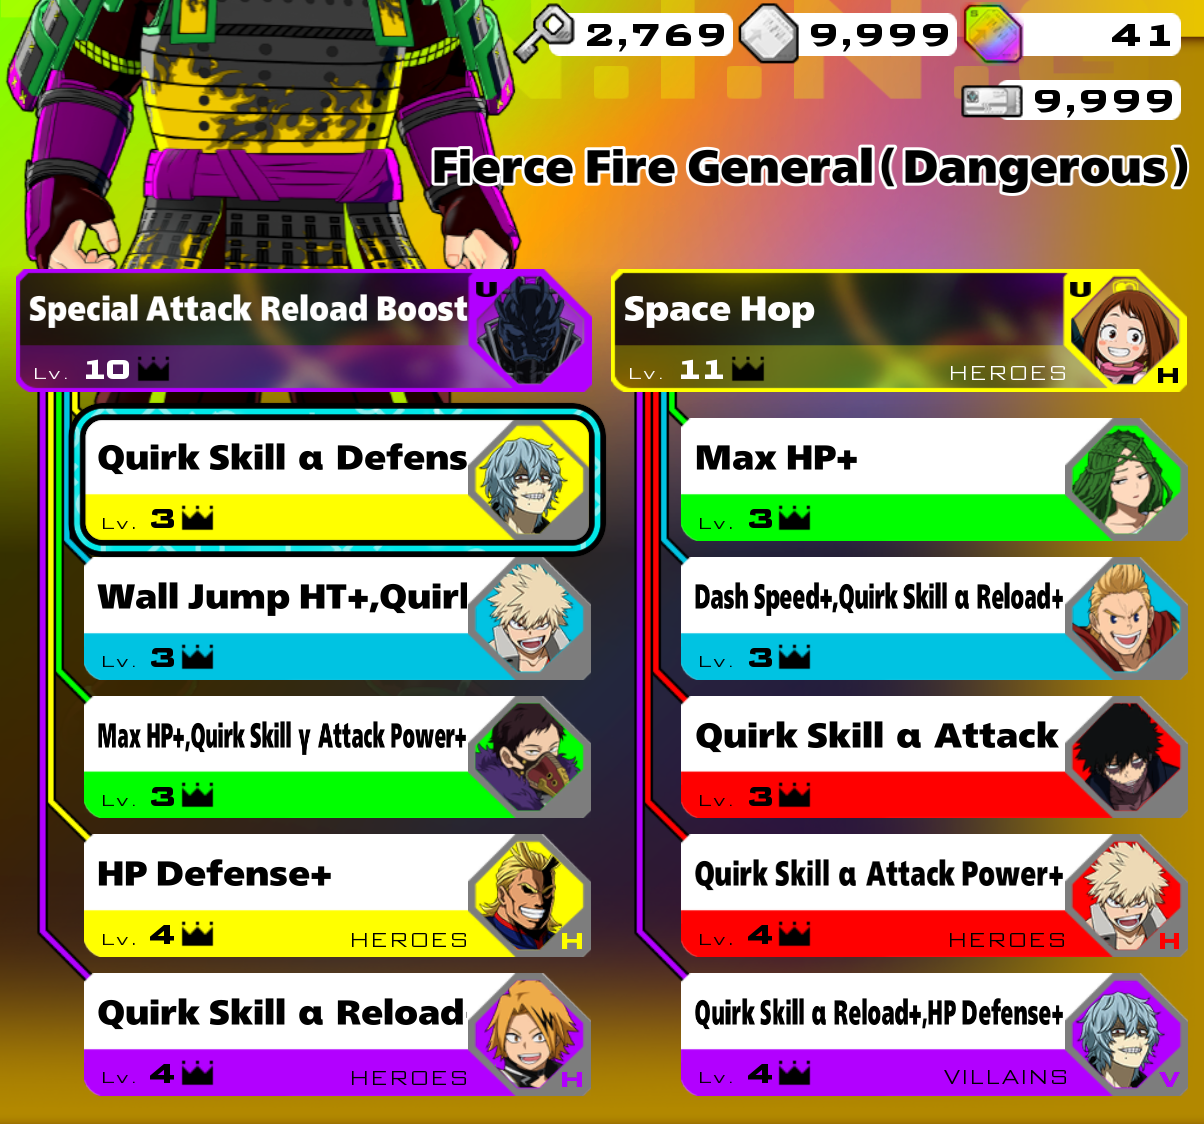
Fierce Fire General (Dangerous) - Build Name: Fierce Artillery
Aggressive Infinite Flight -Useful for those who only own Fierce Fire General-
Default Special Tunes:
- SPACE HOP: Increases jump height for swift evasions and enhanced mobility.
- SPECIAL ACTION RELOAD BOOST: Stay in the sky forever, and bomb low health enemies to extend the duration in final circle.
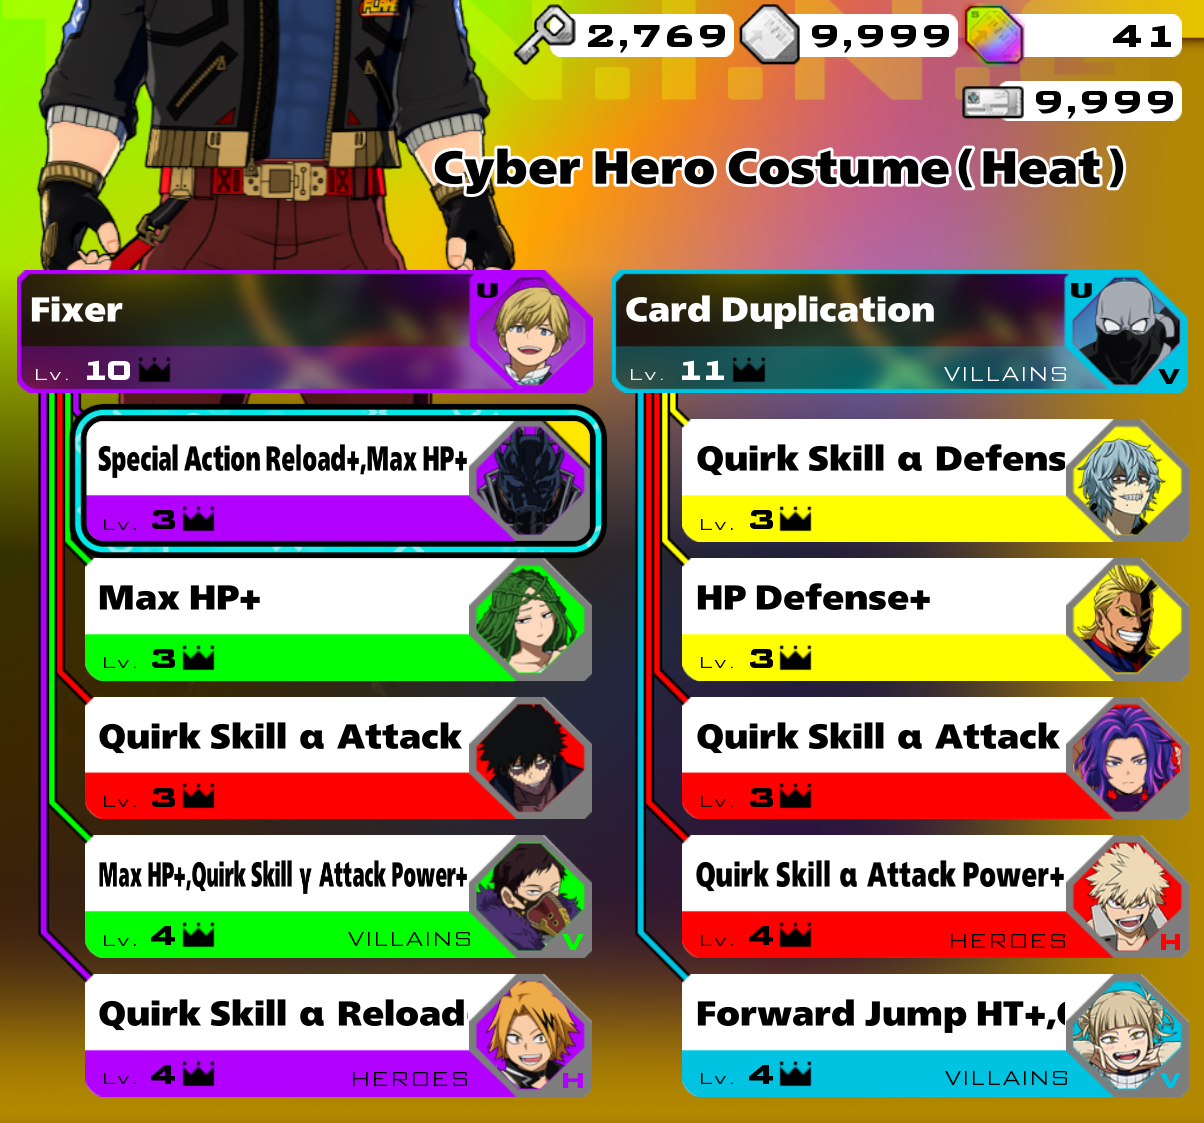
Cyber Hero Costume (Heat) - Build Name: JET BURNED HELLFLAME
HYPER Aggressive α Beamer -Simple, yet effective-
Default Special Tunes:
- FIXER: Multiplies your damage tremendously.
- CARD DUPLICATION: Both variants of Endeavor are level reliant. Uplifts hyper aggressive playstyles. After reaching max level, funnel levels into your team or ability cards, rendering Ability Manifest useless.
Health:
- 250 GP
- 370 HP

Izuku Midoriya (Default) 
Difficulty Score: 🟡Even🟡
Endeavor can struggle against Deku if Deku lands a Gamma or has very good aim. However, Deku is not a significant threat to Endeavor.
Izuku Midoriya (Full Bullet) 
Difficulty Score: 🟡Even🟡
Endeavor does not have significant issues with strike Deku. Although Deku can become difficult to hit when airborne, Endeavor can combo him with Beta and Alpha if Deku's Beta attack misses.
Izuku Midoriya OFA 
Difficulty Score: 🟡Risky🟡
Deku possesses the most effective melee combat among all characters and sticks to opponents with ease. Assault Endeavor also excels in close-range combat, albeit through different methods. To defeat Deku, efficient utilization of Hell's Curtain and Jet Burn is crucial. Jet Burn must be deployed twice below Deku's anticipated melee chain initiation point. Additionally, position your Curtain so its edge inflicts damage during his melee chain. Furthermore, you can bait him with your gamma ability. Most Deku players disregard opponents and their attacks, often charging in despite being within your Prominence Nova. If your Curtain and Prominence Nova are on cooldown, disengage until they become available. If executed correctly, Deku will be weakened and attempt to flee. At this point, land all available Jet Burns.
Katsuki Bakugo (Default) 
Difficulty Score: 🟡Even🟡
Bakugo can deal significant damage with his Gamma ability and remain airborne for a short period. However, this is not a major problem for Assault Endeavor.
Katsugi Bakugo (Machine Gun) 
Difficulty Score: 🔴🔴Very Unfavorable🔴🔴
Assault Endeavor finds it very difficult to deal with a rapid Bakugo. A rapid Bakugo is almost always airborne, making it challenging to land any of Assault Endeavor's moves. Therefore, you should not face a rapid Bakugo alone.
Ochaco Uraraka (Default) 
Difficulty Score: 🔴Unfavorable🔴
Endeavor has significant difficulty against Ochaco due to her high mobility, which makes landing attacks extremely challenging. Avoid combat most of the time unless she is on the ground.
Ochaco Uraraka (Zero Satellites) 
Difficulty Score: 🟡Even🟡
Assault Ochaco can inflict significant damage, but her moves are easily dodged. When she uses her charged Gamma to ascend, utilize the special action high jump action to position yourself above or onto the floating platform and execute the Beta Alpha combo.
Tenya Iida 
Difficulty Score: 🔴Unfavorable🔴
Iida's speed and movement make it very difficult for Endeavor to land attacks. Iida needs to be close to attack, so you'll have to be patient and wait for him to come near you, if you see an Iida coming towards you, use your beta ability around you, and he will be hit by it. Also play around your curtain walls and your jet burn flames
Shoto Todoroki (Default) 
Difficulty Score: 🟡Even🟡
Endeavor can have either a rough or easy time dealing with Shoto. If you encounter Shoto, it is advisable to stay airborne, as his Gamma ability can freeze you and inflict significant damage. Therefore, ensure you remain airborne or closely monitor his movements; otherwise, you should be fine unless the Shoto player has exceptional alpha aim.
Shoto Todoroki (Ice Fang Wind Flame) 
Difficulty Score: 🟡Even🟡
Shoto can be punished by Assault Endeavor in buildings because Endeavor's Beta ability goes through walls, giving him an advantage. Endeavor does not have difficulty fighting Shoto, and Shoto cannot pursue Assault Endeavor into a building since Endeavor can place a Beta there.
Tsuyu Asui 
Difficulty Score: 🟢Favorable🟢
Endeavor will have a hard time hitting Froppy when she uses her Alpha. However, when she attempts to attack, she can be punished if you use your Beta when she is about to attack you. You can trap her, allowing you to combo her.
Eijiro Kirishima (Default) 
Difficulty Score: 🟡Even🟡
Kirishima will have a rough time fighting an assault-type Endeavor. However, if he can land some hits, he will do good damage. Try not to be too close to an assault-type Kirishima.
Eijiro Kirishima (Red Drive) 
Difficulty Score: 🟡Even🟡
Strike Kirishima's good movement can make it difficult for Endeavor to land hits. But If Strike Kirishima's Beta attack misses, you can do Beta Alpha combo.
Denki Kaminari (Default) 
Difficulty Score: 🟢Favorable🟢
Denki lacks the mobility to evade Endeavor. He cannot effectively use his Gamma ability because Endeavor could be airborne or prepared to use his Beta ability upon Denki's approach.
Denki Kaminari (Lightning) 
Difficulty Score: 🔴Unfavorable🔴
Tech Denki is one of your biggest enemies, he shreds anyone who camps skybox. Making Endeavor have to stay on the ground. Tech Denki usually keeps his distance from opponents, shooting from afar. If an opponent gets close, he is less effective and will attempt to flee. This provides an opportunity to pursue him and inflict significant damage. Taking him out is your highest priority.
Momo Yaoyorozu 
Difficulty Score: 🟢🟢Very Favorable🟢🟢
Momo stands no chance against Endeavor due to her having no movement and being a grounded character. Endeavor can just stay in the air and easily land his beta. And Momo can't do anything about it she could go in walls but, Endeavor's beta can just hit right through them.
Tokoyami 
Difficulty Score: 🟢Favorable🟢
Tokoyami possesses strong melee capabilities. If he approaches, you can counter with your Beta, or Gamma (gamma use if he is not yet in close range but still going towards you. If you observe Tokoyami initiating his Gamma, ascend into the air and use your Beta from behind him to interrupt his gamma shield.
Neito Monoma 
Difficulty Score: 🟣Unknown🟣
Depends on the quirks Monoma copies. If Monoma copies many movement-based quirks, Endeavor will have difficulty. If Monoma copies few to no movement based quirks, Endeavor will have an easier time.
Itsuka Kendo (Default) 
Difficulty Score: 🔴Unfavorable🔴
Kendo's Beta ability can block all of Endeavor's attacks. Try to catch her off guard when she is not using her Beta.
Itsuka Kendo (Twin Palm Strike) 
Difficulty Score: 🟡Even🟡
Endeavor does not have a difficult time against strike Kendo. She can deal significant damage with her combos, but if you can beta around you, Kendo would prefer to maintain distance.
Ibara Shiozaki 
Difficulty Score: 🟡Even🟡
Endeavor can sometimes struggle against Ibara because, she deals significant damage. But, she is easy to hit and lacks mobility.
Mirio Togata (Default) 
Difficulty Score: 🔴Unfavorable🔴
Assault Endeavor should not attempt to fight a Mirio face to face. Assault Endeavor will have a rough time hitting Mirio due to his movement. If the Mirio holds his gamma, Endeavor can beta and do 1-2 alphas before the Mirio gets away, same thing when Mirio pops out of his beta.
Mirio Togata (Sheer Counter) 
Difficulty Score: 🔴Unfavorable🔴
Endeavor's attacks are easy to predict, thus being easy for Mirio to counter him. Mirio is difficult to hit due to Endeavor's abilities. Dodge his Alpha attacks and wait for him to use his Gamma before unleashing your Beta Alpha combo.
Tamaki Amajiki 
Difficulty Score: 🔴Unfavorable🔴
Tamaki uses his aimed Alpha to grab opponents and deal significant damage. He also becomes airborne with his special action, making him difficult to hit. It is recommended to focus Tamaki when he is unaware and at low health.
Nejire Hado 
Difficulty Score: 🟡Even🟡
Nejire can remain airborne for an extended period, making Endeavor's attacks difficult to land. The best option to hit an airborne Nejire is with Endeavor's alpha ability. While gamma can also connect, it is harder to land and may leave Endeavor vulnerable to Nejire's attacks during the charge up animation. However, Nejire's damage output is insufficient to significantly affect Endeavor, with the exception of Nejire's alpha, which can be difficult to land.
Nejire Hado (Fairy) 
Difficulty Score: 🔴Unfavorable🔴
Nejire's attacks are easy to land, making it difficult for Endeavor to avoid being hit. Additionally, she can remain airborne for extended periods, making it challenging for Endeavor to land attacks on her. Eliminating her is a priority if the opportunity arises.
Hitoshi Shinso 
Difficulty Score: 🔴Unfavorable🔴
Endeavor's Beta and Gamma abilities leave him vulnerable to attacks during their windup, allowing Shinso to easily counter any actions taken. Additionally, Shinso can readily gain a height advantage, albeit for a short duration. A 1 on 1 confrontation with Shinso is not recommended.
All Might (Default) 
Difficulty Score: 🟢Favorable🟢
Assault Endeavor has an easy time dealing with All Might due to All Might's weak abilities, and Endeavor can easily hit him.
All Might (Gatling) 
Difficulty Score: 🟡Even🟡
Rapid All Might attempts to inflict significant damage but can be punished. Try to maintain distance and catch him off guard.
Armored All Might 
Difficulty Score: 🔴Unfavorable🔴
Dealing with Armored All Might presents challenges due to his high mobility and aerial capabilities, making him difficult for Assault Endeavor to counter. He will maintain an advantage as long as he has the height advantage. Your primary objective should be to lure him into a building, where you can then trap him in your Hell's Curtain. From here, he will attempt melee attacks. Utilize the wall of your curtain, flames, and your team to achieve victory.
Shota Aizawa 
Difficulty Score: 🔴Unfavorable🔴
Aizawa will cancel your quirk and use his alpha to combo you. Avoid face to face combat with Aizawa.
Present Mic 
Difficulty Score: 🔴Unfavorable🔴
Present Mic can out damage Assault Endeavor, making combat difficult for Endeavor, especially if Present Mic's special action speaker is on the ground.
Cementoss 
Difficulty Score: 🟡Even🟡
Cementoss can be very annoying due to his abilities. If Cementoss uses his Alpha, you can counter with your Beta, which will hit him and cause a reaction.
Endeavor (Default) 
Difficulty Score: 🟡Even🟡
Strike Endeavor can gamma through walls and use his beta to hit you while you are in a building. Therefore, you should avoid entering buildings when a Strike Endeavor is nearby. Otherwise, you can out damage him with your beta alpha combo.
Endeavor (Inferno Fist) 
Difficulty Score: 🟡Even🟡
Success depends on your aim and who lands the beta-alpha combo. Avoid using your gamma during combat, as it leaves you vulnerable.
Hawks (Default) 
Difficulty Score: 🟡Even🟡
Hawks's good movement makes it difficult for Endeavor to land hits. Endeavor's Assault Beta can counter Hawks' Beta. When Hawks approaches, use your Beta so that when he uses his Beta to hit you, he will be pulled in, allowing you to use your Alpha.
Hawks (Slicing Wind) 
Difficulty Score: 🔴Unfavorable🔴
Hawks' abilities make it challenging for Endeavor to attack him effectively. Hawks also possesses numerous strong combos. Therefore, it is advisable for Endeavor to avoid engaging in direct combat with Hawks.
Mt Lady 
Difficulty Score: 🟢🟢Very Favorable🟢🟢
Assault Endeavor significantly damages Mt. Lady's hp and gp. When Mt. Lady is in her giant form, Assault Endeavor can use his charged Gamma ability, dealing over 120 damage, which can be further increased with Alpha attacks. Even in her normal size, Mt. Lady must approach Endeavor closely. If she nears an Assault Endeavor who is positioned within a building or using his beta around him, she will be severely punished.
Tomura Shigaraki (Default) 
Difficulty Score: 🟢🟢Very Favorable🟢🟢
Shigaraki cannot hit airborne targets, so staying airborne is highly recommended. It is also very easy to land abilities on him.
Tomura Shigaraki (Catastrophe) 
Difficulty Score: 🟢Favorable🟢
Shigaraki's assault combo requires close proximity. Therefore, when he approaches, you can use Beta to create distance and trap him, allowing you to land Alpha attacks.
Tomura Shigaraki (Thousand-Hand Break) 
Difficulty Score: 🔴🔴Very Unfavorable🔴🔴
If you are in a building and spot Shigaraki, it is advisable to retreat. His beta ability will travel through your hells curtain without him suffering any damage. You are unable to effectively engage him in the air, in close quarters, or within a building, making Shigaraki one of the most challenging opponents in the game. The only viable strategy is to evade his alpha ability from a distance and counterattack with your own alpha abilities. Do not allow him to approach under any circumstances, and descend from the air if he targets you.
All For One (Default) 
Difficulty Score: 🟡Even🟡
Facing All for One can be annoying, especially when caught by his Gamma while airborne or when he uses a Level 9 Beta. All for One can also possess a movement quirk, making him difficult to hit. Overall, Endeavor does not suffer significantly against All for One.
All For One -Youth Age- 
Difficulty Score: 🟡Even🟡
Facing a Yafo can be annoying, especially when he uses his Gamma ability and lands his special action attack, which temporarily disables your special actions. Back off from the fight if Yafo is using his Gamma, unless he is hitting someone else. In that case, you can pressure him and deal damage. Dodging after using your attacks is recommended to avoid getting hit by Yafo's special action.
Dabi (Default) 
Difficulty Score: 🟢🟢Very Favorable🟢🟢
Dabi is another character that has a very difficult time fighting an assault Endeavor due to no movement. None of Dabi's abilities will help him against an assault Endeavor. Endeavor can land his beat just as easy as other none movement characters, and Dabi will have to accept defeat.
Dabi (Crazy Torch) 
Difficulty Score: 🟢Favorable🟢
It is recommended to stay airborne when near Dabi. If he approaches, dash away. He is also an easy target to hit.
Himiko Toga (Default) 
Difficulty Score: 🟢Favorable🟢
Toga has difficulty landing her Gamma attack. If she attempts her Beta, Endeavor can use his Beta to trap her, allowing him to land Alpha hits.
Himiko Toga (Sting Dance) 
Difficulty Score: 🟡Even🟡
When Endeavor is airborne she will have a hard time landing her beta, and if she tries to gamma you on the ground, you can place a Beta allowing you to combo. She isn't that much of a problem try not to make Toga do her combo on you.
Twice 
Difficulty Score: 🟢Favorable🟢
Twice's abilities are not ideal for countering an assault Endeavor. Endeavor can easily land attacks on Twice while Twice is using his gamma.
Mr. Compress 
Difficulty Score: 🔴Unfavorable🔴
Assault Endeavor faces challenges when fighting Mr. Compress. Mr. Compress can reflect Assault Endeavor's alpha and gamma abilities using his beta. Additionally, Mr. Compress is often airborne, making it difficult for Assault Endeavor to land alpha attacks, and Compress's alpha attack out damages Endeavor's.
Kurogiri 
Difficulty Score: 🟡Even🟡
Kurogiri can be very tricky, making it difficult for Endeavor to land his Beta or Gamma attacks due to Kurogiri's teleportation with his Beta.
Lady Nagant 
Difficulty Score: 🔴🔴Very Unfavorable🔴🔴
Exercise extreme caution if Lady Nagant is present in the game. Given that Endeavor is a larger target than most of the cast, Nagant will find it easier to land scoped shots, which inflict significant damage. Additionally, she can be challenging to hit while airborne due to her Gamma ability. Eliminating her should be a high priority, and frequent dodging is crucial when Nagant is nearby.
Overhaul 
Difficulty Score: 🟢🟢Very Favorable🟢🟢
Overhaul should avoid engaging Endeavor in combat. Endeavor possesses superior offensive capabilities, whereas Overhaul's abilities are limited to ground-based attacks, which inflict minimal damage and necessitate precise aiming.
Overhaul (Blighted Precipice) 
Difficulty Score: 🟡Even🟡
Overhaul's assault moves involve significant movement, making it challenging for Endeavor to counter him effectively. When Overhaul uses his Alpha while sliding, anticipate his trajectory and use Beta to trap him.