Guide developed and supervised by: Danoula (Steam)
Last Update: December 22nd 2025 10:47 PM UTC
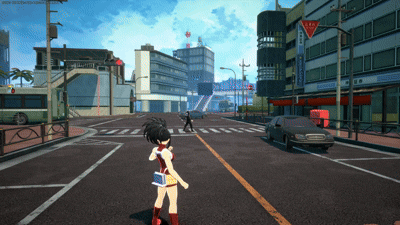
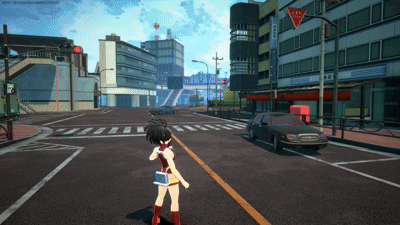
Momo Yaoyorozu is a hybrid support character who thrives on map control and team coordination. While she’s labeled as support, her toolkit allows her to flex between keeping her allies alive and turning into an unexpected threat when opportunities arise. Momo excels at setting up defenses, creating advantageous positions with her constructs, and punishing careless enemies who underestimate her low mobility.
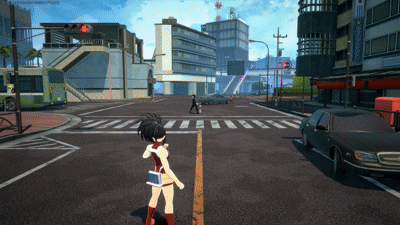
Unlike typical supports, Momo’s strength lies in her adaptability, she can shift between defensive setups and sudden bursts of aggression, catching opponents off guard with well-placed cannons or shields. Her value skyrockets in enclosed or cover-rich environments where she can dictate the pace of fights, deny enemy entry points, and protect her team effectively. However, in open areas or against high-mobility characters, she can easily be overwhelmed due to her slower movement and limited escape options.
She relies in positioning and environmental awareness. She rewards strategic play, using walls, cars, and natural obstacles as extensions of her arsenal.
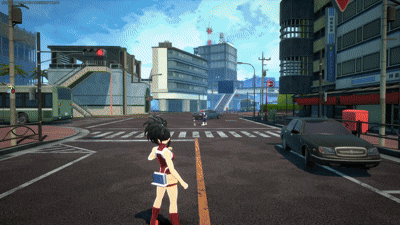
Best Map: UA Island & Chaos City
Alpha Skill - Create: Strike and Stop
Momo's alpha skill allows her to swing at enemies to stop non-armored abilities and cancel movement skills to lock and stagger enemies in place, which makes it hard for the enemy to escape if not spammed. It serves as a "back off" ability to either stop a threat attacking your allies or yourself. If the enemy jumps, one well-timed alpha instantly knocks them to the ground, and you can loop this so long as you're not interrupted. You can also sneak an alpha when setting up a combo involving the gamma skill for some extra damage. It should be noted that her alpha counts as a projectile, so abilities like Mr. Compress's beta shield will reflect it back to you.
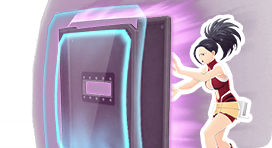
Beta Skill - Create: Unfalling Castle Wall
Momo's beta skill allows her to create a shield that can be used offensively, defensively, and supportively. When holding this ability, Momo will run forward with a shield that will block all incoming attacks so long as she takes them from the front, since Momo can't block non-directional attacks such as Ochaco's gamma (Both Rapid and Assault), or area attacks that come from behind her, as the shield does not cover her back. The ability to block attacks can be really useful against characters like Technical Todoroki that are usually hard to approach due to the large amounts of AoE attacks. However, this ability should not be used to run away, since even though it allows you to move faster, it leaves you exposed from behind while taking away your ability to dodge, rendering you vulnerable for a tiny speed boost. While dashing with the beta, you can press dodge to pass through the shield’s placement and end up in front of it when it deploys. This is especially useful when being chased into a building. Instead of doing a slow 180 to close the entrance and risking a poorly placed shield, you can press dodge right before entering to instantly block the entrance from behind with perfect placement.
When the skill is tapped instead of holded (or at the end of the hold version) this ability does a good job at keeping yourself or your allies alive and buy you some time, as it can be used to cover an ally to give yourself some space to rescue them or let the timer run. It can also be used to block entrances/exits, either to prevent the enemy from reaching you/your teammates or to keep them trapped in a building and spam gamma cannons at them. This can also be useful to buy yourself time to heal or resurrect an ally. When the beta shield is placed, Momo’s alpha attacks and melee attacks can pass through it. If an enemy tries to break the shield, or is close to it, you can safely attack them from behind it, allowing you to apply pressure while staying protected.
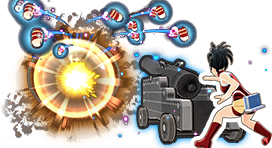
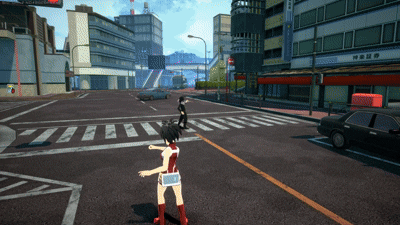
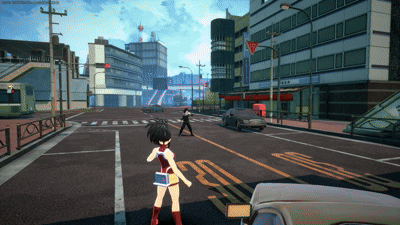
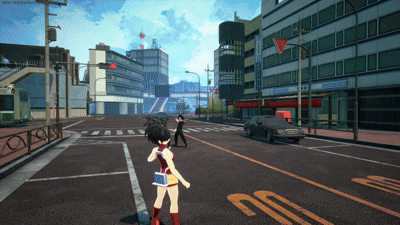
Gamma Skill - Create: Bullet Rain
Momo's gamma skill gives her the ability to place cannons that will shoot 3 cannonballs that will explode in smaller matryoshka bombs. This ability has insane range and DMG, being able to cause havoc from great distances. At higher levels (4 and 9) you get an extra cannon, which allows you to cover a greater area to make sure at least one hits (normally one targets the front, and the rest target the sides, this can be used to either hit the spot you predict your enemy will go to, or to prevent them from taking a specific path. A lone alpha should be sneaked in to maximize damage, but don't go for more or else you will risk putting the enemy on knockdown with an alpha rather than with a cannonball, losing valuable damage.
Defensively, you can aim the cannons at a KOd ally's or enemy's remains to be able to loot while discouraging others from doing so and also giving you some protection against melee characters. If you're being chased, you can go indoors and place cannons in the way to discourage chasing, as the enemy will get hit badly if they decide to come inside anyways.
Additionally, these cannons can be aimed all the way up to shoot at the sky, doing this will make the cannonballs take a while to fall back and hit the ground, which makes it great for the small final circle, as people might think they're safe, that is, until the cannonballs finally land and hit them whole. It should also be added that each matryoshka bomb released from the cannonball's explosion deals about 50 DMG, which isn't much, but in tight spaces they can stack, leading to even greater DMG.
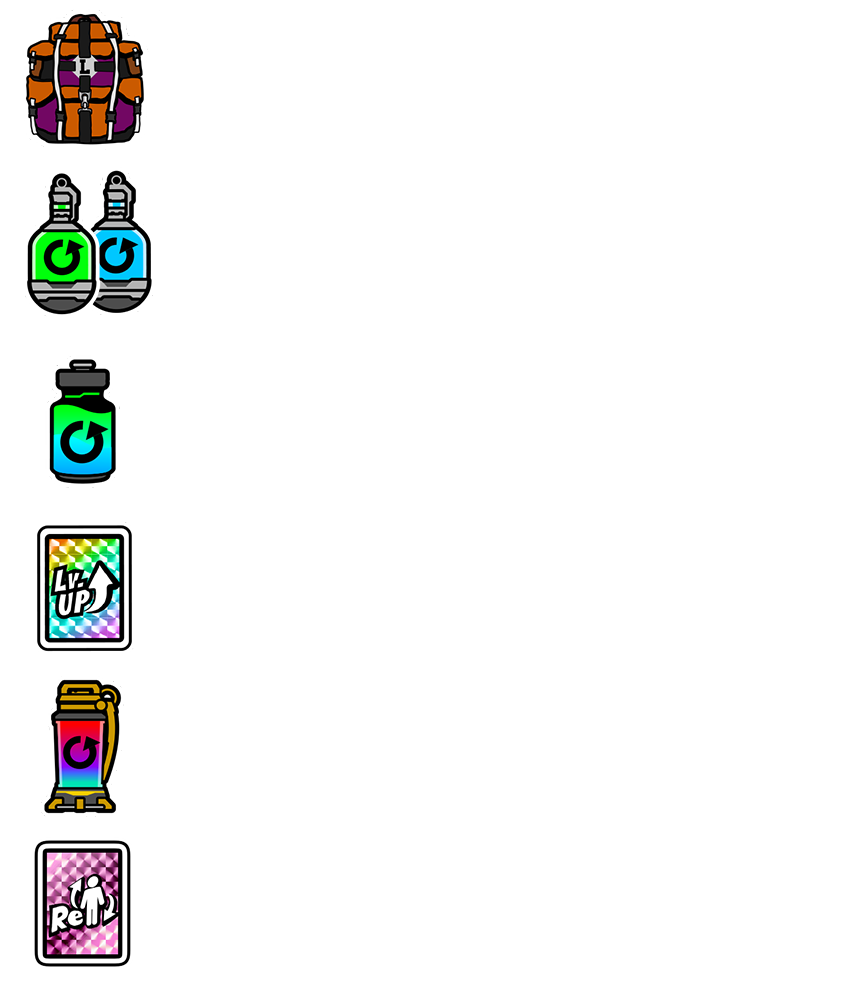
Special Action - Yaoyorozu's Lucky Bag
Momo's special action allows her to summon a bag that will drop 4 to 5 items. It's recommended to use it at the beginning of the match to start with a large backpack, and if you're lucky, some extra levels. This ability should also be used when an ally is dead, this is because her Special Action spawns a resurrection card when this condition is met. Do this even if you already have one, as it never hurts to have 2 resurrection cards. The probability of getting each items is as follows:
Basic Attacks
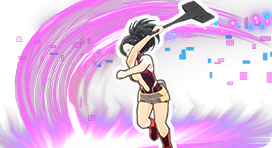
Ground Melee
A 3-string combo chain. It starts with a quick, short-range swing used to interrupt enemies and start melee-based combos, crucial for locking targets in place before chaining into Alphas or setting up cannon pressure. The second melee hit deals moderate damage and maintains stagger, keeping opponents locked in position. The third hit is where her melee truly shines, it launches a sledgehammer projectile, allowing Momo to punish enemies even from mid-range. If your Alpha skill isn’t leveled enough to close distance effectively, the sledgehammer can fill that gap great for catching running enemies or interrupting their skill animations. Furthermore, the great range along with being ranged yet still be considered a "melee attack" means she's the only character able to trigger tunes like Embrittlement or Sisterly Disposition from afar.
Using the full melee chain is perfectly viable—it deals respectable damage and leaves opponents open for follow-ups. However, the third strike’s projectile is what truly makes her melee versatile, letting you punish enemies who think they’re safe at mid-range.
Air Melee
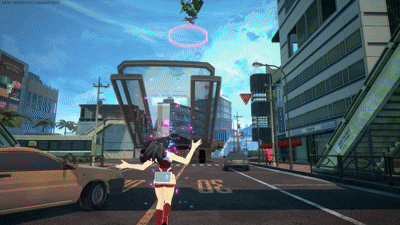
Momo’s air melee is another underappreciated tool. After landing a hit with Alpha, you can jump and perform an air melee to extend your combo, then immediately follow with another Alpha as the target falls.
This move has excellent utility - it can knock enemies out of their skills, interrupt combos, and even occasionally break through Super Armor under certain conditions. While it’s not guaranteed every time due to game mechanics, the air melee is often worth attempting to regain control or punish overextensions.
Leveling Paths
Balanced Path
A path that keeps a balance between alpha and gamma levels, not neglecting the former. Once alpha and gamma are max level, you mostly care about beta being level 4, which you might already have thanks to ability cards. From here, you can either give the cards to your teammates or aim for beta level 9 if you're building a defensive setup.
Why is Beta so low priority?
This ability is often countered, and level 1 allows you to cover a good chunk of entrances and exits already, plus, you often get there accidentally through ability cards. Meanwhile, alpha and gamma are abilities you will be actively using for both offense and defense, so you want those to be stronger.
Combos
The different ways you can combine and chain various skills for higher damage within 500 DP (Downpower). The downpower of Momo's abilities are as follows:
Simple but great combo for any 1v1 or even a team fight to shred GP. Place a cannon (preferably two) and hit one alpha between cannon explosions to stagger the enemy, not letting them dodge the cannon. Near walls or indoors, this combo can go from Medium DMG to High DMG thanks to the matryoshkas.
Melee 1 -> Alpha -> Beta
A close up quick combo. Land a melee attack following with an alpha and quickly dashing with a beta shield. Can be rolled out of if not quick enough or if the enemy rolls towards you. Rolling into any other side will hit. Can also protect and cancel enemy abilities.
Melee 1 -> Alpha -> Alpha -> Beta
A variation of the previous combo that adds an extra alpha. If it's a 1v1, that won’t be interrupted by a third party. Can also protect and cancel enemy abilities.
Gamma (Placing) -> Alpha -> Gamma (Hit) -> Beta
The most powerful Momo combo occurs when combining both Gamma DMG into Beta DMG. It's best in 1v1s, and it can also protect and cancel enemy abilities with beta. If this combo occurs indoors or near walls, the matryoshkas can add up to 100 DMG, increasing the combo's overall DMG.
Gamma -> Gamma -> Beta
Similar to the previous but better when in team fights, because of the AoE Double Cannons. Can also protect and cancel enemy abilities. Note that beta will miss if the enemy is hit by 2 cannonballs before.
Just 4 regular fist melees and finish with an air melee. Little DMG but annoying, as it won't let the enemy escape for the duration of it. Effective if you have a beamer teammate who can shoot the staggered target while you slowly melee them keeping them in place. Basically it's less of an offensive combo and more of a support combo to let your teammates be the ones doing the damage.
Positioning
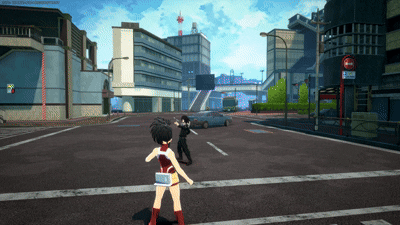
Momo is a non-mobile character with no mobility-based tools, so you can’t reposition often, and escaping a sticky situation can be difficult. She is a high-risk character who won’t forgive mistakes. One positioning error can ruin your game, even if you were dominating the lobby.
Secure buildings
Momo is a monster in tight indoor spaces. Luring enemies into a building is a highly effective tactic. With strong area-control tools like Gamma, Alpha pressure, and melee options, she can hold buildings and alleyways extremely well, blowing up anyone silly enough to follow you inside. Her Beta can provide extra safety for you and your teammates by blocking entrances, especially in the final circles when the battlefield becomes completely chaotic.
From a secure position, you can safely drink support items and use your Special Action to spawn heals or revive cards, making it much safer to revive teammates.
Momo is usually heavily targeted and often seen as “an easy kill.” Stay close to your team, but don’t expect full presidential-level bodyguarding. Try not to remain in the open for too long. Poke with Gamma when it’s safe, and don’t be passive. Be active and aggressive in 1v1s versus favorable or even matchups.
Play on the edge and inside the Poison Mist
Whenever possible, play around cover. If no cover is available, position yourself on the edge of the Poison Mist. Staying away from the center statistically reduces your chances of being spotted and targeted, which works especially well when your team is drawing attention on the front line.
If you trust your team, you can frontline too, but always have a retreat plan. Don’t be afraid to step into the Poison Mist and stay there. As a 350 HP character, Momo can survive in the mist if you have enough heals. Use smaller heals if the big ones won’t finish in time to keep you alive.
Teamplay
Momo is a team-reliant character. Your Special Action is incredibly valuable and can flip the outcome of a fight by letting you revive teammates without searching for civilians or opening large chests. To use this properly, you need a coherent team. It’s naturally easier with a premade group, but you can still build strong synergy with randoms, it just takes more effort.
In-game leadership
Just like in the anime, you have a unique opportunity to think strategically and analyze the match on a deeper level than most players. You’re naturally more invested in keeping the team coordinated. Instead of complaining about teammates, take the initiative and build effective teamwork yourself.
Stay Vocal
In random queue, you have limited time to build rapport with teammates. Stock your emote and voice line wheels and use them actively: greet your team at the start, praise good plays, and use quick apologies if you can’t revive someone. These small gestures make teammates acknowledge you and show you’re willing to cooperate.
In the heat of battle, players often forget about their team. If you interact more, they’re more likely to notice your calls and play around your needs.
Pings
Pings are your most essential tool for sharing information, and you can’t afford to neglect them. Ping everything: enemy positions, rotations, and loot spots. Always respond to teammates’ pings, and use the negative option when necessary.
Most importantly, don’t hesitate to call for help immediately. As a character with no mobility or escape options, you can’t wait until things become desperate. The moment you feel at a disadvantage, drop an SOS ping. You’ll be surprised how often teammates respond.
Another crucial ping is “Group Up” to guide positioning. If you spot a strong building to occupy or a rooftop to hold, mark it so your team knows you want to play there.
Prioritize your life over a teammate
Hot take, but it wins games.
If your teammate gets downed and starts spamming SOS, analyze the situation first, quickly. Don’t sprint in alone and get focused by the same team that downed them. If it was a strong team, or they have characters that are unfavorable for you, it’s often better to let your teammate die and wait until it’s safe to grab their badge.
Afterward, you can use your Special Action to spawn a revive card and bring them back.
If it was a solo enemy, you can try to help by placing shields to protect your teammate’s body and stalling until they get up. Mix controlled aggression with survival: advance with your shield up to block attacks, and if the enemy is a flyer, circle with your shield up to deny damage. Only do this if you’re confident you can actually secure the save.
You are more valuable alive than they are. Unlike most characters, she can allow the whole team to die and still bring everyone back because she can spawn a revive card.
If your teammate died far away, ping their badge. If your other teammate is a Rapid or has strong mobility, they can grab it while you hold a safer position and revive them later.
Use their thirst to your advantage
A lot of people think Momo is weak, and that misconception is dangerous. Many of her deaths come from bad positioning, getting focused, or unlucky circles, but in a clean 1v1 she can hold her own extremely well.
Enemies know you have low mobility, but that doesn’t guarantee them a win. Your job is to control the terms of the fight. Lure them into a disadvantageous position: inside a building, into an alleyway, or into the poison mist. They will often chase, giving you a perfect chance to cannon-combo them.
If you catch their wake-up afterward with your Alphas, you’ll usually finish the kill.
The list of recommended special tunes (not ordered):
Wall Runner One of the best tunes for Momo, adds crucial mobility. Run on walls, edge jump, wall dodge - all things Momo desperately needs.
Willpower Survive fatal damage with 1 HP. Perfect for clutch plays and extra survivability.
Crushing PU Charge A great option that grants her 20% PU on kills, perfect to get PU faster in case trouble arises and wreck havoc and mayhem in the battlefield.
Special Action Reload Boost After downing an enemy, your Special Action will reload 5 times as quick, perfect to quickly get more healing items and resurrection cards.
Embrittlement Inflicts 10% Defense DOWN after landing a melee hit, which is perfect for Momo's melee combos.
Recommended Builds and Costumes
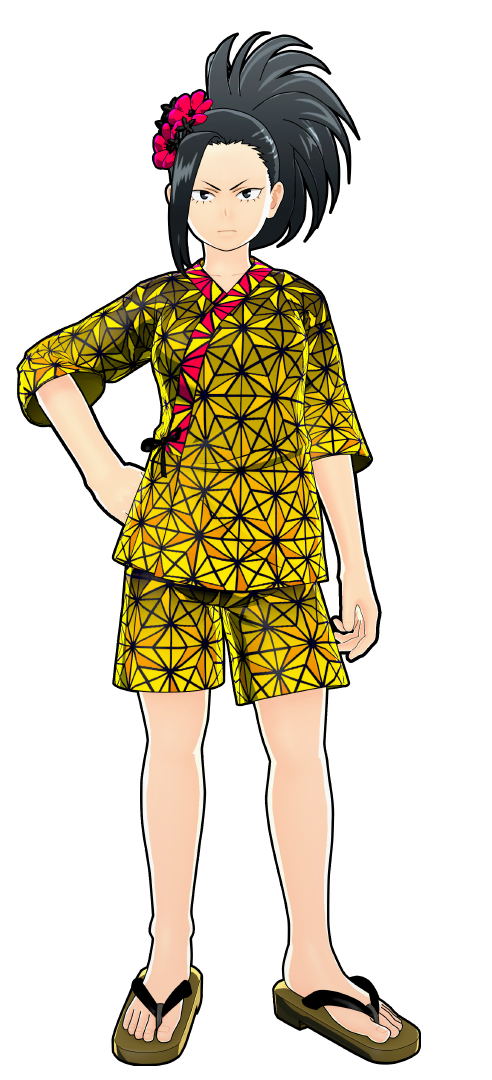
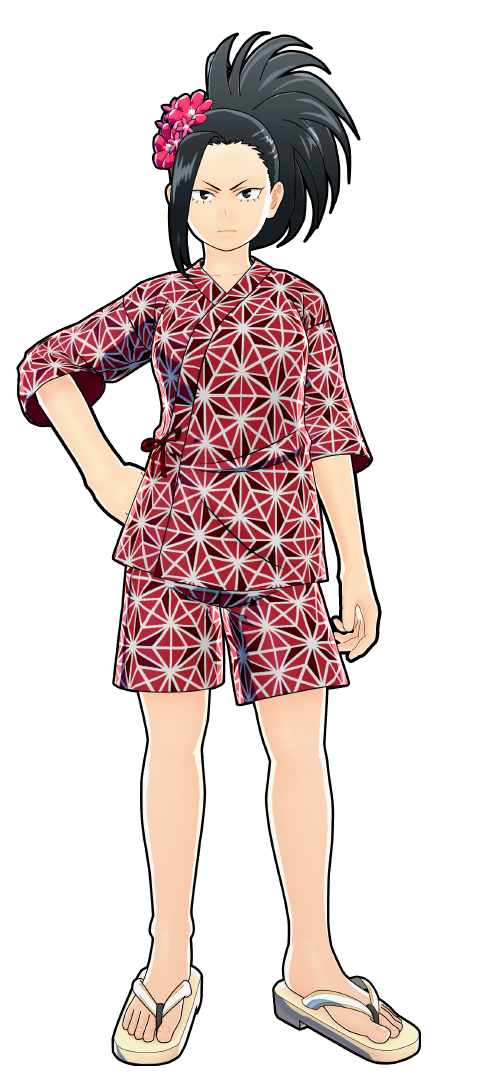
Festival Yukata (Dangerous)
Best-in-slot for damage and survivability, supporting Crushing PU Charge/Willpower + Wall Runner and
having lots of strike slots for extra DMG with the possibility to expand through the rapid and
assault
slots. You can also go for Trance Blow, trading survivability by debuffing.
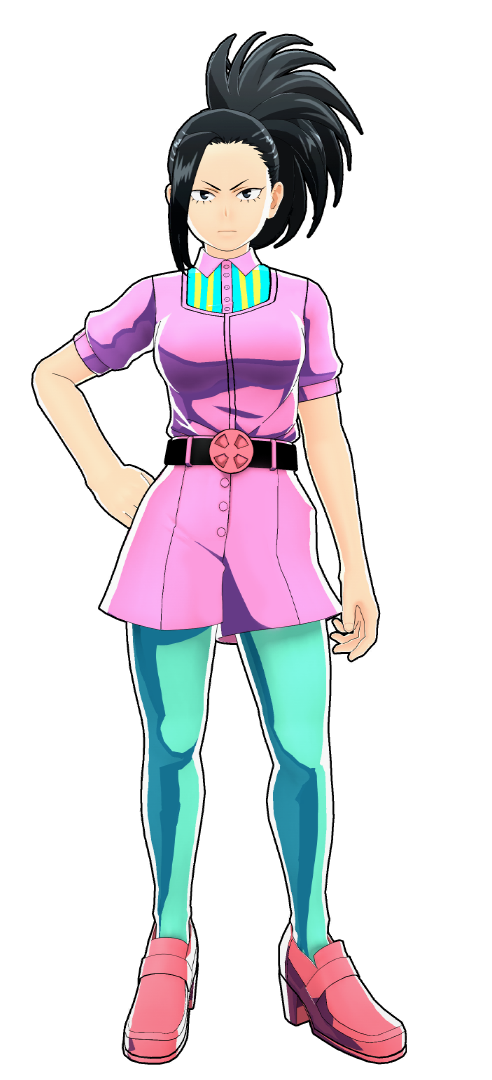
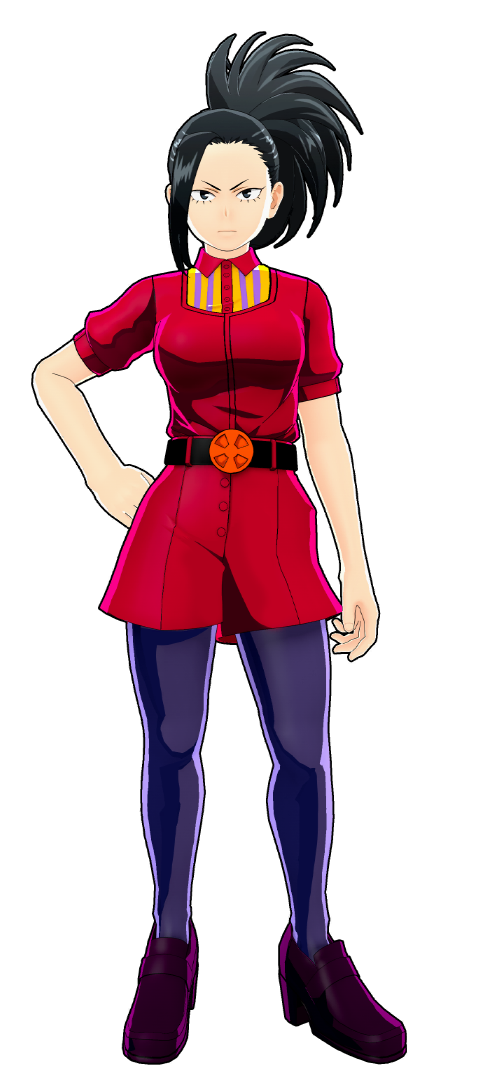
Casual Wear (Fancy)
Support-focused build that supports Special Action Reload Boost and a strike slot to either equip
Willpower for extra survivability, Trance Blow for melee-heavy players to deeply annoy your enemy
and
give yourself a window to detonate them with cannons, or Crushing PU Charge to increase your later
survivability and destruction, mainly if you're an aggressive Momo player. It also has decent normal
tuning slots.
Festival Yukata (Default)
A nuke build for those who just want to see her gamma cannons do crimes. It makes really good use of
Fixer thanks to having 3 slots for gamma DMG (two of which can reach lvl 4), an HP DMG tuning and a
gamma reload one all in the left column. You have the possibility of also equipping Willpower for
extra
survivability, or Crushing PU Charge if you also want more chaos and destruction if you get enough
KOs.
Casual Wear (Heat)
Gives strong survivability when paired with Revenge Support & Sisterly Disposition.
U.A. Summer Uniform (Default)
Good lower-cost alternative to Casual Wear (Fancy).
Momo gets countered by many characters if played in open areas with little to no cover. Most newer characters have huge AoE damage, large hitboxes, long range, and strong mobility, which Momo can struggle against. However, with dedication, Momo can still counter much of the meta.
Map awareness and playing around cover are crucial for Momo’s success. Using the map’s surroundings - trees, cars, walls, and other environmental features plays a huge role in her effectiveness. While this applies to any character, those with high mobility can sometimes ignore cover and engage head-on, as their movement abilities provide an escape option if things go wrong. Momo, lacking such mobility, relies heavily on the map to stay competitive. Positioning yourself near cover allows you to place cannons strategically, block attacks with your shield, and control engagements. Mastering map awareness is vital for turning Momo’s potential into victories.
Izuku Midoriya (Both)
Difficulty Score: 🟡Even🟡
In open areas, Momo struggles significantly. Deku has long-range attacks and high mobility. However, if you play around cover and close the distance, it becomes a good fight. Don’t spam your alphas; use them strategically to keep Deku in place. Momo’s alphas can cancel movement abilities and sometimes go through Strike Deku’s Gamma wall, preventing him from jumping. If you see a Strike Deku falling from the sky to hit his Beta, a well-timed alpha will cancel it, leaving him vulnerable. Place cannons around to stagger him. If a Strike Deku is in the air, he can get two shots on you, so keep that in mind. Play cautiously around both, but engage close-range with Strike Deku.
Izuku Midoriya OFA
Difficulty Score: 🟢Favorable/Even🟡
Momo can struggle against an OFA Deku if he keeps his distance and spams his ridiculously huge hitbox alphas. Try to dodge his attacks since they are easy to read. If he gets close, do not alpha him while he is alphaing you. His alphas have super armor, so you will not stagger him. It is best to keep your guard up and use your cannon under yourself. Most OFA Dekus go for melee combos. You can cancel their melee with your own melee or alpha.
Katsuki Bakugo (Both)
Difficulty Score: 🟢Favorable🟢
Similar to Deku. The Rapid version of Bakugo is far more powerful, but your alphas can cancel his escape and both his Beta and Gamma (he often uses them up close). The Strike version is easier to counter. Stay close, use your shield to cancel their Gammas, and prevent their escape with alphas. Engage aggressively.
Ochaco Uraraka (Default)
Difficulty Score: 🟢Favorable🟢
They are hard to play against due to their AoE stun lock, so time your dodges well. Up close, you win. Predict their movements, place cannons, keep Ochaco in place with alphas and melee attacks, and use your shield to block her other attacks. If you get unexpectedly attacked, you’ll either die or be left with low HP, so fight indoors and place cannons strategically. Don’t stand near walls, as her Gamma can go through them. Engage confidently.
Tenya Iida
Difficulty Score: 🔴Unfavorable🔴
Skilled Iida’s will defeat Momo. Support your team and use alphas to prevent Iida from leaving or attacking you. Note that he’s one of the few Rapids who can still escape your staggering and run away. Roll his Beta, as it has Super Armor and ignores your alpha. Place cannons on top of yourself for protection.
Shoto Todoroki (Default)
Difficulty Score: 🔴Unfavorable🔴
His Beta and Gamma ignore your shield. Keep your distance, use cannons to attack, and let your team handle him while you support.
Shoto Todoroki (Ice Fang Wind Flame)
Difficulty Score: 🟢Favorable🟢
Your shield counters his Gamma fire and can break his ice spikes. If a Tech Shoto is spamming Gamma to escape, walk through it with your shield and strike him with it.
Tsuyu Asui
Difficulty Score: 🟢Favorable🟢
Keep an eye on Tsuyu. Momo counters her well; one well-timed alpha ruins her entire combo. Engage confidently.
Eijiro Kirishima (Both)
Difficulty Score: 🟡Even🟡
Assault Kirishima isn’t a major threat to Momo. Dodge repeatedly, and you’re fine. He has Super Armor on every attack, so your alphas won’t always knock him away, be cautious.
Strike Kirishima is dangerous. His massive damage, AoE, movement, speed, and defense are hard to counter. Time your Beta dodge, use alphas to keep him in place, and try to explode him with cannons. He’s too fast and can escape, so play defensively. His Beta can be blocked by your shield, but it can bug and still hit you. Let your team handle both versions, and focus on supporting. Play extremely cautiously.
Denki Kaminari (Both)
Difficulty Score: 🟡Even🟡
Watch out for Denkis, they play evasively, and their stun + damage is extremely high. Dodge their stun, then do what Momo does best: keep them in place and explode with cannons. Don’t engage unless they’re in your face. Play cautiously.
Momo Yaoyorozu
Difficulty Score: 🟢Favorable🟢
The better Momo will win this match-up (though this can vary by tuning builds), so if you've mastered Momo, you will win. If you lose, then that's an opportunity to learn about what went wrong.
Neito Monoma
Difficulty Score: 🟢Favorable🟢
Annoying and prone to escaping. Time your alphas to prevent him from fleeing. Easy to handle unless he’s using quirks that hard-counter Momo, like Ibara, Kendo, or Cementoss. Engage confidently.
Itsuka Kendo (Both)
Difficulty Score: 🔴Unfavorable🔴
Both Strike and Assault versions counter Momo. Use alphas to keep them off you and plant cannons on yourself for protection. Be ready to dodge everything. Teammates should assist here. Assault Kendo is easier to handle, while Strike Kendo is extremely powerful. Play very cautiously and with your team.
Ibara Shiozaki
Difficulty Score: 🔴Unfavorable🔴
A hard counter to Momo. Her thorny hair ignores your shield, so don’t shield dash at her - only roll. Fight her indoors to maximize cannon damage. All her attacks have Super Armor, allowing her to tank damage. Engage only with a team and avoid if alone. Should be focused first as she can revive teammates.
Mirio Togata (Default)
Difficulty Score: 🟢Favorable🟢
Dodge his attacks, and you win. One solid combo, and he’s down. Easy matchup.
Mirio Togata (Sheer Counter)
Difficulty Score: 🟡Even/Favorable🟢
Tech Mirio is generally easy to handle as Momo. His movement and attacks are predictable once you learn their rhythm. The main threat is his Gamma, a counter move where Mirio glows and poses. If you hit him during it, he ignores damage and hits back hard. After a successful counter, his Gamma instantly recharges, so stay patient and punish when the glow ends. Watch for the animation where Mirio lowers his hands - that marks the end of his counter window and your cue to strike. From there, punish him with a full combo or Alpha sequence. Momo’s Alphas are also excellent for interrupting Mirio’s movement skills, preventing him from phasing in and out safely.
Tamaki Amajiki
Difficulty Score: 🟡Even🟡
A strong character whose gamma attack ignore walls and buildings. If he grabs you into a combo, try to alpha him and escape or counter with your own combo. Engage only unexpectedly, like a ninja, or when he’s focusing on you. Always be ready to dodge. Play defensively.
Nejire Hado
Difficulty Score: 🟡Even🟡
Most Nejire’s stay airborne and spam betas. Don’t attack while she’s in the air; keep an eye on her. Engage only when she lands. Use alphas to prevent her from moving or flying and punish her for landing.
Hitoshi Shinso
Difficulty Score: 🟡Even🟡
His combos are fast, deal high damage, and he has significant mobility. Interrupt his combos with your alpha or melee attacks. Explode him with cannons, as his combos make him stationary. Avoid if alone and support your team to fight him.
All Might (Default)
Difficulty Score: 🟢Favorable🟢
Treat him like Deku. Stop his escape with an alpha, combo, and explode with cannons. You can stop his Beta with a shield, or an air melee can interrupt it, though both can bug, and he may still hit you. His Gamma can be stopped with a perfectly timed alpha when he starts using it. Play around cover.
All Might (Gatling)
Difficulty Score: 🟢Favorable🟢
Keep your distance; his grab is strong and unexpected but can be canceled with a shield or a well-timed alpha. When a Rapid All Might uses his alphas, you can take the upper hand by spamming cannons. Since his alpha gives him Super Armor, so he won’t get knocked out of your cannon explosions and will take full damage.
Armored All Might
Difficulty Score: 🟡Even🟡
Another flyer with high mobility and stuns. His attacks are easy to cancel with your alpha. Keep pressure on him during the fight, but be ready to fall back if necessary.
Shota Aizawa
Difficulty Score: 🟡Even🟡
A tricky character but counterable if played correctly as Momo. If grabbed and Aizawa follows with melee, quickly use Shield Dash to cancel his combo or, for safety, use your own melee. Perform a full melee or melee-based combo. Otherwise, keep an eye on Aizawa and always roll his grabs. Your alphas cancel his escapes. Play cautiously.
Present Mic
Difficulty Score: 🟡Even🟡
Avoid him. He has insane damage and can quickly destroy your shield or cannons. Play with your team, supporting them. He’s not too hard to counter if you play cautiously.
Cementoss
Difficulty Score: 🔴Unfavorable🔴
A hard counter to even the best Momos. You can try wall-running to reach his pillars and kick him off high ground or destroy his cement with cannons, but it’s better to support your team while they deal with him. Try to third-party. Play cautiously and stay away.
Endeavor (Default)
Difficulty Score: 🟢Favorable🟢
Easy to deal with. Use alphas to lock him in place and explode with cannons. Avoid the indoor Momo strategy when he’s around, as his Beta and Gamma go through walls. Play cautiously and dodge his betas.
Endeavor (Inferno Fist)
Difficulty Score: 🔴Unfavorable🔴
Very strong, avoid engaging, just run and support your team. Only attack as a third party, canceling his attacks and escapes with your alpha. He’s extremely tough to face as Momo.
Hawks (Default)
Difficulty Score: 🟢Favorable🟢
Dodge his Betas and engage. You can even shield dash into his Beta dash to punish him for attacking you.
Hawks (Slicing Wind)
Difficulty Score: 🟡Even🟡
Another flyer, but not as annoying as Young AFO. Try to fight him indoors as well. You can stun him out of his attacks with your alpha. His attacks are easy to dodge.
Mt Lady
Difficulty Score: 🟢Favorable🟢
Dodge her Beta stomp and use Momo’s stagger-and-explode combos. If Mt. Lady goes big right in front of you, shield dash at her feet to block her huge stomps but can bug and still go through. If she goes big at a distance, place cannons to deal significant damage and potentially knock her back into her small form or even down her. Engage confidently.
Tomura Shigaraki (Default and Catastrophe)
Difficulty Score: 🔴Unfavorable🔴
Avoid both. Their attacks go through your shield and can instantly destroy your cannons and shield. Keep your distance, only attack as a team, or shoot cannons to zone them. Team play is crucial here.
Tomura Shigaraki (Thousand-Hand Break)
Difficulty Score: 🔴Unfavorable/Even🟡
He has strong mobility, AoE attacks, and free wall hacks. Your shield gets countered by his alpha, but it is easy to dodge. Stick with your team.
All For One (Default)
Difficulty Score: 🟡Even🟡
His suck-in Gamma and alphas are easy to dodge, but his Beta goes through walls and locks you in. Watch for sneaky AFO Betas, and avoid wall-running or jumping when his Gamma is ready, as it can disrupt you. His alphas are fast, so be ready to dodge. Overall, he’s manageable to play against. Stay close, prevent movement, and play cautiously.
All For One -Youth Age-
Difficulty Score: 🔴Unfavorable🔴
He is mostly airborne and has super armor on most of his skills. It is usually better to avoid him. If the fight is indoors, do not be afraid to play aggressively. Your shield blocks his big gamma attack. Focus on supporting your team. Remember that he can turn off your special action, so dodge repeatedly. A mosquito.
Dabi (Default)
Difficulty Score: 🟡Even🟡
Technical Dabi is tough; his Gamma destroys your cannons, and his Beta traps knock you away. Use your shield to engage or run through his fire. If he’s about to use his Gamma, cancel it with one alpha to win the fight, as long as his Gamma isn’t up. He can revive himself, so finish him quickly after he goes down.
Dabi (Crazy Torch)
Difficulty Score: 🟡Even🟡
Strike Dabi has weird grab hitboxes and can grab you even if you dodge. Stay close but not too close to avoid his gamma explosions aura, cancel his attacks, and explode with cannons. Always finish him when he’s knocked down, as he can revive himself. Play cautiously
Himiko Toga (Both)
Difficulty Score: 🟡Even🟡
The default Tech version is easy to handle; use your alpha to cancel her attacks.
For the Rapid version, dodge everything if she attacks. Get close and use standard Momo combos—she has low HP, so it’s painful for her. Dodge her Beta and Gamma, and she won’t approach. Don’t engage a Rapid Toga unless you’re confident you’ll win, as her infinite skills can cause trouble.
Avoid giving Toga your blood, as it allows her to transform into Momo and spawn your Special Action – Yaoyorozu’s Lucky Bag, to gain a Revive Card if her ally is KO’d. We don’t want that.
Twice
Difficulty Score: 🟢Favorable🟢
Engage and use Momo’s standard stagger-and-explode tech, not much else to say.
Mr. Compress
Difficulty Score: 🟡Even🟡
His alphas are very strong; watch out, as he can delete you from the game. If he’s using his shield, engage with melee or shield dash, as your alphas and gammas can be redirected back at you. When he tries to teleport away, use an alpha or jump melee to cancel his escape. Engage, but play cautiously.
Kurogiri
Difficulty Score: 🟡Even🟡
He’ll try to teleport you away with his damaging portals. Engage with a team or when he’s solo or the last of his team. Chase him down; a few standard Momo combos will finish him. If you knock down his teammate, he can teleport them away to rescue them, so listen for where he teleports them to attack both. Play cautiously around your team. Should also be focused first, as he can revive teammates.
Lady Nagant
Difficulty Score: - Coming Soon...
Overhaul
Difficulty Score: 🟢Favorable🟢
Your shield counters everything he throws at you. Dodge or shield dash through his Gamma, and you’re set. Note that the shield can sometimes bug and fail to block his Gamma. Engage confidently.