

Dabi Guide
Guide developed and supervised by: Siridian (PS)Contributors: Nugget (PS)
Last Update: -
Dabi excels at playing defensively and sneaky. His main strengths are that he is really good at catching enemies off guard, no matter where he is and he can pretty effectively defend his team and provide excellent support when in a team fight. He really shines when fighting indoors and in closed spaces; walls and corners are his best friend. Since he has no movement you want to avoid open areas and places with little to no cover.
He's not a DPS character, meaning unlike most of the cast, he does not excel in running off and getting kills, the best way to utilize his strengths while limiting his weaknesses is to stick with your team and provide support and defense.
Best Map: UA Island / Chaos City


Alpha Skill - Arson
This ability allows Dabi to fire a slow homing projectile towards the opponent that inflicts the Burning (Blue) status, dealing damage over time (DoT). It's mainly used as a pressure tool, as a nuisance so to speak. Due to its slow tracking, unlike most alphas you cannot use it at a distance, or to snipe opponents. So the best way to utilize this is by shooting at a general direction from the backline while your team fights an enemy team. This will do a few things:
- The enemy will not only have to fight off your team, but they will also have to watch out for these slow, homing fireballs, so they will constantly be dodging or blocking (for the likes of Kendo and Red Drive's beta skills), and this will create openings for your team.
- Even when they think they got away from the main fight (especially if you have your α maxed) they do travel quite a bit so it may catch them off guard and they'll be on the lookout.
- These alphas cause no practical knockdown, so if the enemy is stunned or unaware of you, you can get in a solid 3-4 hits before they realize what's happening and make a counter play.
Below level 4, the range, size, and tracking is pretty sub-par, which is why its best to get it to level 4 at the start. The reason you want to level this up last is because this is the worst ability in his kit. However it is useful to have it at least at level 4 to assist the team and sometimes catch opponents running away.
Dabi has a trick to using his alpha. Instead of just spamming your alpha, you want to dash and then jump and shoot at the same time. Once you hit the ground, you will automatically dash, which will allow you to repeat this process. This trick allows you to shoot faster while keeping yourself agile, and once one gets the timing, it will come naturally.
Beta Skill - Shadow Fire
Arguably Dabi's best tool, this ability allows Dabi to set traps that trigger a flame pillar when an enemy gets too close, dealing damage and inflicting Burning (Blue) status. They can also be placed midair. Even though both your allies and yourself can see the trap from far away, these remain invisible for the enemy until you're almost on top of them, so it makes them a great tool to use in and outside of battle. You can have up to 5 at a time on the map and each trap does 4 ticks of damage before the enemy gets knocked down. These traps can stun enemies without GP, making them unable to act the moment they start taking damage.
Blocking Projectiles
Beta can also be used to block a projectile for one hit or to counter/trade a close range attack (such as an Iida rushing in, or a non-hardened mode Assault Kirishima using his own beta). If the enemy has a traveling armored move (such as Shigaraki's gamma or All Might's beta), the enemy will only take 2-3 hits of damage and fly through the trap. This is true if the trap is on the ground or in the air. However, if they don't have GP, they can sometimes get stunned and/or knocked down by the trap if these are higher level than the enemy's abilities, mainly for slower abilities.
Smart Traps
The traps are best used as actual traps. When not in a fight, place them around the map in certain locations such as doorways, hallways, alleys, narrow paths, known healing locations, ramps, jump pads... The possibilities are endless. You can also surround the enemy with traps after they are knocked down, blocking or greatly hindering their escape.
Recon Tool
Always play around your traps in a fight, do not just toss them out and move the fight elsewhere, the idea is to bait the enemy to come to you, so always play around them. The best use for these outside of combat is also the ability to know where an enemy is. When rescuing civilians (or using them as bait) you can always place a trap on a civilian and wait for when you see and hear DMG numbers pop up. If you know where it was coming from you can be certain that it was that trap you placed on the civilian and thus know the enemy's location.
The other thing you must always do after a fight is place a trap where the enemies body was after you KO them. This will cause their ally to trigger the trap when they go to retrieve their badge. If you play Dabi you must get into this habit.
Offensive Utility
You can use the traps offensively by baiting an enemy into your traps or jumping towards an enemy and dropping it directly on their face. This can also be really effective at catching wake ups by either predicting where they will wake up to and press a button or moving with them.
Finisher
If the enemy has an insta-rez character on their team, 3 traps is all it will take to finish an enemy. Each trap does an additional tick of damage to DOWN'd enemies. After you finish an enemy in order to not waste a trap you must wait 2 seconds before placing a trap on their emblem due to enemy's bodies lasting longer.
Gamma Skill - Ring of Fire
Dabi's best defensive ability. This skill is a single hit move that creates a fire ring that blocks anything the game considers a projectile.
While projectiles are blocked, melee attacks are not, and enemies can roll right into your ring and attack you, so when you pop your gamma make sure you're moving around and/or place some traps in there too. During a fight it's also a good idea to place some traps in specific spots and use a gamma to protect them from other projectiles. If you're healing, make sure to also keep an eye out for your surroundings.
The gamma lasts long enough to pop a small HP/GP drink at levels 4 and above. You can use also use this to try and help a downed teammate and even combine it with a beta for better coverage. Keep in mind that the ring does not have a roof, therefore, enemies can still attack you from above if they are high enough.
The gamma will do an initial instance of damage when casted, however, its main damage comes from the ring itself. The gamma will do the most damage when used point blank on an opponent. If you catch an opponent on the edge of the ring, they will take a maximum of up to 5 hits before they get knocked down. You can use gamma to try and catch an opponent's wakeup by timing your movement with theirs. It also inflicts the Burning (Blue) status.

Gamma damaging the enemy. Gamma blocking attacks.
The ring also goes through walls, so if you hear someone or are predicting someone's will turn the corner, you can pop the gamma to catch them.
Special Action - Unquenchable Flame
Dabi's Special Action is a self-reviving ability. When DOWN, you can use this to let out a mini gamma and pick yourself back up with half your HP and no GP. In theory, it sounds really good, however, there are many flaws. You can only use it in the safe zone, so if you happen to be thrown into the Poison Mist, you will not be able to use unless you crawl back to the safe zone. You also cannot use it while being attacked or pushed, so for it to work, you need to remain undisturbed for about 1-2 seconds once you're on the floor and Dabi is on his stomach, since it can get further delayed if you're behing thrown out by the knockback of other abilities. The other issue with this skill is that if you're hit in the exact same frame as you revive yourself, the mini gamma will pop out, but you won't revive yourself.
People are usually very aggressive to finish a DOWNd Dabi to prevent him from getting up, but if you can get it off it has some benefits. The biggest strength is actually the fact that the activation strikes enemies that are on top of you or extremely close. This means that if the opponent is trying to execute you or they just so happen to be right on you, you can use your Special Action and smack them away, dealing damage and inflicting Burnint (Blue). It does especially high damage if they get stuck in the mini gamma's ring.
This ability does not benefit from the Special Tune "Reinforced Revive".
Basic Attacks
Ground Melee
A 2-string combo, starts with a punch leading into a kick. Both applying the Burning (Blue) status when landing. A solid option when the enemy gets too close or rolls into your gamma. The kick sends enemies back a decent bit, making space and pushing them out of your gamma if they rolled into it. The punch has a decent speed, slight lunge when tracking, and not that much endlag, making it a good tool that you can just throw out. The kick has a slight lunge when tracking aswell, but has more endlag making it a bit more risky. The punch is also good at interrupting moves without hyperarmor thanks to its speed. For example, Shinso's beta, since it has a slight wind-up. If you punch and it lands before he can get beta out it will interrupt him, avoiding damage and allowing you to follow up on the stagger. This is something you'd do if gamma is on cooldown, otherwise use gamma for interrupting moves as it is safer in most cases.
Air Melee
A fast descending punch that sends enemies downwards and applies the Burning (Blue) status, when tracking activates it changes Dabi's momentum towards the enemy. When landing on the ground, air melee can be canceled into ground melee, though on HP this isn't recommended as it causes a bug where the enemy gets i-frames after they are hit by the punch of ground melee. In this case following up with an alpha on HP is a viable alternative for some extra guaranteed damage. Air melee's speed makes it a great way to get out of untrue combos that leave you slightly airborne, for example, Aizawa's alpha->melee->gamma can be interrupted with air melee after you are hit by Aizawa's melee.


Leveling Paths
Balanced Path: Trap Oriented
On a cold winter morning, in the time before the light. In flames of death's eternal reign, we ride towards the fight. When the darkness has fallen down, and the times are tough all right. The sound of evil laughter falls around the world tonight
![]()
![]()
![]()
![]()
![]()
![]()
![]()
![]()
![]()
Balanced Path: Ring Oriented
Fighting hard, fighting on for the steel, through the wastelands evermore. The scattered souls will feel the hell, bodies wasted on the shores. On the blackest plains in hell's domain, we watch them as they go. In fire and pain, now once again, we know
![]()
![]()
![]()
![]()
![]()
![]()
![]()
![]()
![]()
Trapmaster Path
So now we fly ever free. We're free before the thunderstorm. On towards the wilderness, our quest carries on. Far beyond the sundown, far beyond the moonlight. Deep inside our hearts and all our souls
![]()
![]()
![]()
![]()
![]()
Ringleader Path
So far away, we wait for the day. For the lives all so wasted and gone. We feel the pain of a lifetime lost in a thousand days. Through the fire and the flames, we carry on
![]()
![]()
![]()
![]()
![]()
Why is Alpha Lvl.4-9 not recommended first?
As the red day is dawning. And the lightning cracks the sky. They'll raise their hands to the heavens above. With resentment in their eyes. Running back through the mid-morning light. There's a burning in my heart. We're banished from a time in a fallen land. To a life beyond the stars
Techs
No Dabi techs are currently available in this guide.
Combos
Gamma -> Melee 1 -> Dash -> Melee 1 -> Dash -> Melee 1-2/Ring DMG
A combo that lets punish enemies that get too close to him. It only really works on HP, as people with GP can still attempt to dodge it.

Recommended Normal & Special Tunes
Normal Tunes
Strike Slots: Beta DMG > Gamma DMG > HP DMG > Alpha DMG
Assault Slots: > HP DMG > Alpha Defense > Beta Defense > GP DMG > Gamma Defense > Melee DMG
Rapid Slots: Rapid Bakugo > Rapid Toga > Twice
Support Slots: Overhaul > Ibara > Momo > Compress > Kurogiri > Cementoss
Technical Slots: Nejire > Toga > Shoto
Special Tunes
| The list of recommended special tunes (not ordered): | ||
|---|---|---|
 |
Willpower A solid option to extend Dabi's survival. Because his kit is very defensive, being able to survive one extra hit can make the difference in whether he survives or not. |
|
 |
Wall Runner Another solid tuning. Dabi is a no mobility character, so this tuning is useful for both survivability and comfort. This also allows you to equip different Ability Cards such as support ones, as normally your two ability card slots would otherwise be occupied by Rapid Cards. |
|
 |
Critical Permeation Solid for regaining your shields in a fight without needing to disengage or fully escape the enemy. Pairs wells with High Speed Replenishment for more reliability in healing after getting guard broken. |
|
 |
Electrification A good tuning on Dabi since he can get a lot of guardbreaks with his traps, and he will usually be close to the enemy when doing so in battle, so chances are you will be able to stun the enemy with this tuning and take advantage of the situation. |
|
 |
Full Burn A strong tuning, as it increases the time his PU/PC is active, which in turns means he does extra DMG and has shorter cooldowns for a longer amount of time. Because PU/PC is usually used when the player is in trouble, it won't be hard to take advantage of the tuning's effect. |
|
 |
Symbol of Peace Dabi builds his PU/PC meter pretty slowly usually, sometimes he might not even get it, that's why this tuning is useful by greatly filling the PU gauge and quickly grant Dabi the means to get out of a troublesome situation. |
|
 |
Hyper Regeneration While not the greatest tuning out there, this is still a decent pick for Dabi with how easily he can get guard breaks. The passive regeneration provided by Hyper Regeneration is really handy at times. If you're not being hyper aggressive and jumping into battles it does boost his general survivability. |
|
 |
High Speed Replenishment Given Dabi's ability to create defensive coverage for himself High Speed Replenishment can make it easier for him to pop small GP drink when combined with traps and gamma. |
Recommended Builds and Costumes
 |
Villain Costume (White Hair ver.) (Heat) A really good costume blessed by both special tunings and normal ones. The high amount of strike slots makes it easy to build high beta and HP DMG, and even has some slots for gamma DMG ones like the support slots for Overhaul and the rapid ones for Rapid Bakugo. Special tuning wise, this costume supports both Willpower and Wall Runner, two solid tunes that will greatly extend his survivability and comfort. |
 |
Disguise: Hoodie (Combat) A good costume that's lacking on normal tunes in exchange for strong special tuning combinations, such as Electrification + Wall Runner or Critical Permeation + Wall Runner. |
 |
Villain Costume (White Hair ver.) (Dangerous) A costume that does alright in the normal tuning department, but that allows builds such as Full Burn + Symbol of Peace to make sure you get Plus Ultra early and make it last longer. |

Izuku Midoriya (Default) 
Difficulty Score: 🟡Even🟡
The match-up is 50/50, whoever strikes first. if he can land more alphas than your pitiful reaction time can handle, you're cooked. In a ideal scenario though, you can kite him with your alpha & beta, roll, and air hit from the left or right to dodge his incoming attacks. Your beta and gamma can also block his alpha if need be. and if he's in close range, uses his snipe alpha or uses beta carelessly, you can rush & punish him with your gamma.
Izuku Midoriya (Full Bullet) 
Difficulty Score: 🔴Unfavorable🔴
he can keep you in place with his alpha, which is about 200 DMG per two alphas. Then he has his gamma to keep up with you while you're on hard knockdown. if they mistime their stomp (Beta), you can counter it with your stomp (Gamma), but more than likely, you're going to have a hard time fighting him. Match-up is mostly losing.
Izuku Midoriya OFA 
Difficulty Score: 🔴🔴Very Unfavorable🔴🔴
Katsuki Bakugo (Default) 
Difficulty Score: 🟢Favorable🟢
His alpha pierces through your beta but it doesn't affect you, just the trap protecting you. if he tries to special action in your direction to throw grenades, you can roll & move forward in his direction and kite him with more betas, and if he tries to gamma you, that's a free beta. If he misses the gamma, free gamma punish. Match-up is mostly winning.
Katsugi Bakugo (Machine Gun) 
Difficulty Score: 🔴Unfavorable🔴
In all honesty, you're cooked. This match-up is mostly a loss. You can try to counter-act if your traps are within range of his beta or gamma, as he will get blown up. Especially if you use them after jumping off of a building or in a building. Your gamma can block his alpha but if the trade isn't too bad, using betas inside your gamma, you might be able to win the match-up.
Ochaco Uraraka (Default) 
Difficulty Score: 🔴Unfavorable🔴
She's not a beamer with her alpha until she sets it up with her gamma, so you're relatively free not to kite as much, your beta and gamma counters her beta as well. The sauce lies in her gamma, which is rollable but only by a certain frame, and it sets up a bunch of betas & alphas for a whole high damage combo, maybe your beta and gamma will block some and allow you to attack from below if it's still active and she screws up, in which case you might win the match-up. Mostly losing though. her AoE hitbox and constant high damage combo attempts can be overwhelming.
Ochaco Uraraka (Zero Satellites) 
Difficulty Score: 🟡Even🟡
Her alpha is pretty rollable because of how slow it is, her charged alpha packs way more of a punch. She can rush you down with her beta giving you no room to breathe unless you already had a beta set in place. Her gamma is slightly quicker than Rapid Ochaco's, and if she hits you with her gamma into alpha, you're almost dead. At least it's not a combo as powerful as those from her rapid counterpart that doesn't let you play the game at all. If she goes up to heal up with her held gamma, you can heal down there and try again. Match-up is mostly 50/50.
Tenya Iida 
Difficulty Score: 🟢Favorable🟢
Iida loses pretty nonchalantly. He tries to Alpha you, gets rolled or punished by beta. He tries to beta you, same thing happens 90% of the time since it’s armored. The only chance he has is if he runs away and tries to sneak you or 1v3, but this is a 1v1 scenario. Even if he runs away, you won that round. Dabi is, after all, a “Come At Me Bro”/“Get Off Me Bro” defensive character. They have no choice but to walk into your danger hazards considered how Iida is close range, and there are pretty good moments where they should just run away like the good lil iida they are, but they tend to be pretty overzealous just to die in the end to Wall Runner, your semi-tracking alpha, your large gamma, or beta. Mostly winning.
Shoto Todoroki (Default) 
Difficulty Score: 🟡Even🟡
Dabi’s Match-up against him is kinda 50/50, can be mostly losing if they know what they are doing. Whoever strikes first honestly, Dabi’s gamma can wallhack through his beta, he can revive on top of his beta if needed which is surprisingly disadvantageous for the Shoto. Recommended with Critical Permeation or the super armor tunings. If he tries to use his gamma surf, you can beta, gamma or roll it. You can use beta or gamma to block his alpha and standing gamma.
Shoto Todoroki (Ice Fang Wind Flame) 
Difficulty Score: 🟢Favorable🟢
His alpha is pretty slow and telegraphed, much like yours. At least, Dabi’s can be used endlessly. He has no mobility, similar to you. But deep down, you know you are the superior technical todoroki brother.
His alpha also knocks you down after 2 hits, putting you on wake-up state. Giving you more time to stall and get your cooldowns back quicker. Can be rolled too. His alpha freeze is not much better. Does slightly more damage and can follow up with beta afterwards if they’re frame 1 & quick enough, but pretty disadvantagous for him already. Beta and Gamma also blocks his alpha. His beta explosion is rollable. Similar to AFO’s gamma but his kit serves the matchup more than Tech Shoto ever could. Your gamma can go through his normal beta if he’s within range. Don’t air wake-up or press anything after you air wakeup after his normal beta makes contact. And lastly, Tech Shoto’s gamma, but considering how slow it is. You can just reposition or punish him for even throwing it out. Your gamma blocks his gamma, after all. MU is mostly winning.
Tsuyu Asui 
Difficulty Score: 🟡Even🟡
Tsuyu’s main combo involves her getting close using her Alpha, and then going into Beta you. Blocking her Alpha will stop her momentum, and leave her open to a counter attack while she's stuck in the air. If she tries to Beta you dodge her aerial one by rolling to the side. The grounded Beta is a bit harder, but you’ll see most success rolling away from her rather than behind her, as the tongues hitbox will still reach back there if you mistime it. If she misses her ground Beta, she's left wide open, allowing for an easy punish. Her mobility lets her move similar distances to Compress, but while slightly more versatile in where she moves it's also slower, giving neither a clear advantage there. Watch for the extra movement granted by her air melee however, as it allows her to weave around you more easily in close quarters. If she's in your face, dodge her Betas, and then Gamma away.
Eijiro Kirishima (Default) 
Difficulty Score: 🟡Even🟡
Despite his terrible mobility, Kirishima actually doesn’t fare too badly against Compress in other departments. For starters none of his attacks can be reflected or blocked by Compress’ Beta, making the move useless in this fight. Additionally Kirishima is one of the kings of wake up catches, with his two most powerful moves knocking you down on hit and being great at catching you too. Compress hates being put in these kinds of situations as he has very limited options on what can be done on wake up. The worst part of this match up for Compress however is actually Kirishima's Special Action. Hardening completely removes the stun from Compress’ Alpha, one of his best tools, and also cuts the damage by a large amount. The only reason Compress doesn't lose this match up is purely because of Kirishima’s terrible movement. In areas with buildings/high ground, Compress' best option is to try and stay above Kiri and use his Alpha to scare him away, or force him to eat damage on his approach, before running and repeating over and over. If Kirishima had movement, he’d be an absolute nightmare for Compress.
Eijiro Kirishima (Red Drive) 
Difficulty Score: 🔴🔴Very Unfavorable🔴🔴
Compress’ greatest nightmare, Red Drive takes all the good things about Assault Kirishima and gives it movement. Everything said about Kirishima’s Special Action before is true once more, except now he is also much harder to hit. Red Drive’s Special Action basically makes him unpunishable in the Compress match up. Alongside that, his combo game and damage potential are insane, easily outperforming Compress. It’s even harder to benefit from catching Red Drive off guard due to his much larger health pool, as well as his Special Action preventing any stun and decreasing your damage. The only redeeming factor of this match up is that Compress can block Red Drive’s Gamma, which is actually a very big deal here. Red Drive players love to spam this when you’re out of range or in the air, so this at least allows you to mitigate some of his incoming damage. Try to stay above him as much as possible while using your Alpha in moderation and blocking his Gamma when he tries to hit you back. While his movement is excellent, Compress can make ground initially when it comes to getting away. Even if he can catch up fairly well, it at least gives Compress a chance to run.
Denki Kaminari (Default) 
Difficulty Score: 🟡Even🟡
Compress can easily reflect Kaminari’s Alpha shots, and keep up with him due to his lesser mobility. His Beta will leave him stationary, so use this to your advantage if he ever misses it to deal huge damage to him. If you're ever caught inside, try and back up while spamming Alphas at him now that he can't move. The thing that evens out this match-up is just how high the damage is when Kaminari lands his Gamma on you. While telegraphed, it still comes out decently fast, and if you're hit you’ll take huge damage, or maybe even go down if the Kaminari is with a coordinated team. His Special Action also makes landing melee combos on him impossible without being countered, severely limiting your methods of damage outside of using your Alpha, or reflecting his.
Denki Kaminari (Lightning) 
Difficulty Score: 🟢Favorable🟢
Compress’ Beta will block Lightning’s mines, as well as reflect his Alpha while he isn’t ADS. This highly limits Lighting's options in close range engagements, meaning his best bet is likely to try and Gamma you for a stun. Reflecting his Alpha can actually stun him in return if he tries spamming it without thinking, setting you up for some free hits. You’ll also need to be weary of his Special Action preventing your melee combos too. When it comes to Lightning’s homing (aim mode) Alpha, you unfortunately block it rather than reflect, but this is good enough to keep you safe while you’re in his range. Your Gamma is great for closing ground so you can confront these players as well. If you ever have to escape from a Lightning Denki using your Gamma, remember to activate Beta in the air the second you exit your marble to prevent them from hitting you with their homing Alpha as you run.
Momo Yaoyorozu 
Difficulty Score: 🟢🟢Very Favorable🟢🟢
A good match up for Compress, he out performs Momo in most situations. Her lack of movement and consistent ranged damage is very noticeable here, as she essentially can't do anything to you in even a midrange engagement, and even less if you're above her. Her Beta, while it does block your shots, is very simple to dodge, and can also be teleported over to rain Alphas from above. If she uses it to run you can hit her from behind or Gamma to catch up. While her Gamma is strong, it isn’t great outside and the cannonballs can also be reflected by your Beta if needed. Your Beta also blocks its splash damage. Her Alpha is likely her best option here, as it easily knocks down and allows for wake up catching with her Gamma. It can be reflected however, so predict when she uses it and you’ll stun her to start your own combo. The only place she can turn tides is inside where her close range expertise can excel, especially her cannons. For the most part, just don’t follow her inside because that's where she wants to be.
Neito Monoma 
Difficulty Score: 🟣Unknown🟣
While this match up is often decided by what quirks Monoma is currently in possession of, he does have something else he can take advantage of. Obviously his Special Action refreshing is what beings referred to here, giving him some incredible movement with his Beta and stolen quirks. In early to midgame, Monoma is near impossible to catch up thanks to this refresh unless he gets very cocky and doesn’t get far enough away. If his Special Action depletes or he doesn't go far enough, Compress’ double Gamma is good movement against him. If he’s able to copy your Gamma it makes his mobility even scarier. His refresh also allows Monoma to spam a variety of other moves, many of which Compress could possibly struggle with. In terms of his base kit his Alpha can be reflected for surprisingly high damage thanks to its high fire rate, or leaves him pretty exposed to a stun from your own Alpha. His beta is the biggest issue just because it's a fast melee attack, but it fortunately isn't too threatening. If he enters his Gamma its best not to hit him so he doesn't get given yours. If he starts healing with it active, you’ll need to weigh your options to determine if it's worth stopping him at the price of giving your Gamma. Typically it won't be unless your sure you can secure the kill immediately afterward. When it comes to Monoma's who air stall, Compress does actually do quite well against them. Your double Gamma allows you to get incredibly high in the air, and even if he’s still above you your Alphas range can still allow you to hit him. Grab a teammate with your Special Action and bring them up there too to try and force him down even faster.
Itsuka Kendo (Default) 
Difficulty Score: 🔴Unfavorable🔴
Kendo’s shield is a huge problem for Compress in a fight. Its huge size and high health means in a one on one situation, there's really no way to hit Kendo until you can wear down her shields health. To make matters worse, if the item from Compress’ Alpha isn't released before hitting the shield, it will only take the 5 damage the marble hits for instead of the much larger damage done by the item and shockwave. Kendo is another character who loves wake up catching too, and her Gamma is excellent for this. Her Alpha also does big damage while in close range, and while you can reflect it for big damage back she may bait you into this before hitting you with Gamma. Her melee combo game is also very good, and much better than Compress’, so be careful there too. Try to just keep her at a distance to whittle down her shield and run with your Gamma if she gets close. Fortunately she doesn't have the movement to chase or run from Compress, so without her shield she’s a sitting duck.
Itsuka Kendo (Twin Palm Strike) 
Difficulty Score: 🔴🔴Very Unfavorable🔴🔴
Unfortunately Kendo has been given movement to chase and run from Compress, turning an already bad match up into a terrible one. While Compress’ double Gamma is still better overall for distance, Twin Palm’s Gamma into air melee movement is incredible and she can definitely still catch up if you aren’t careful, especially early game or in smaller final circles. Her Alpha will stun you too (even through Gammas armor) and although you can reflect it to stun her and use Gamma to get away or start your own combo, you're bound to take high damage if you’re hit. Her Beta allows her to soak up damage while increasing its power, and like Kirishima prevents your Alpha from stunning her, nullifying Compress’ greatest strength. All of her moves can easily force wake up catches too. If she tries to catch you with a charged Alpha or while you're in the air, hold Beta and force her to miss her Alpha or take the reflected hit so you can Gamma. If she keeps holding it, move to cover or break line of sight to try getting away with Gamma. If she doesn't charge the Alpha she could pretty much try anything, so it's best to just try and dodge what she chooses. Trying to reflect an uncharged Alpha is not worth taking a Beta or Gamma if you predict wrong.
Ibara Shiozaki 
Difficulty Score: 🔴Unfavorable🔴
Ibara can be a very scary fight when on Compress. With her Alpha she has huge range and even bigger damage, putting Compress at the disadvantage as he can’t block it with his Beta and it knocks him down. Her Beta, especially at higher levels, is great at both knocking you down and catching your wake up if you aren't careful. Her Gamma does insane damage directly to your HP, and like all grabs can hit you through your Gamma’s armor and stop it going off. Her close range expertise means you rarely want to try and melee her, especially since she has armor on all of her moves. All of her moves do leave her as a stationary target on a whiff, so make sure to capitalize on that to return big damage or get distance from her if you're in her Beta/Gamma range. The sky and tall buildings are unsurprisingly your best bet in this fight, as she's limited to using only her Alpha and being an easy target to hit if she misses while you look down on her. If you're in the air and she hits you however, you become a lot easier to hit again as your recovery takes away a lot of your momentum, making you a slow moving target in the open air. Make sure to utilize your i-frames so you aren't an easy target for a second hit.
Mirio Togata (Default) 
Difficulty Score: 🟡Even🟡
While Mirio is prone to exploding if you can catch him off guard, his movement and love for close up encounters can sometimes put Compress at the disadvantage. He loves close quarters fights, and his movement is also superb, being one of very few characters who can outright get away from Compress. His Gamma being able to block your projectiles and force you in close can be good to bait you into an uncomfortable position. What helps Compress the most in this match up is Mirio’s low health pool, and easily exploitable punish windows upon an Alpha or Beta whiff. These leave Mirio stationary and if you're fast enough to hit him can lead to him taking big damage. If you aren't quick enough however, he can reset the situation if he enters his Special Action for invincibility to wait out his cooldowns. In his Special Action he can also just run up to you directly without threat to force close range fights. In this situation it's best to either run yourself, or use Gamma to get away.
Mirio Togata (Sheer Counter) 
Difficulty Score: 🔴🔴Very Unfavorable🔴🔴
Fitting his namesake, Sheer Counter is an excellent counter to just about everything Compress wants to do. For starters his Alpha makes him invincible, meaning not only can you not hit him with your own Alphas, but reflected Alphas don’t hit him back either unless he stands still. This is terrible for Compress, as your main method of damage is completely stopped here, and you can’t stun him either. His counter is also a fantastic move against Compress. Since your offensive gameplan pretty much boils down to spam Alpha, it's very easy for Sheer Counter to predict this and time his Gamma accordingly. Your Alphas huge size and the shockwave after make it especially easy for him to counter you. While his movement isn’t superb compared to Compress’, he actually has a way to counter your Gamma too. By timing his Gamma alongside yours, hitting him with the smoke bomb you drop will send him straight after you to easily knock you back down. You must play cautiously around Sheer Counter, baiting his counter so you can punish him on a whiff or run away. His Beta can be similarly punished if he misses, and fortunately isn’t too strong of a move. His Special Action is still a problem letting him engage you for free, except you now have to be careful about timing his counter if you try and Gamma away from him while he’s in it.
Tamaki Amajiki 
Difficulty Score: 🟡Even🟡
Although his Alpha is blocked by your Beta, the grab version of it can still be quite scary as a hit means you’re likely to be losing a large chunk of your health. That being said, a whiff or hit into your Beta often lets you squeeze an Alpha hit back at him while he recovers, giving you the sustainability to win the fight. His Beta is a bit trickier, as its tracking and movement speed can sometimes make it a bit awkward to dodge. On hit it also gives him invisibility, so make sure you keep track of him if he knocks you down. Learning the dodge window for this move makes it much more bearable since it's his best option against Compress. His Gamma is fortunately not a huge problem for Compress. While it will always be annoying as a third party tool, in a direct fight Compress can just block it with his Beta. If you catch a Tamaki using it with their back turned or if they miss, they’re a sitting duck and you can often deal huge damage or even downright knock them if they don’t cancel it fast enough.
Nejire Hado 
Difficulty Score: 🟢Favorable🟢
One of Compress’ better match ups, Nejire is one of only four characters whose entire moveset can be stopped by Compress’ Beta. Her Alpha is quite damaging, but if she isn't careful you can reflect it back for huge damage, meaning she has to be careful when using it. Her Beta can be blocked with yours, and while it is good for knocking you down it takes quite a while to do so meaning you can easily put your Beta up to stop it. You can allow her to waste her Beta charge firing into your own Beta and then Alpha her back if she shifts focus. If she isn't looking at you her Beta leaves her a mostly stationary target to wail on too. Her Gamma can give her height making her harder to hit, but once more can be reflected, although it rarely actually hits her back. It is her best wake up catch in this match up, and it can still be threatening if she has her team with her to stop your Beta going up. Her movement is generally worse than Compress’ and while her floating and air dash can make it more difficult to hit her, you can just wait for her to come down since she can’t do anything to you up there anyway thanks to your Beta.
Hitoshi Shinso 
Difficulty Score: 🔴Unfavorable🔴
While his Alpha can be blocked, often allowing you to slip in an Alpha while he recovers, his sheer damage potential and team combo potential still make this match up quite hard. Shinso is another character who thrives in catching your wake up with his Gamma and Beta. Teleporting into the air while he falls with his Beta is a great way to both take loads of damage and get knocked out of your marble, wasting a charge. This combined with the fact that the brief animation before you teleport leaves you wide open to being hit by his Gamma, Alpha, or even his Special Action, means your best wake up option is incredibly risky if you can't find a safe spot to use it. His Gamma allows him to land all his moves much easier if it connects, and it can even be mixed into combos for a guaranteed hit to make running even harder. On a miss however, he does leave himself quite open while he recovers which will allow you to spam Alphas in return. This also applies to his Special Action, and his Alpha as mentioned before. His movement is good but doesn't bring him quite as far as Compress' Gammas, and he's using up his best offensive skill to get around, so if you need to get away or you have to chase him neither option should be too difficult provided you can get going.
All Might (Default) 
Difficulty Score: 🟡Even🟡
While All Might’s Alpha can be reflected like most others, you may be surprised to learn you can even block the splash damage from it with your Beta as well. All Might's Beta will be his best tool against you on Compress, as if you don’t recover quick enough after being hit, it can be combo’d into a second Beta or into a ton of Alphas. For this reason if you're hit by it, recover as fast as possible, but let your i-frames run out so you can’t be hit by any subsequent moves, especially that second Beta. If you start reflecting Alphas, this is most likely the move he’ll use in response, so get ready to dodge it. All Might's Gamma isn't too strong, and is mostly used as a way to stall since you can’t hit him while he’s in it. Typically All Might players will use his Special Action leap after exiting this to run, so be ready to quickly wail on him with Alphas while he crouches and then keep chase with your Gamma. This should fortunately be quite easy, as although All Might has decent movement Compress’ is still superior. If he chooses to use his Betas to get more distance it also means his best move in this fight will be gone, so keep track of how many charges he uses when moving around.
All Might (Gatling) 
Difficulty Score: 🟢Favorable🟢
Gatlings Alpha is just about one of the easiest Beta reflection targets in the entire game. Its long start up before it starts dealing big damage will give you ample time to begin reflecting it with your Beta. Just be mindful you can't stun him out of his Alpha due to its armor, so if you try to trade Alphas you’ll be on the backfoot. If he tries to use his uncharged Beta, you can also reflect that to stun him and start potential Combos. Holding your Beta out will likely bait him into going for one of his two most dangerous moves in this match up, his charged Beta, or his Gamma. His Gamma is especially damaging, and can grab you out of your own Gamma, so be on the lookout for those two moves. If he misses his Gamma his recovery is quite punishable, allowing you to spam your Alpha against him. Although Gatlings movement is a lot better than default All Might’s, escape or chase still shouldn’t be a primary concern for Compress here.
Armored All Might 
Difficulty Score: 🔴Unfavorable🔴
While this may seem like a good matchup on paper thanks to Compress’ Beta being able to stop all of his skills, this unfortunately isn't enough to trivialize this fight like it does for other characters the Beta fully counters. Armored All Might is able to excel in all ranges thanks to his versatile kit, and while your Beta does stop his long range Alpha shots, his close quarters prowess is what makes this matchup truly difficult. Armored All Might can easily close distance on you using either his Special Action or Beta, where his excellent Melee and Air Melee attacks can easily take advantage of you holding your Beta up. If you drop your Beta to try and counter this however, he can easily start high damage combos using the stun from his Beta or Gamma, or even just by spamming Alpha to freeze you. You really have to try and stun him while he’s stuck in something like his aerial Beta, ground Beta recovery, or Special Action to prevent him from just straight up out damaging you. Even this may not work however, as he can still send his summoned drones after you while stunned, allowing him to stop your Alphas and break out of your combo. If you need to run from Armored All Might you’ll also need to be careful as his Beta can easily grab you out of it, and his tracking drones can stun you in the air. Even if you do teleport away, his superb movement can easily allow him to catch up to you if he knows where you're going. This also means it can be quite difficult to chase him down.
Shota Aizawa 
Difficulty Score: 🔴🔴Very Unfavorable🔴🔴
While Aizawa’s Alpha can be blocked by your Beta, often allowing you to squeeze an Alpha in between his attempts to grab you, his damage potential and reliable counter to your whole kit easily gives Aizawa the upper hand. When you throw your Alpha in between his attempts to grab you really have to try and aim for a stun or else he can spam his own Alpha to try and start his high damage combos. Aizawa can also easily close distance and dart around you using his aerial Alpha and Beta, making him very hard to hit. Aizawas Gamma is a hard move to fight when on Compress, as its ability to block all shots from his front and sides means you’ll have to be behind him to get a hit on him. If you're able to get the opportunity to attack his exposed behind however he’ll be stuck losing a lot of health. Aizawa's Special Action is unsurprisingly a huge counter against Compress, as not only does it allow for an easy attempt of his grounded Alpha with you not being able to block or fight back, but if you’re in your Gamma’s marble and become affected by it, you’ll be kicked out which ruins your momentum. Finding a good moment to use your Gamma in this fight can already be hard as well, as the pause before your teleport sets him up for an easy grab if you aren't careful. Aizawa's movement is nothing to scoff at either, being able to make good ground regardless if he's running from or chasing you.
Present Mic 
Difficulty Score: 🟡Even🟡
Like when fighting most Alpha spam characters, an easy get around to a trigger happy Mic will be to reflect his Alpha with your Beta. This is especially important to do in this match up, as thanks to his Special Action Present Mics Alpha can easily stack up damage even faster than normal. Mic does have some counterplay here, as throwing his radio behind you will let it hit you since your back is turned to it. In close quarters Present Mic players will often go for his easy tap Beta into Gamma combo. If he starts with Beta you can actually block this and attempt to dodge his Gamma after or start stunning him if you're quick. Be careful if he expects this though, as if he does just Gamma he’ll punch you straight through your barrier. If you ever dodge his Gamma, its end lag gives you a good punish opportunity, or gives you time to Gamma away if you're in a bad spot. Just like his tap Beta, you can also block his charged Beta, which shouldn’t be too difficult as its long start up gives ample time for you to put up your Beta. In the event he does knock you down, watch for his tap Beta, as its stun will stop you from teleporting on wake up. In terms of movement, Mic is very outclassed against Compress, and you shouldn’t struggle to run or catch up to him.
Cementoss 
Difficulty Score: 🟢Favorable🟢
Despite his unique playstyle Cementoss will normally be a good match up for Compress. Both his Alpha and Gamma can be reflected while still in midair, meaning his combo game against Compress is much more limited as it relies on the stun from direct hits for max damage. If you're hit by Alpha or Gamma, recover/roll as fast as possible to try and prevent a follow up attack. Cementoss is great at creating his artificial high ground for both vertical movement and to create a safe spot to heal. Compress’ Gamma is an excellent counter to this however, as it can easily get you above Cementoss to rain Alphas on him. Watch for if he places a Gamma on top however, as it’ll block you from getting above him if you’re too close to the pillar. If he doesn't stack his pillars high enough you actually won’t need Gamma at all, as simply throwing Alphas from the ground can still let you hit him thanks to the marble's arc and the projectile size. While this primarily covers the counter play outside, fighting Cementoss inside is not advised unless you already have a considerable advantage. His ability to block your exits combined with the fact his moves are super easy to hit inside, will put you at a big disadvantage.
Endeavor (Default) 
Difficulty Score: 🟢Favorable🟢
Endeavor struggles quite a bit in this match up. His Alpha, while capable of high damage if you aren't careful, is very easy to block and you can react to it after he gets a tick or two worth of hits. His Beta will be his most threatening move thanks to its very high damage, so reflecting it is instrumental in stopping Endeavor's offense. It does offer counterplay against your Beta though, as once it lands on a surface the pillar it makes can’t be blocked anymore. His Gamma is also not blockable. If he misses it or you catch an Endeavor using it against someone else however, him being stuck in the air gives you an excellent opportunity to spam Alphas into him. In the event he knocks you down, try to find cover before using Gamma to get away. Otherwise the pause before the teleport makes you an easy Beta target. The movement granted by Endeavor’s Special Action is far outclassed by Compress’ Gamma.
Endeavor (Inferno Fist) 
Difficulty Score: 🟢Favorable🟢
Much like with Strike Endeavor, Inferno Fist’s Beta is the move you’ll want to watch for. Its spawn AOE and ability to drag you back inside can make for a lethal trap, so it's best to just Gamma out in most situations. If Inferno Fist tries to melt you with Alphas while you're stuck, reflect them with your Beta until he stops before you use Gamma to discourage him from following. If he tries to use his Gamma, teleport instantly to avoid it. In the event you don’t have Gamma available, you can reflect his Gamma too, but only while it's airborne. Once it hits the ground you’ll need to run. If you're ever in the open holding your Beta against him, be aware you’re an easy target for his Beta and that you’ll need to watch for it. His movement is the same as his base, so still not great.
Hawks (Default) 
Difficulty Score: 🟡Even🟡
Hawks only really has one good move in this match up and that is his Beta. Its near guaranteed shield break and being a super easy method to knock you down already make it great. The additional movement on hit it provides him is the cherry on top though, as Hawks become much harder to hit with his increased speed and can easily follow up on you. If he misses his first Beta it is easy to punish however. His slow moving auto-track Alpha sucks, and will do very little damage before you can react and block it. A Hawks who can quickly beam with the aimed version before moving again is much harder to react to. His Gamma is easy to dodge and reflectable too, so make sure to attempt the reflect whenever you see him do his spin. Even with his nerfs his movement is nothing to scoff at, and if you get outlined by his Gamma you may have difficulty running away.
Hawks (Slicing Wind) 
Difficulty Score: 🟡Even🟡
Slicing Wind only really has one truly problematic move for Compress in his Gamma. Its combo potential, and large hitbox make it very dangerous if you can’t avoid it. Try and recover as quickly as possible to prevent follow ups if you're hit by this attack. Like most Alpha’s, Slicing Wind’s is reflected right back at him, so make sure you're ready to send them back at him when needed. His Beta is sort of an awkward move to characterize. While it is damaging if he lands it, it can be dodged fairly easily and leaves him very open to punish if he misses. His movement is quite good, comparable to Compress’, so it may be difficult to run or catch up to Slicing Wind if he has his cooldowns.
Mt Lady 
Difficulty Score: 🟡Even🟡
Mt. Lady is an excellent close range fighter, and ideally someone you want to interact with from a nice middleground. This highly limits her damage options and forces her to make a play to try and get in which you can predict, or spam her Alpha which you can reflect. Highground is ideal though as it's much harder for her to reach and she wastes moves to get up. If Mt Lady ever gets too close to you, you should try and Gamma away since that's where she excels. Do be careful though, as her stomps can stun you out of it. If she ever knocks you down her Beta will be her best wake up catch option, so avoid that as best as possible. Her movement is quite poor, so you’ll outclass her there. Her giant form isn’t particularly bad unless you're right beside her making you an easy target. Her Alpha is incredibly easy to reflect thanks to its slow speed, and her Beta is easily dodged by teleporting into the air. Her Gamma will be the only real threat as its huge hitbox means you aren't safe in the sky. If she ever enters this mode, try your best to disengage as fast as possible, as her huge damage reduction and insane damage make winning a fight almost impossible if she's even kind of healthy.
Tomura Shigaraki (Default) 
Difficulty Score: 🟢Favorable🟢
Unfortunately for Shigiraki he really struggles to do much to Compress. His Alpha and Beta being grounded when Compress can easily fly into the air or get high ground with his Gamma means he lacks the ability to deal consistent damage to you. His Alpha also leaves him open to a counter attack since he's stationary using it. Even when you don’t have Gamma available, jumping over and over to stay off the ground until you get it back will negate some damage. You do need to keep in mind his Alpha and Beta can travel up surfaces though, so you aren't entirely safe when you are on top of buildings. If Shigiraki tries to Gamma you, dodge towards him so he runs right past you. It’ll grab you through your Gamma’s armor so using it won’t be a safe option to get away. His Gamma and Special Action being his movement sources means you won’t struggle to run or catch up to him. Shigiraki really isn't scary unless you’re in a small final circle or inside a building with him. Try and avoid those situations and he shouldn't be an issue.
Tomura Shigaraki (Catastrophe) 
Difficulty Score: 🟡Even🟡
Catastrophe is another character utilizing stuns like Compress. While you can reflect both his Alpha and Beta, he can easily get around this by throwing them at the ground instead to damage you. This means you’ll have to be smart using it, as just holding it out will invite unwanted damage while you do nothing back to him. If he's close to you Catastrophe can also go for his Gamma instead, allowing him to start his combos. If you’re ever hit by one of these combos you’ll also be taking a ton of damage which’ll force you to flee. Fortunately he isn’t too good at catching your wake up or stopping your Gamma. The best thing to try and do in this match up is just get the stun on him first if you're close, or stay above him and rain down your Alpha. Fortunately your Gamma is great movement against Catastrophe, so he can’t outrun or chase you well.
All For One (Default) 
Difficulty Score: 🟡Even🟡
When it comes to AFO’s base kit you’ll be having quite a back and forth match up. Like all Alphas if AFO spams it against you it’ll be very easy to reflect it back. You can reflect the charged version too, and thanks to its slow movement speed you can actually walk into its path on missed shots to ensure it's reflected. His Beta will be his counter to you, as it's quite large and can’t be reflected or blocked. Its ability to go through walls also gives AFO an option to stop you from following him in or out of buildings. His Gamma is a very back and forth move here. Dodging this move leaves AFO wide open to a counter attack or it’ll allow you an opportunity to escape him. Its lack of Armour also means you can stun him out of it if you're close enough. Mistiming a dodge however gives AFO a free combo which is almost guaranteed to do huge damage. This move also can’t be dodged while you’re in the air, which is a problem for Compress since he’s in it so often thanks to his Gamma. When approaching AFO or using Gamma in an area you know one is in, try when possible to make sure he’s already used his Gamma so you won’t be caught in it while airborne. His base kit doesn't have any movement. AFO’s stolen quirks will offer an additional challenge to you depending on what he has in the pocket. Any quirks that provide him movement will be what you want to watch for, as a 400HP character with the potential to run or catch up to you can make for a scary fight.
All For One -Youth Age- 
Difficulty Score: 🔴Unfavorable🔴
Compress’ Beta is a real pain for Young AFO to deal with. Like most, his Alpha will be reflected if he attempts to spam it against you, and the explosion afterward will be blocked as well. His uncharged Beta will also be blocked, however depending on your spacing the ball that lands behind you can still hit Compress’ back on occasion, so be wary. While his charged Beta does get around yours, Young AFO leaves himself open to be stunned when charging it, and its slow fall time also gives you opportunity to run away if he gets it off. The real issue with Young AFO however is just how hard it is to actually fight back against him when he’s in the air. While in his Gamma, he can get incredibly high up, making it almost impossible to fight back from the ground, especially since he can constantly knock you down with Gamma energy blasts. While these too can be reflected by Beta, it really limits your options as you're more or less forced to run so you don’t get hit by the charged Gamma’s large radius. His Beta allowing him to hover, alongside his Special Action flight, allows him to stay high up for an even longer time. While you can get decently high up yourself, you don't float like he does and his Gamma armor stops you stunning him too. He becomes even more oppressive alongside teammates who make the ground unsafe. His Special Action alone is also a very good movement tool to help him escape from or chase you.
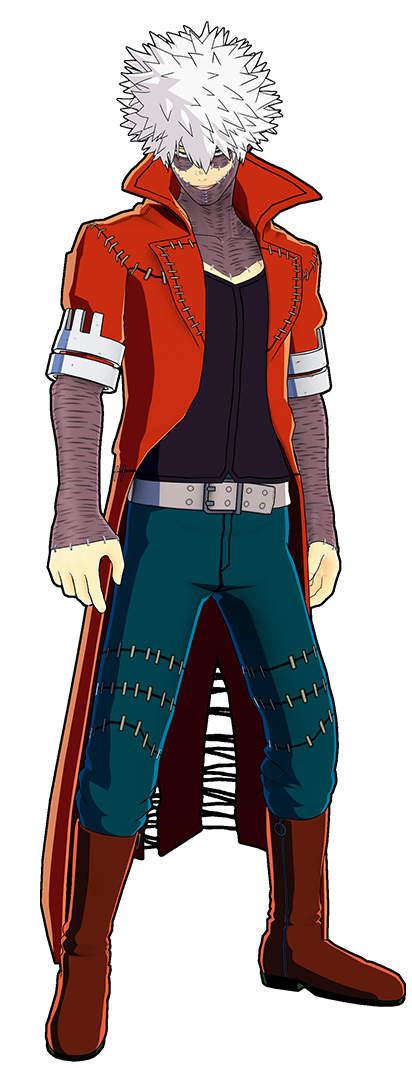
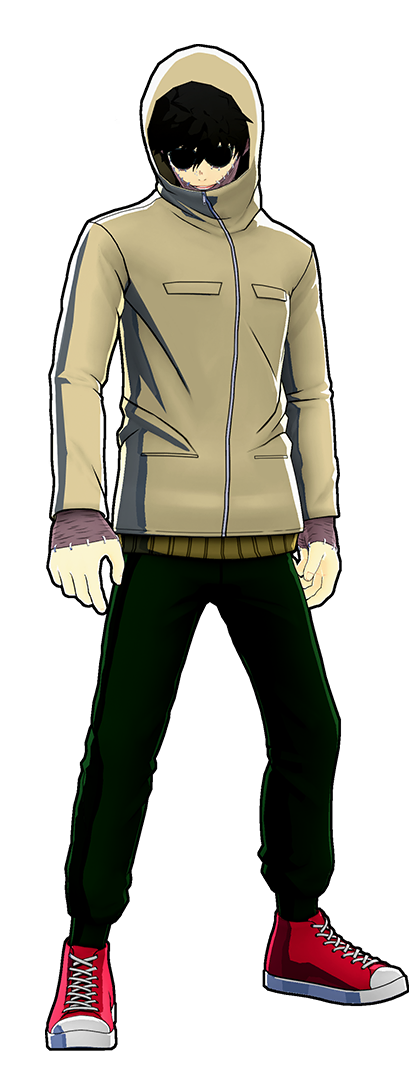
Dabi (Default) 
Difficulty Score: 🟢🟢Very Favorable🟢🟢
Dabi is another character who really just can’t touch Compress outside of close range. Engage Dabi from a mid range or from above and he shouldn’t be an issue. Although his Alpha tracks you, its slow speed makes it very easy to dodge, and even easier to reflect. His Beta only deals damage when you run over it, so watch for where he places it in a fight. Your Alpha is great at setting them off from range, as the large projectile size and shockwave can both set them off. Dabi’s Beta can also eat projectiles to protect himself. Unfortunately for Dabi, this only includes the marble portion of your Alpha since the object persists until it touches the ground. While the object will fly past if he remains inside the trap's radius, if he continues to run he might get hit anyway. If you chase Dabi into a building his traps will be a much bigger problem in the enclosed space. He can also use them to block exits to stop you fleeing. His Gamma is his best tool against Compress thanks to it actually fully blocking your Alpha. If you're outside, simply Gamma over it to rain Alphas from above. If Gamma is unavailable he still can’t do much to you since as long as you're outside the radius, his Alpha is his only option to hit you. Inside buildings his Gamma is much better since you can’t teleport over it, and it can go through walls to hit you on the other side. He doesn’t have movement to run or chase.
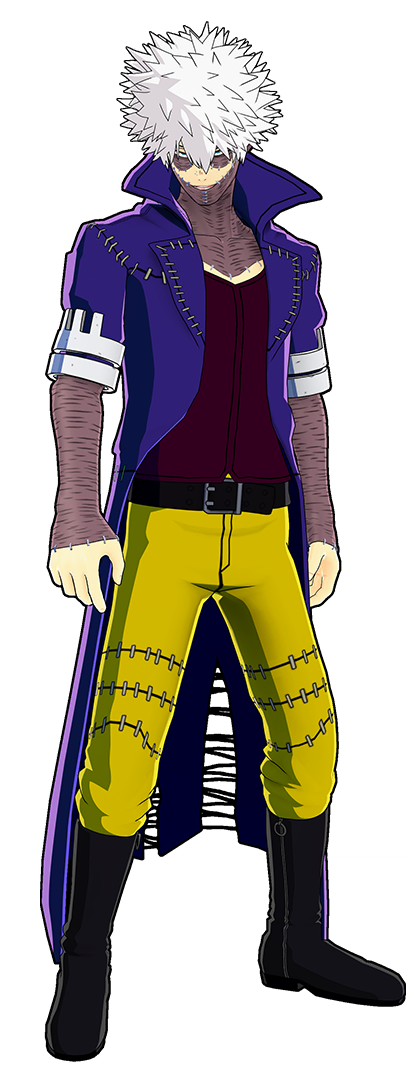
Dabi (Crazy Torch) 
Difficulty Score: 🟡Even🟡
Crazy Torch’s simple game plan of run up and Beta you can work both great and poorly against Compress. On one hand he becomes very easy to predict, often running at you in a straight line and inviting you to stun them with Alpha. You can even stun him out of his Beta before he hits you. Getting stunned like this while also draining their own HP if their Gamma is active puts Crazy Torch in a very bad spot. If he can hit you though, Compress can really struggle since the grab knocks you down on hit. Compress hates these wake up catch scenarios, and Crazy Torch is great at them thanks to his Betas tracking. If you try and Gamma he can just Beta you again to either DOWN you or get you very low. It's very important to keep track of how many Beta’s Crazy Torch has (max 2), because if you’re alive after the second one is used you know he can’t catch you anymore and you can Gamma away. His Gamma is another good counter to you though, as the small fire shockwaves it produces will block your Alpha from hitting him, and also all but guarantee you won’t be able to finish a combo on him thanks to it knocking you away if you're going for a melee. His alpha isn't very problematic for you, and his Beta being his movement means his best offense is wasted if he uses it to run.
Himiko Toga (Default) 
Difficulty Score: 🟡Even🟡
Togas Beta will be her best move in this fight. Its quick movement speed and ability to knock you down even through your Gamma’s armor can make it difficult to counter. You can stun her out of this move however, so if you dodge it try and either punish her with Alphas or Gamma to distance yourself. Her Alpha has a shockingly long range for what it is, so you're not safe just because you’re out of her Beta distance. It can also stack damage fast if you aren’t careful, so make sure to reflect it when possible. Toga’s Gamma can be blocked by your Beta, so always try and stop it when it comes out. If you don't, she'll be able to either refresh cancel her abilities similar to Monoma, or can chase or run using your own mobility. If she transforms into you for a mirror match, check the Mr. Compress match up.
Himiko Toga (Sting Dance) 
Difficulty Score: 🔴Unfavorable🔴
Sting Dance is another hard to hit aerial character that Compress struggles with. Thanks to her fantastic air mobility, Sting dance is often darting around above you and not giving many opportunities to counter attack her until she's back on the ground. While her Alpha is reflectable and her Gamma can be blocked, her Beta can bypass it and stun you, allowing for an easy Gamma follow up from her. You especially don’t want Sting Dance to start cooldown refreshing as normally her moves won’t start reloading until she's touched the ground. Giving her the option to reset in the air is not good. While she's in the air it's best to just try and dodge her until she makes a mistake or runs out of moves and is forced to land. If she misses a Gamma for example, she's slow to recover, which gives you the chance to try and stun her. You can also get into the air yourself using Gamma, which will prevent her Beta from hitting you since it only hits below her. If she transforms into you for a mirror match, check the Mr. Compress match up.
Twice 
Difficulty Score: 🟢🟢Very Favorable🟢🟢
The match up against Mr. Compress is not kind to Twice at all. For starters he’s technically one of the characters who can have all of their moves stopped by Compress’ Beta. Simply holding out your Beta to Twice will severely limit his options. His best bet is to try and Gamma to close distance and force you into an uncomfortable range. However its stun effect is stopped by your Beta and although he will still keep moving toward you it can easily be dodged by rolling past him as he gets close to you. Its linear movement also makes him an easy target for an Alpha stun if you aren't in range to get stunned yourself. His only other real option is to try and melee you, which isn't a terrible option thanks to the slide allowing it to hit from an unexpected distance. Learn to expect this and dodge it, and Twice is incredibly punishable on a miss. The only other way for him to get around this is to hope a clone of a player he previously downed counters Compress. His alpha is reflectable, the summon of his Beta is reflectable and its low health means its Alpha spam will kill itself. His Gamma’s stun is blockable, and it's also pretty poor for movement. Just wait for a mistake, and Twice can virtually never win this fight.
Mr. Compress 
Difficulty Score: 🟡Even🟡
Due to the threat of your Compress’ Alpha stun, a lot of this match up can be spent with both parties holding their own Beta and trying to predict when the other will drop theirs. If you want to aggress in this situation, try closing the distance on your mirror but in a diagonal line so you’re harder to hit, and throw some jumps in there as well. From here, you can stagger Alphas to try and predict the enemy dropping their Beta. Approaching on a diagonal while jumping ensures any reflected Alphas don’t stun you back as long as you aren't too close. If you predict right you can start your own Alpha combo. If that's too risky for you, another option is to play it safe by attempting to react to them dropping their Beta instead and then using Alpha, but this will require a quick reaction time. Some Compress players are very wary of opposing Alphas, and may not drop their Beta at all. In these situations you’re more or less forced to close the distance to start potential melee combos. If you're on the defense it's best to keep your Beta up like this. If an attempt to close ground for a melee is made you can use your Gamma, as its armor will protect you from any melee stun and will damage your opponent back with the smoke bomb. You can also roll out of Beta, so consider rolling backwards and then using Alpha to stun an opponent stuck in the melee animation. Always remember an enemy Compress could do this to you when you approach them too. You may also be tempted to Gamma into the air and use Alpha from above. You should always try and be the second Compress to do this though. Assuming your opponent Gammas into the air, you can Gamma up after them immediately. This prevents them from hitting you while they’re above, and makes you harder to hit and locate in general. If they choose to go higher with their second Gamma, go up after them again. This leaves you as the Compress with the high ground as your opponent is stuck falling below you, and they can only try and Beta to save themselves. This also gives you a good opportunity to land on them for an easy melee combo. If you went up first, they could do this to you. Because your movement is the same, the previous idea also applies here. If you're the first to Gamma away, the other Compress can always catch you, so try and force the other to run first. For the most part you want to try and use Gamma second.
Kurogiri 
Difficulty Score: 🟢Favorable🟢
Kurogiri is the final character who is completely stopped by your Beta. Against your Beta his Alpha will be reflected, and his Beta will be blocked. This means just like Twice you can more or less just wait for him to make a mistake to punish him. Kurogiri is another one of the characters who can just outrun Compress if he’s put on the back foot however, as his portals go crazy distances you just can’t keep up with. Additionally, if a Kurogiri is able to hit you with his Beta, locking you into something like his quad Beta combo does absolutely ridiculous damage and will immediately put you at a major disadvantage. Even some of his other combos can be quite threatening. If he ever sends his Gamma ball after you keep in mind his Alphas will be blocked rather than reflected. This means you will have to shoot it down, which fortunately isn't too hard with your Alpha's massive size. If Kurogiri is trying to air stall in his Gamma, Gamma up after him and hit him while he's stuck up there to try and force him down.
Lady Nagant 
Difficulty Score: -
Coming Soon...
Overhaul 
Difficulty Score: 🟢Favorable🟢
Overhaul is another fairly grounded character who can struggle against Compress’ aerial movement. Staying on top of high ground or in the air above him will be your best option, as this invalidates pretty much his whole kit. While he can semi-counter you sitting on high ground with his Beta, he struggles to follow up on any damage he deals this way. His Gamma will be his scariest move, as it stops you from using your own Gamma if it catches you, and can combo into itself or any of his other moves. It's also very good for catching your wake up if he ever knocks you down. He does pause to use both his Beta and Gamma however, so if he ever misses these attacks you can punish him with Alpha stuns. His Special Action can end any melee combos you attempt on him so there's no point in using that as a punish option unless you know he's used it up. He can also heal up for free using it, making it a bit harder to take him down. Like most grounded characters, Overhaul will only get the upper hand on you when fighting in small or enclosed spaces where his Gamma is easy to hit. Avoiding these situations is the key to success when fighting Overhaul.